Optimize your Gemba Walks with the Gemba Walk Assistant by iObeya for streamlined processes and real-time insights.
In this article, learn how to:
conduct a Gemba Walk:
use checklists to ensure process compliance.
capture photos to document issues and facilitate analysis.
update KPIs in real-time during your Walk to track performance.
report problems during your Gemba Walks and identify issues in real-time.
download checklist summaries after each walk for quick and easy reporting.
Using Checklists
Checklists help you stay focused and organized during Gemba Walks. They ensure you do not miss key areas of observation.
Using checklists makes it easier to track compliance, identify issues and take immediate action.
To use checklists in Gemba Walk Assistant:
From the app’s home page, access the Gemba checklists assigned to you.
.png)
Click a checklist to start your Gemba Walk.
Note:
You can search for a checklist using the search bar.
Going to the Gemba
Once you select the checklist relevant to the process or area to observe during the Gemba Walk, begin your Walk.
The following screen is displayed.
.png)
You can:
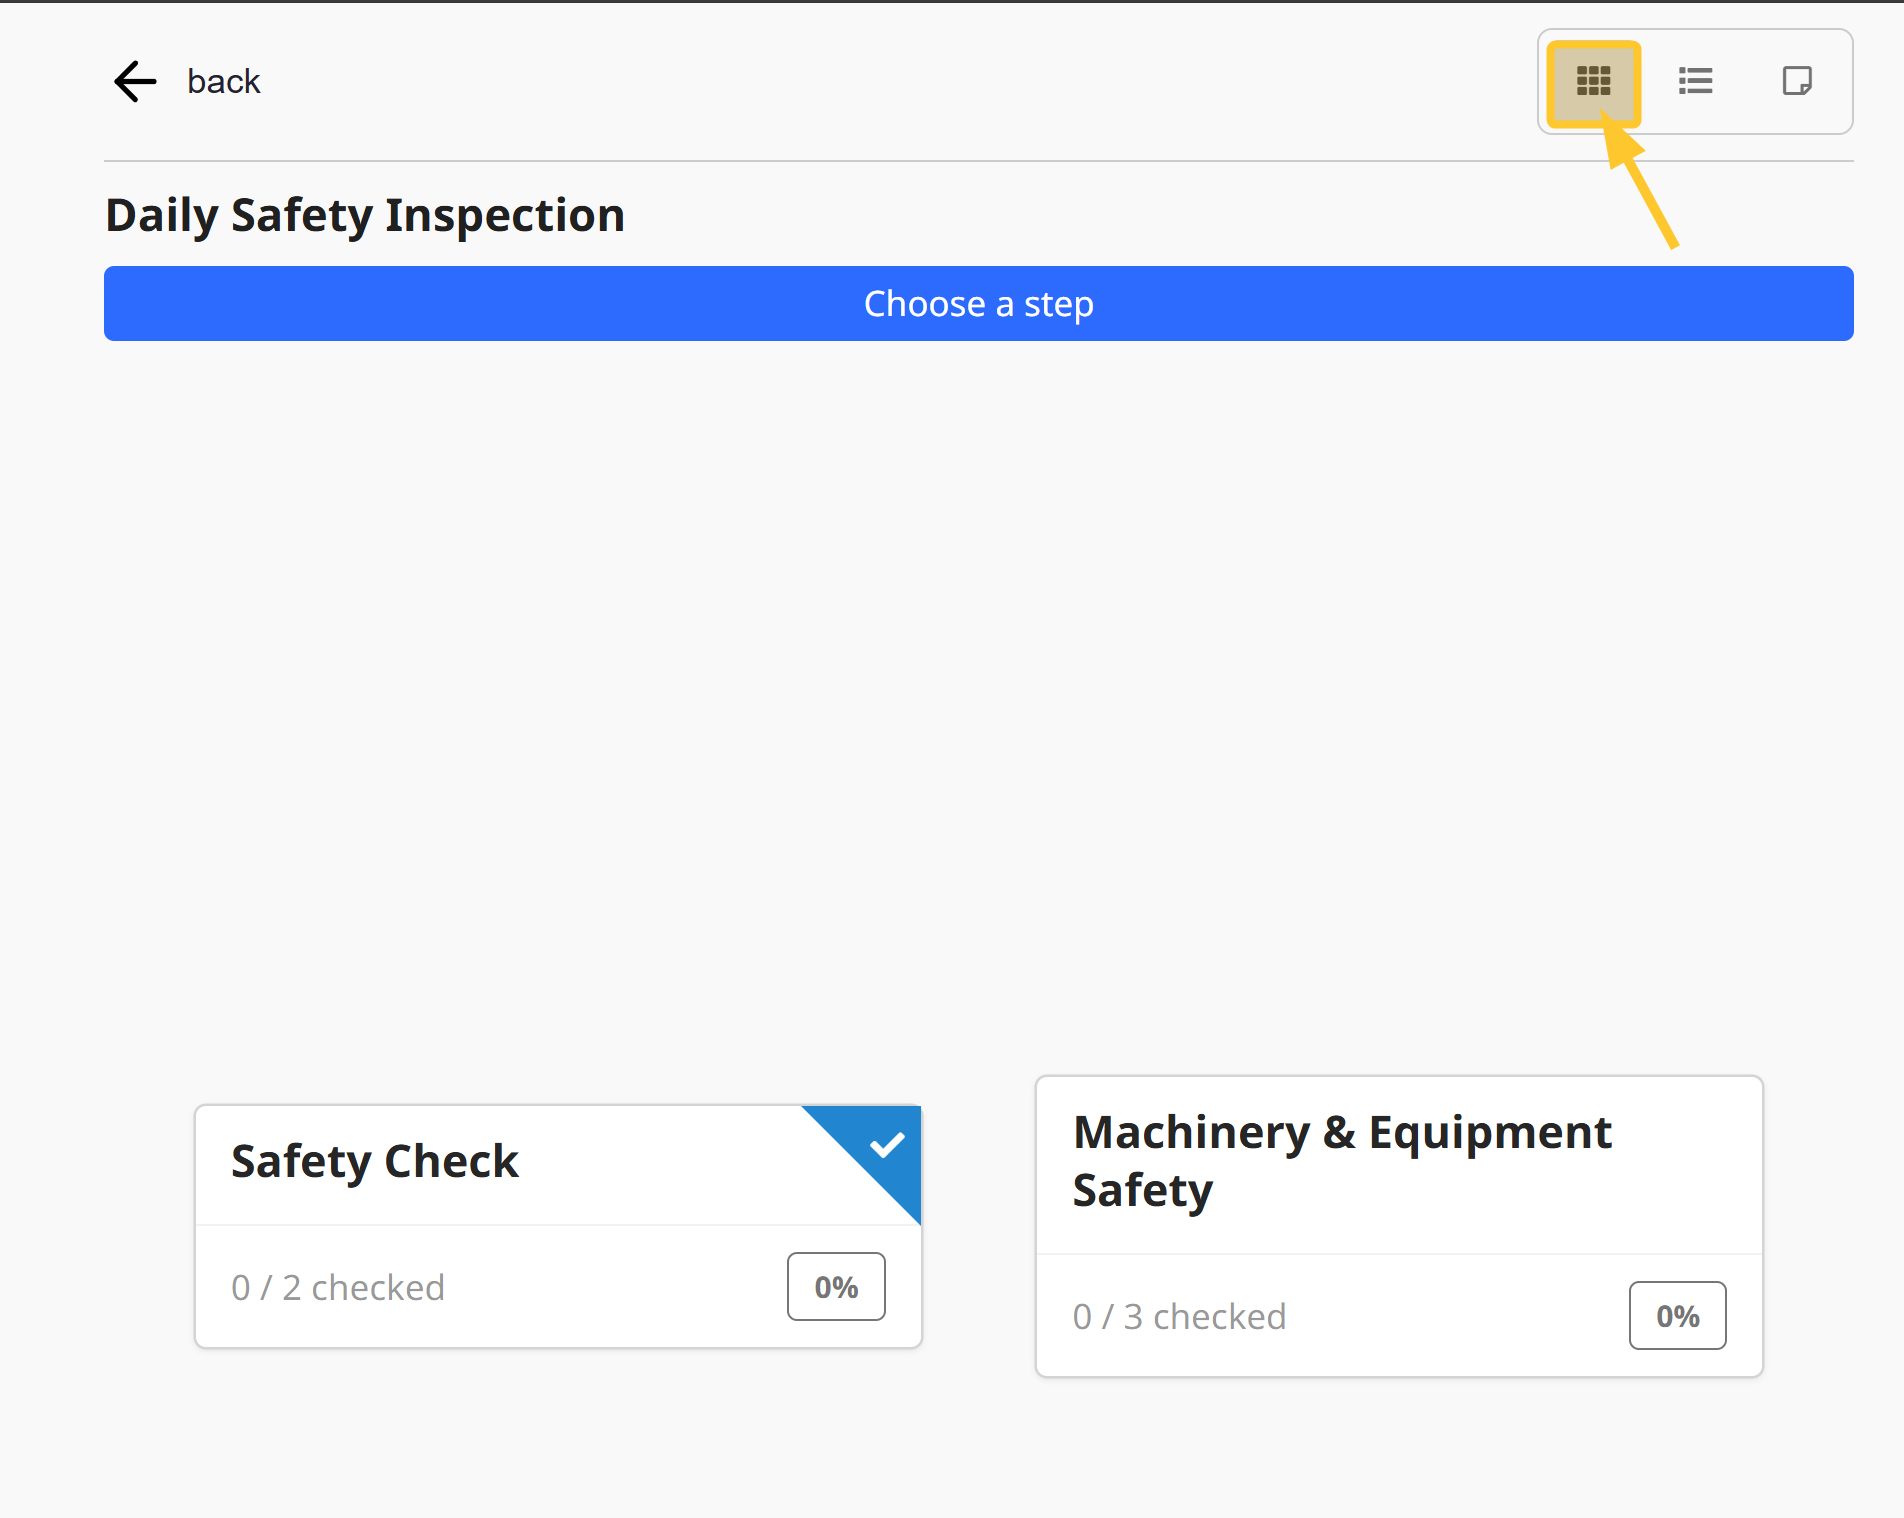
change the display of the steps and points to check. 3 options are available:
Option 1: allows to see an overview of the steps and pick any step to focus on.
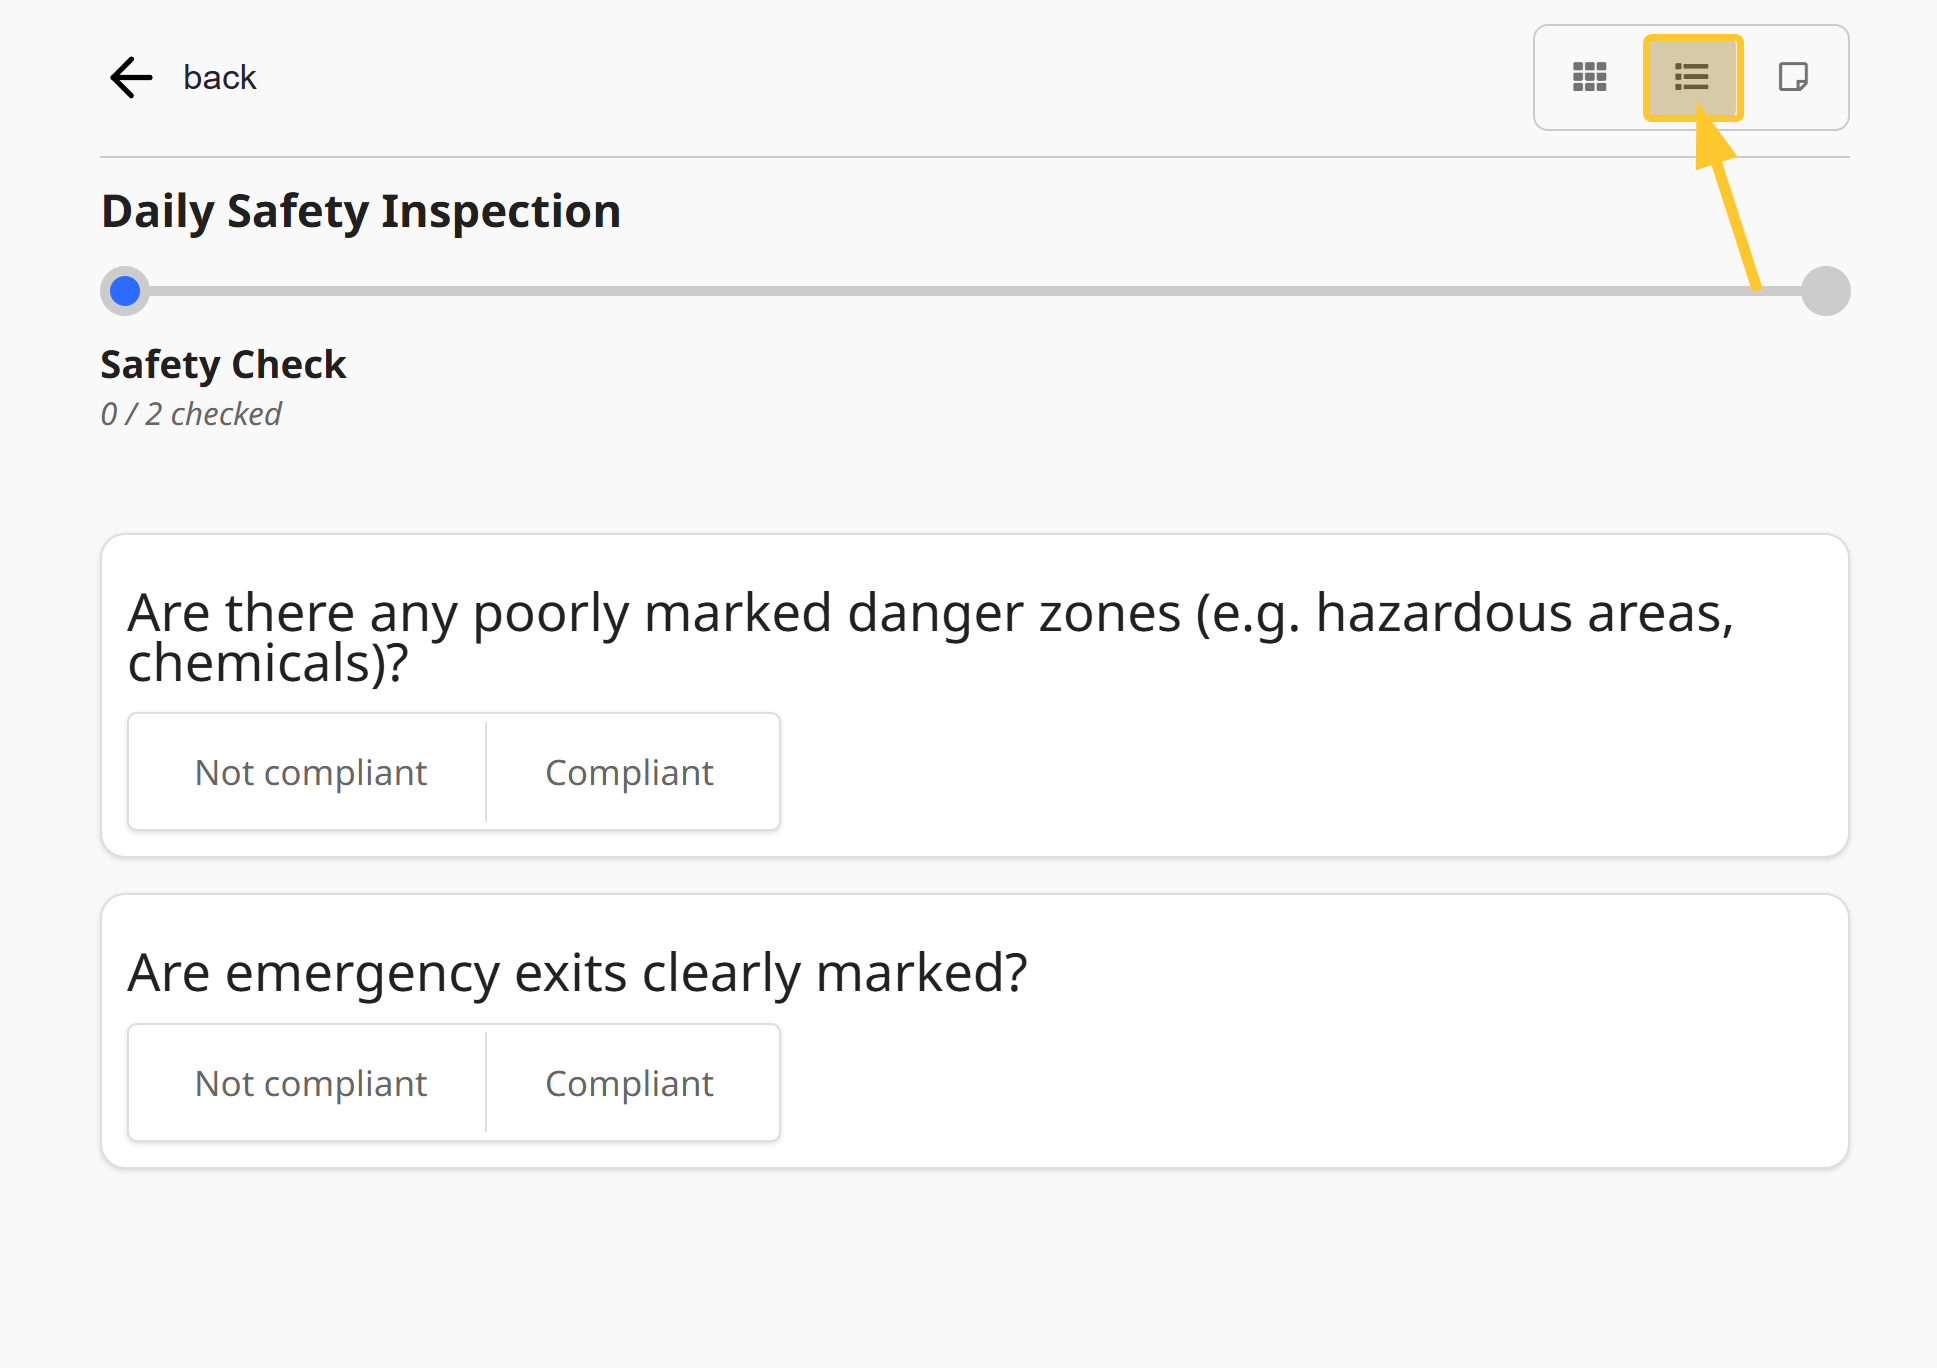
Option 2 (List view mode): allows to validate compliance or non-compliance of processes.
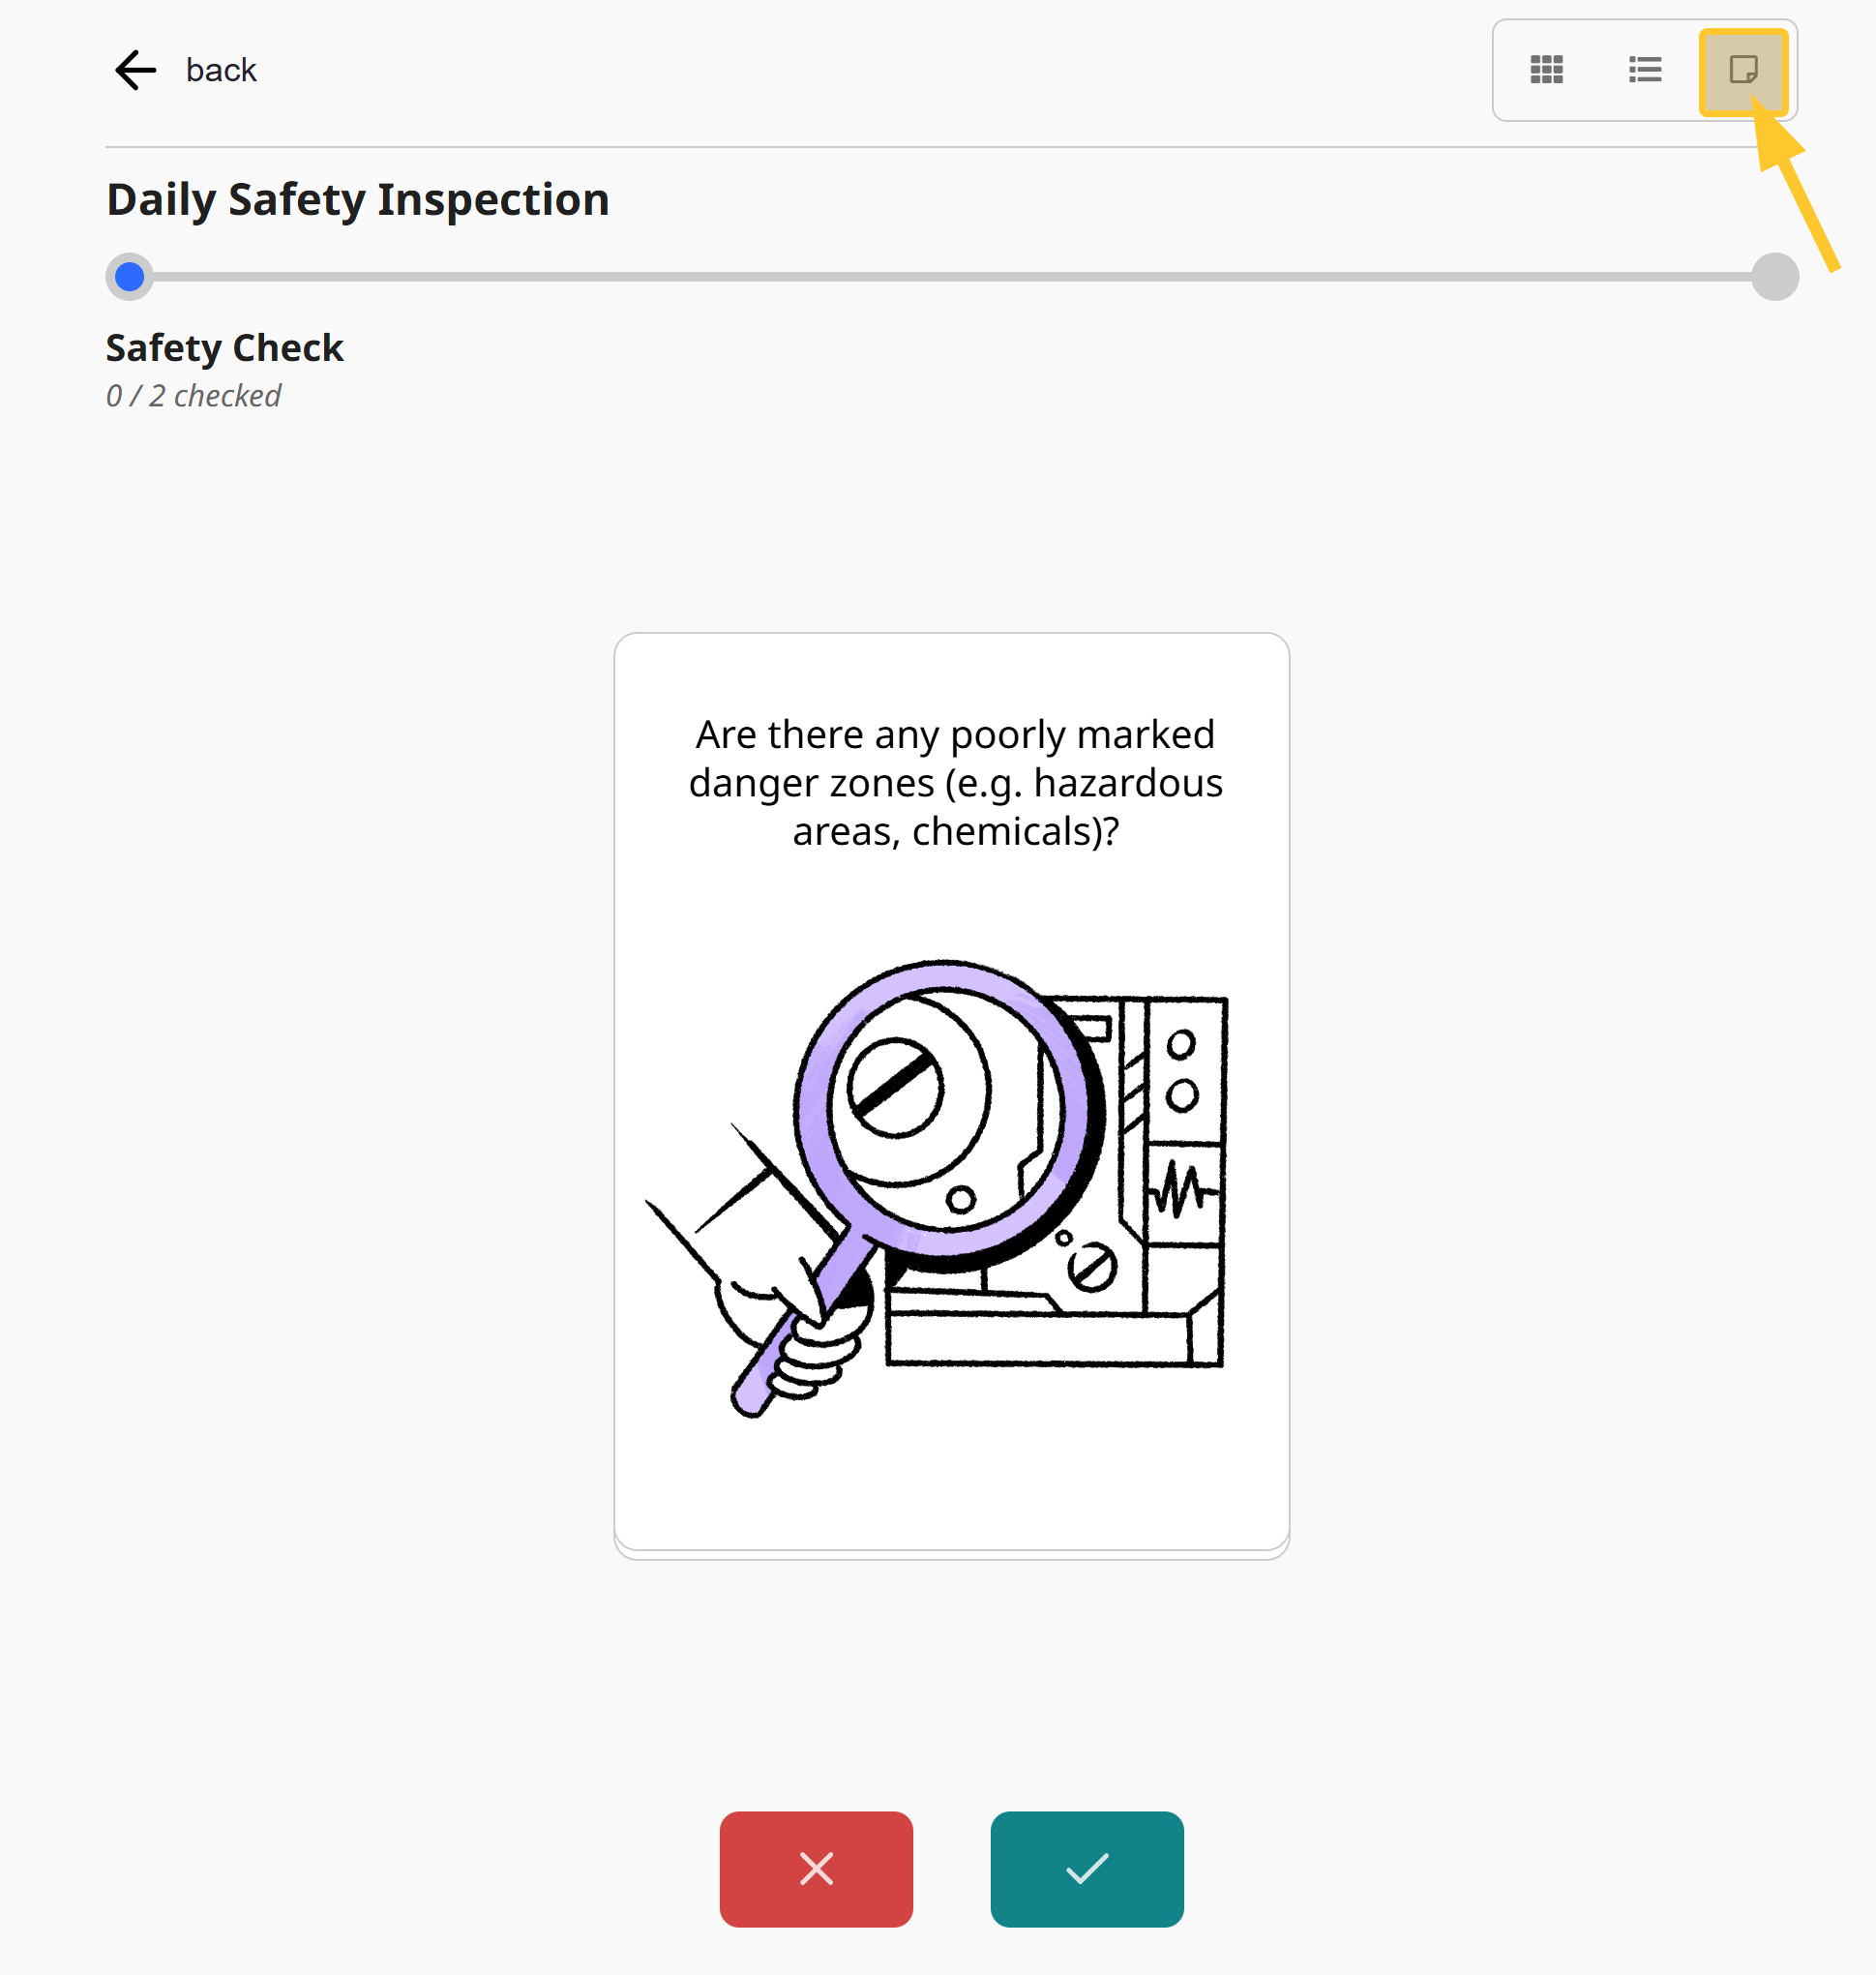
Option 3 (default display): allows to swipe right if you validate or left if you do not validate and want to provide your observations.
You can also use the red (X) and green (checkmark) buttons.
swipe right if you validate or left if you do not validate and want to provide your observations.
use buttons:
red (X) if you do not validate and want to provide your observation.
green (checkmark) if you validate.
go back to the checklists.
report a problem outside of the Gemba checklists.
After you complete your Gemba Walk, click My Gemba is done to get a concise summary of deviations of your Gemba:

Click the eye icon to:
view the details of the reported issues.
modify problems before sending (before you click Close).
After editing a problem, click Back to save your changes.
Warning:
Gemba checklists completed on 1 device are not synchronized on another device.
Reporting a Problem
You can report a problem in the Gemba Walk Assistant in 2 ways:
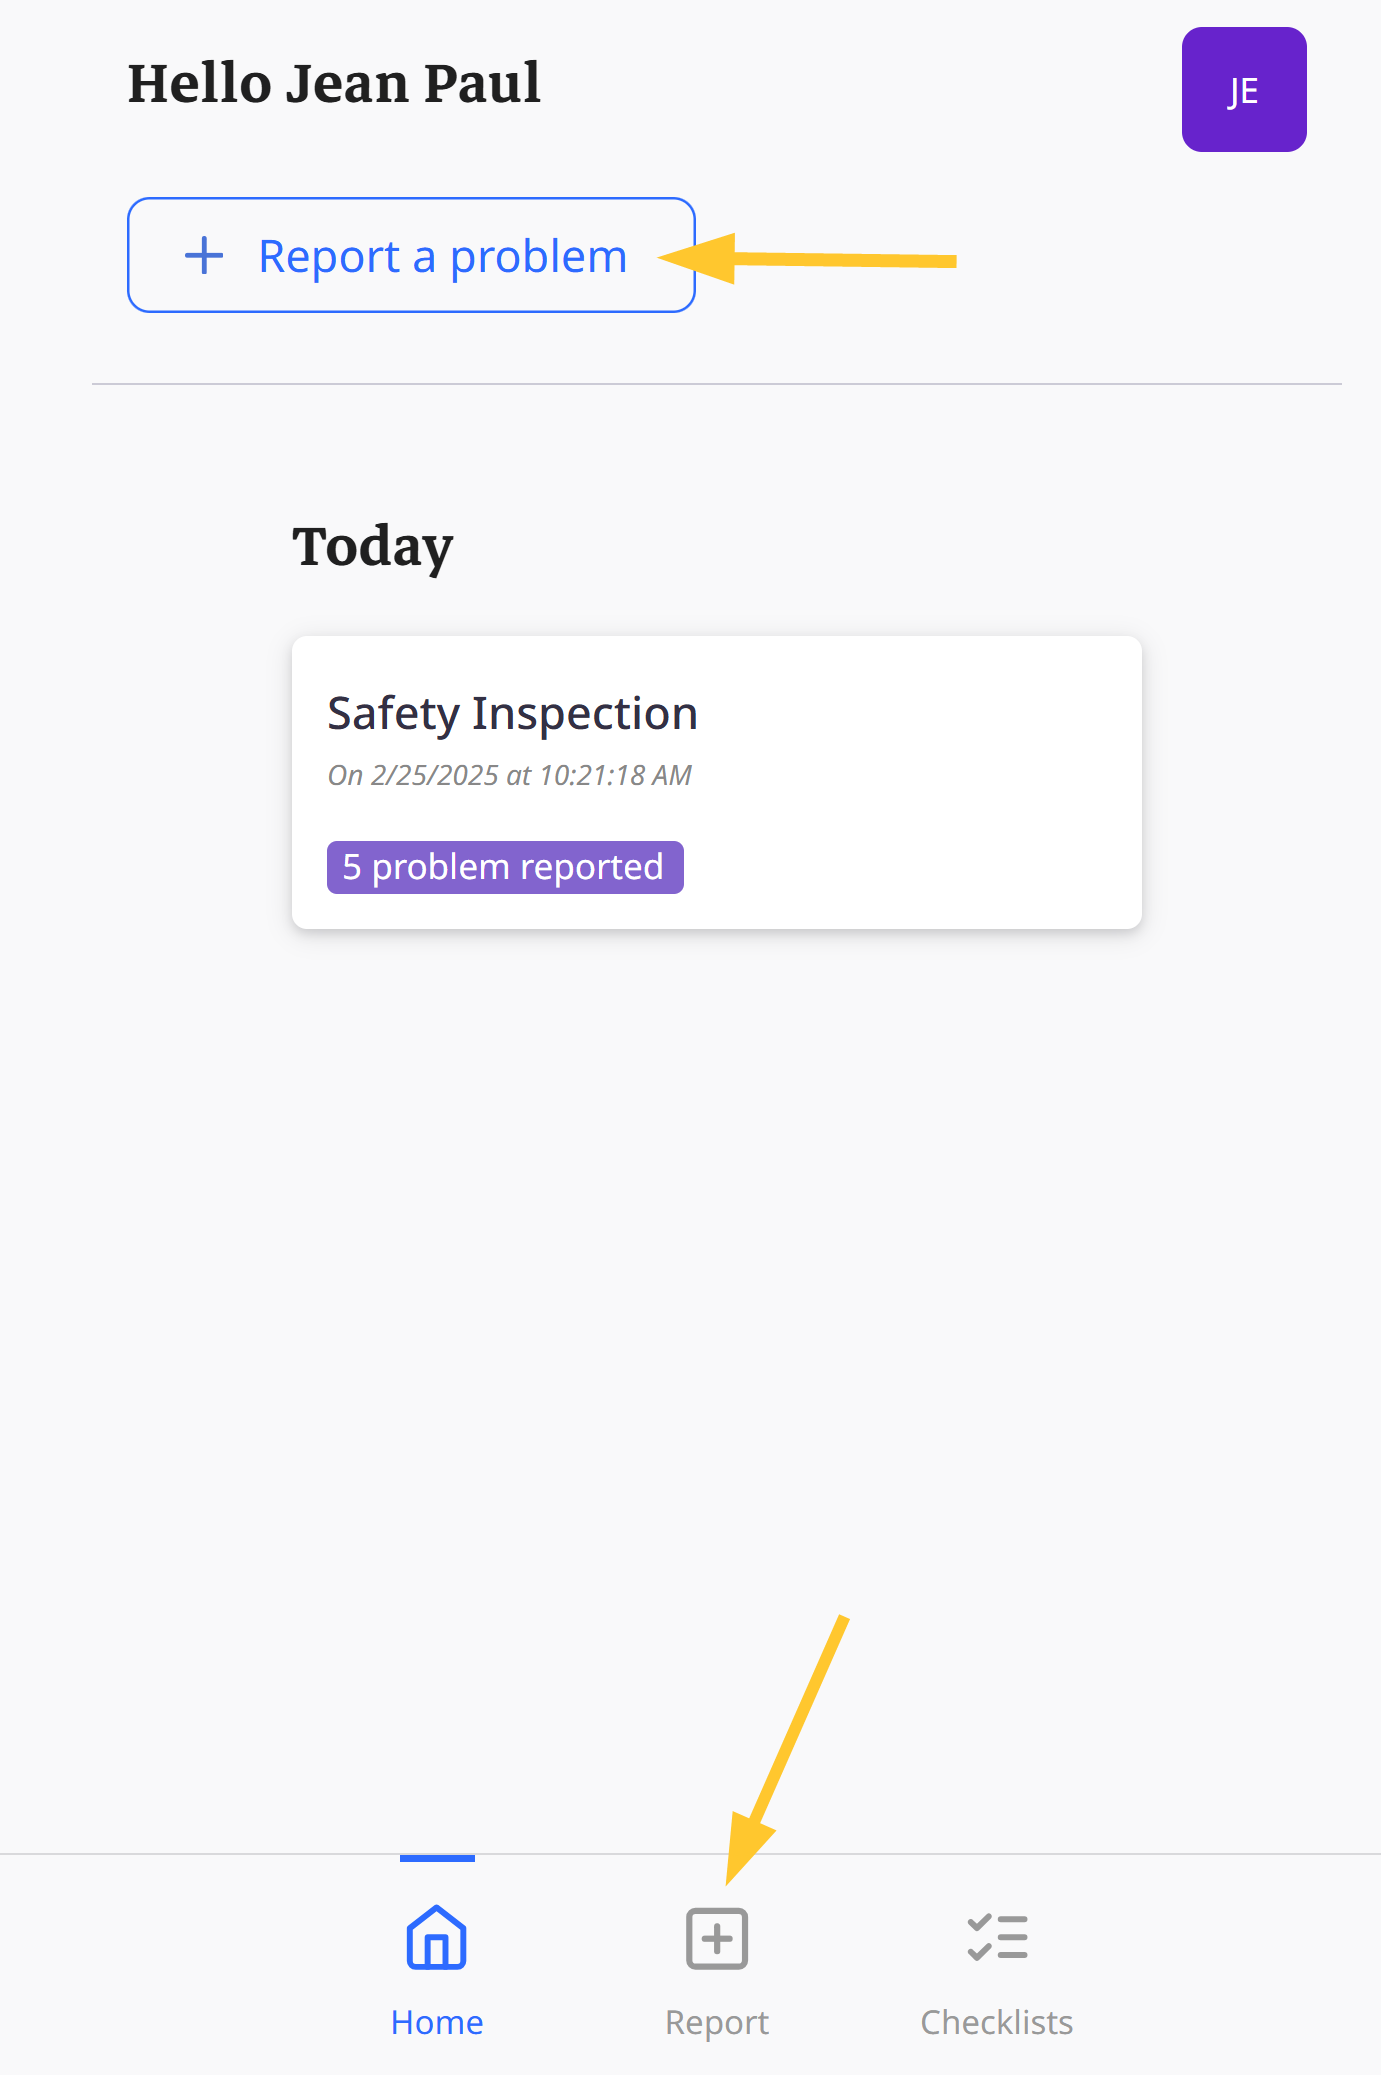
From the Home page > + Report a problem
Click +Report a problem to submit problems outside of the Gemba checklists.
The following screen is displayed:
.png)
Describe the problem to be reported and select its criticality.
Import pictures from your device or take photos to illustrate problems and facilitate analysis and corrective actions.
Select the room and the board in which you want to map the problem to be reported.
Click Report the problem to validate.
The problem:
is displayed on the home page.
.png)
Warning :
When you click a reported problem, you cannot modify it. You are in read-only mode.
is automatically reported on the relevant iObeya board:
This triggers the creation of a related action card in the board.
Photos are displayed directly on the iObeya board.
.png)
Note:
You can analyze reported problems and manage corrective actions directly within iObeya.
During your Gemba Walk if You Use Checklists
Report problems in the event of non-conformity during your Walk or anytime an improvement opportunities is identified.
.gif)
To do so, you can:
use red (X) button.
swipe left a card.
declare that a point to be checked is non-compliant.
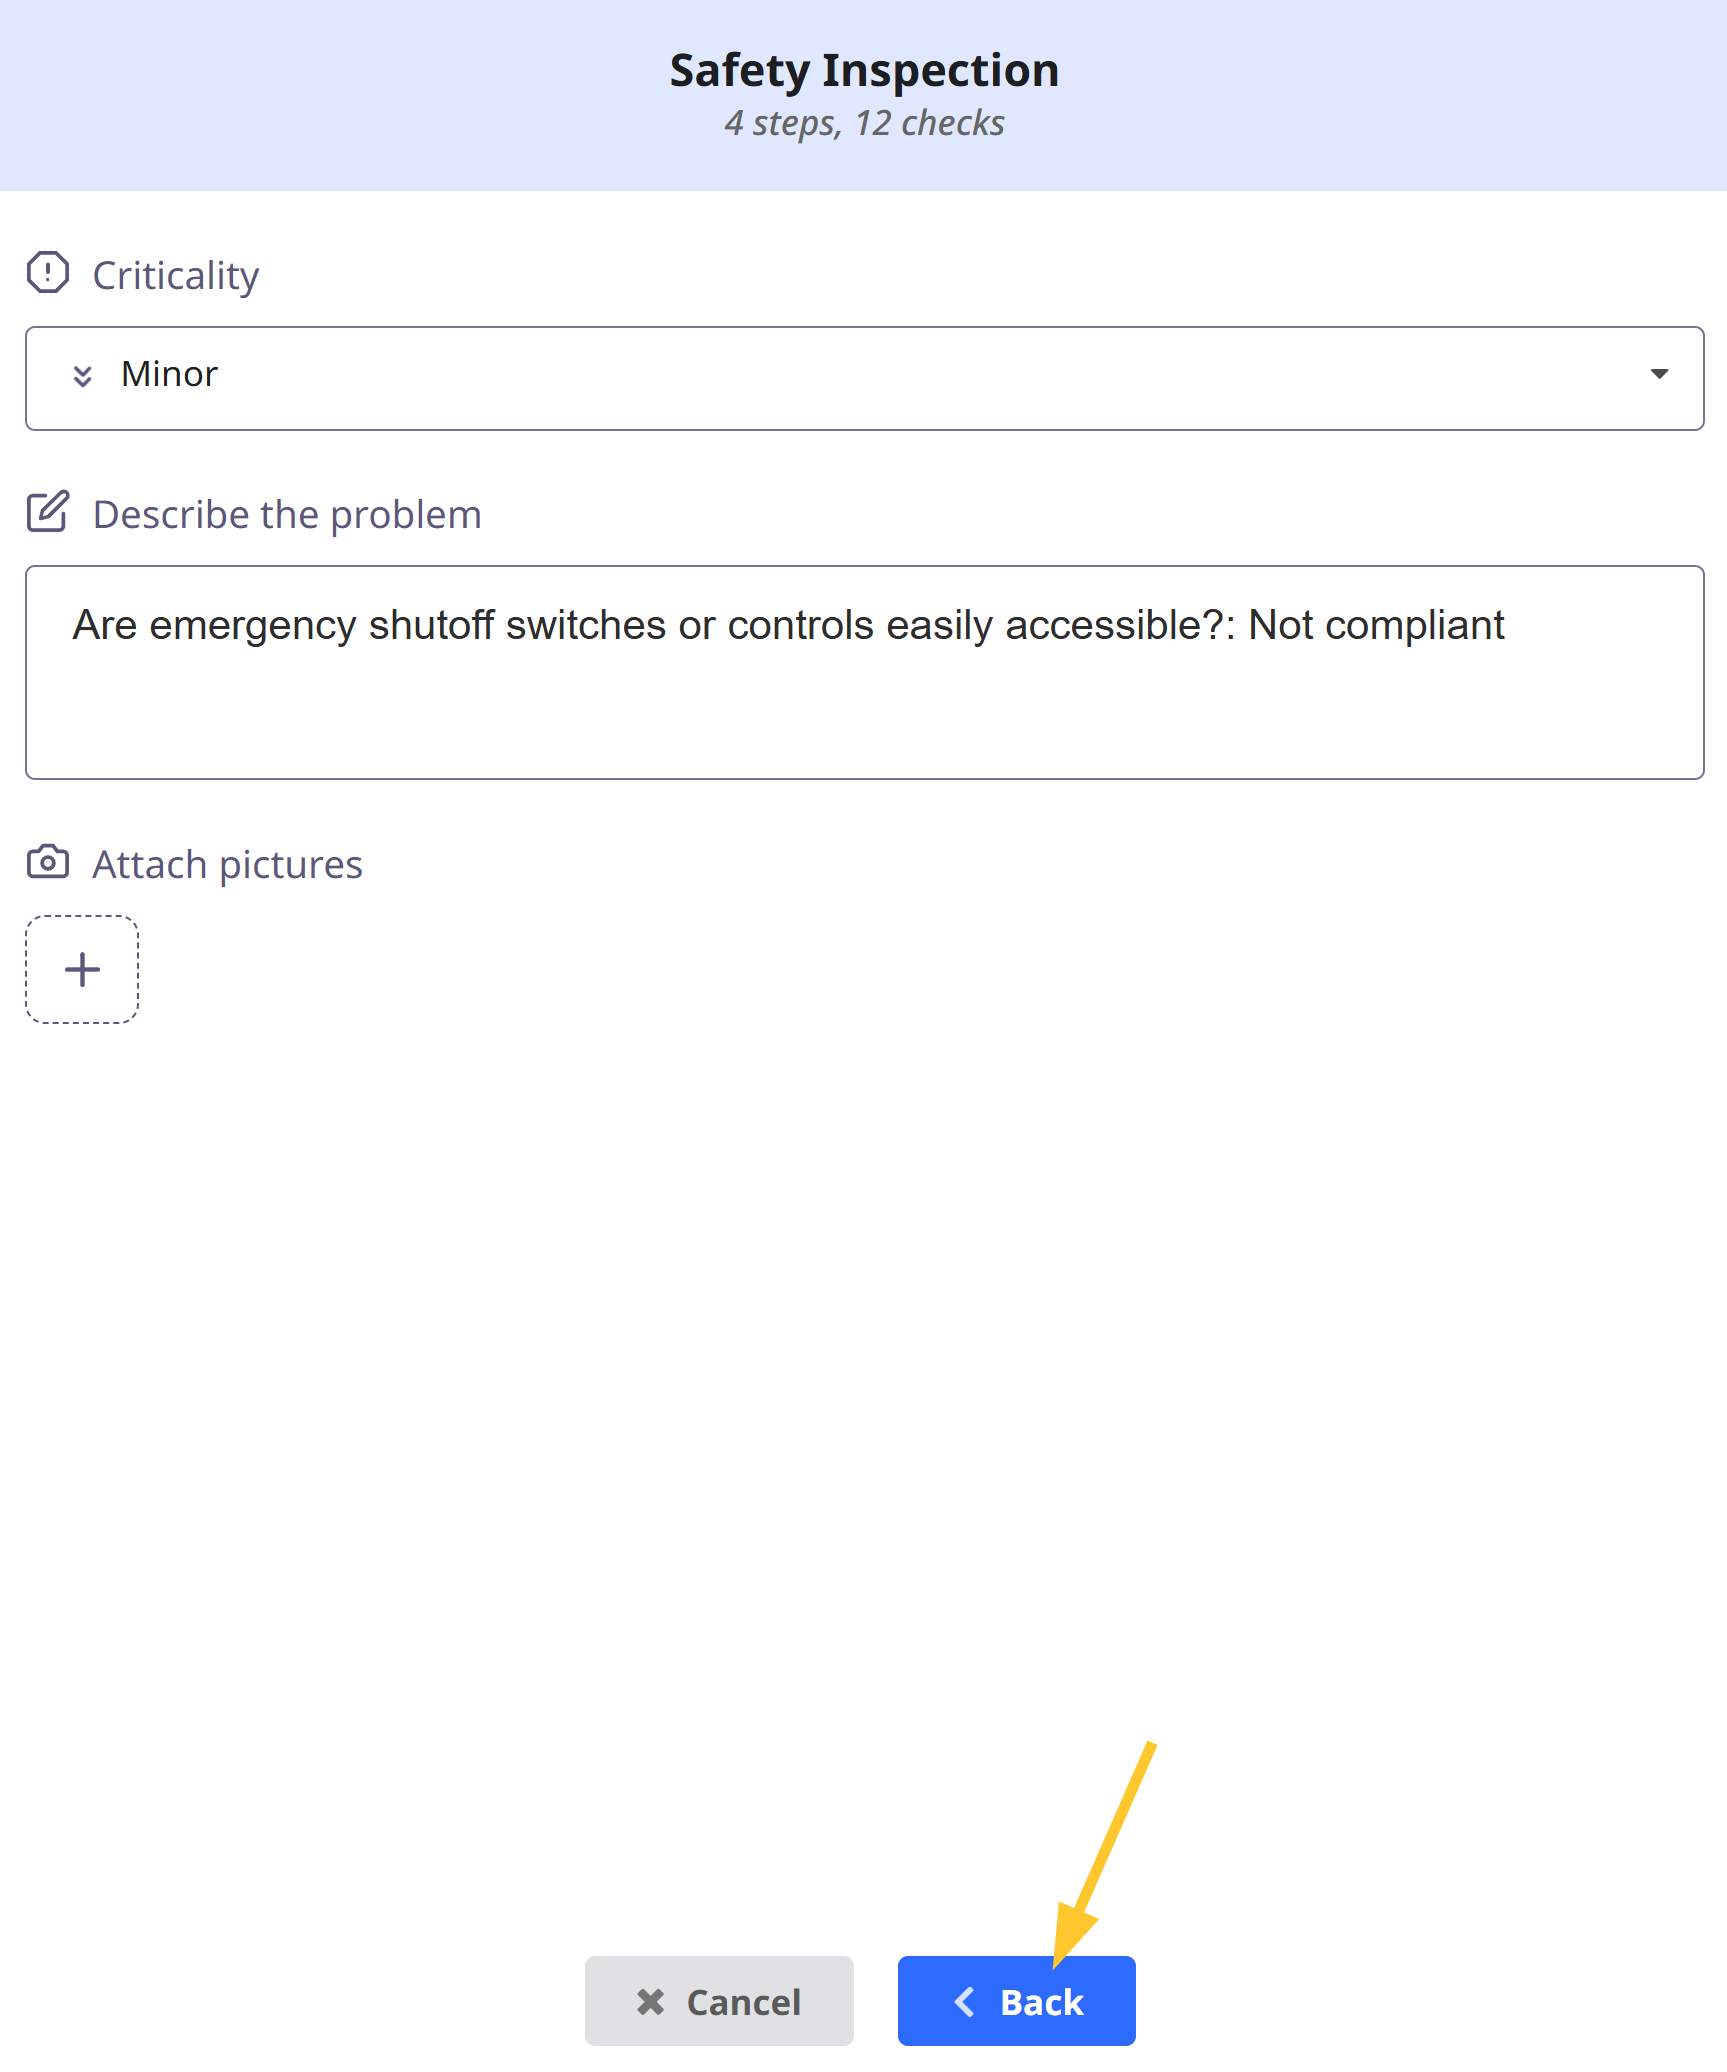
The following screen is displayed:
.png)
Describe the problem to be reported. It is automatically filled in by the point to be checked.
Define its criticality.
Note:
If a counter is added during the creation of the checklist, fill it in.
.png)
Import pictures from your device or take photos to illustrate problems and facilitate analysis and corrective actions.
Click Report the problem to validate.
All problems are automatically reported on the relevant iObeya board.
.png)
Each reported problem triggers the creation of a related action card on the board.
Each photo taken is directly attached to its related action card on the board.
Counters automatically update the indicators on the relevant letter.
Note:
You can analyze reported problems and manage corrective actions directly within iObeya.
Downloading Aggregated Gemba Walk Reports in PDF Format
From the Gemba Walk Assistant, you can download aggregated Gemba Walk reports in PDF Format:
Cheklists summary
Problems summary
To download reports:
Click on your profile initials name located on the top right corner of your screen.
Click:
Download checklists summary to get an overview of all observations made during your Walks.
Download problems summary to get an overview of all problems reported outside of the Gemba checklists.
Warning:
The PDF report of problems and checklist summary is kept for 48 hours.