Creating an effective visual workspace in iObeya starts with understanding how to add and manage various elements on your board. Whether you are setting up a project timeline, a Kanban board or a strategic planning map, the ability to add and customize elements is important for visualizing and organizing your work.
In iObeya, elements such as standard notes, text boxes, shapes and charts serve as the building blocks of your board. Each element plays a unique role in helping you capture ideas, track tasks and represent data visually. This article guides you through the process of adding these essential elements to your iObeya board, so you can create a dynamic and interactive workspace tailored to your team’s needs.
Let’s dive into how you can start adding and configuring these elements to make the most of your iObeya experience.
To add elements to your board:
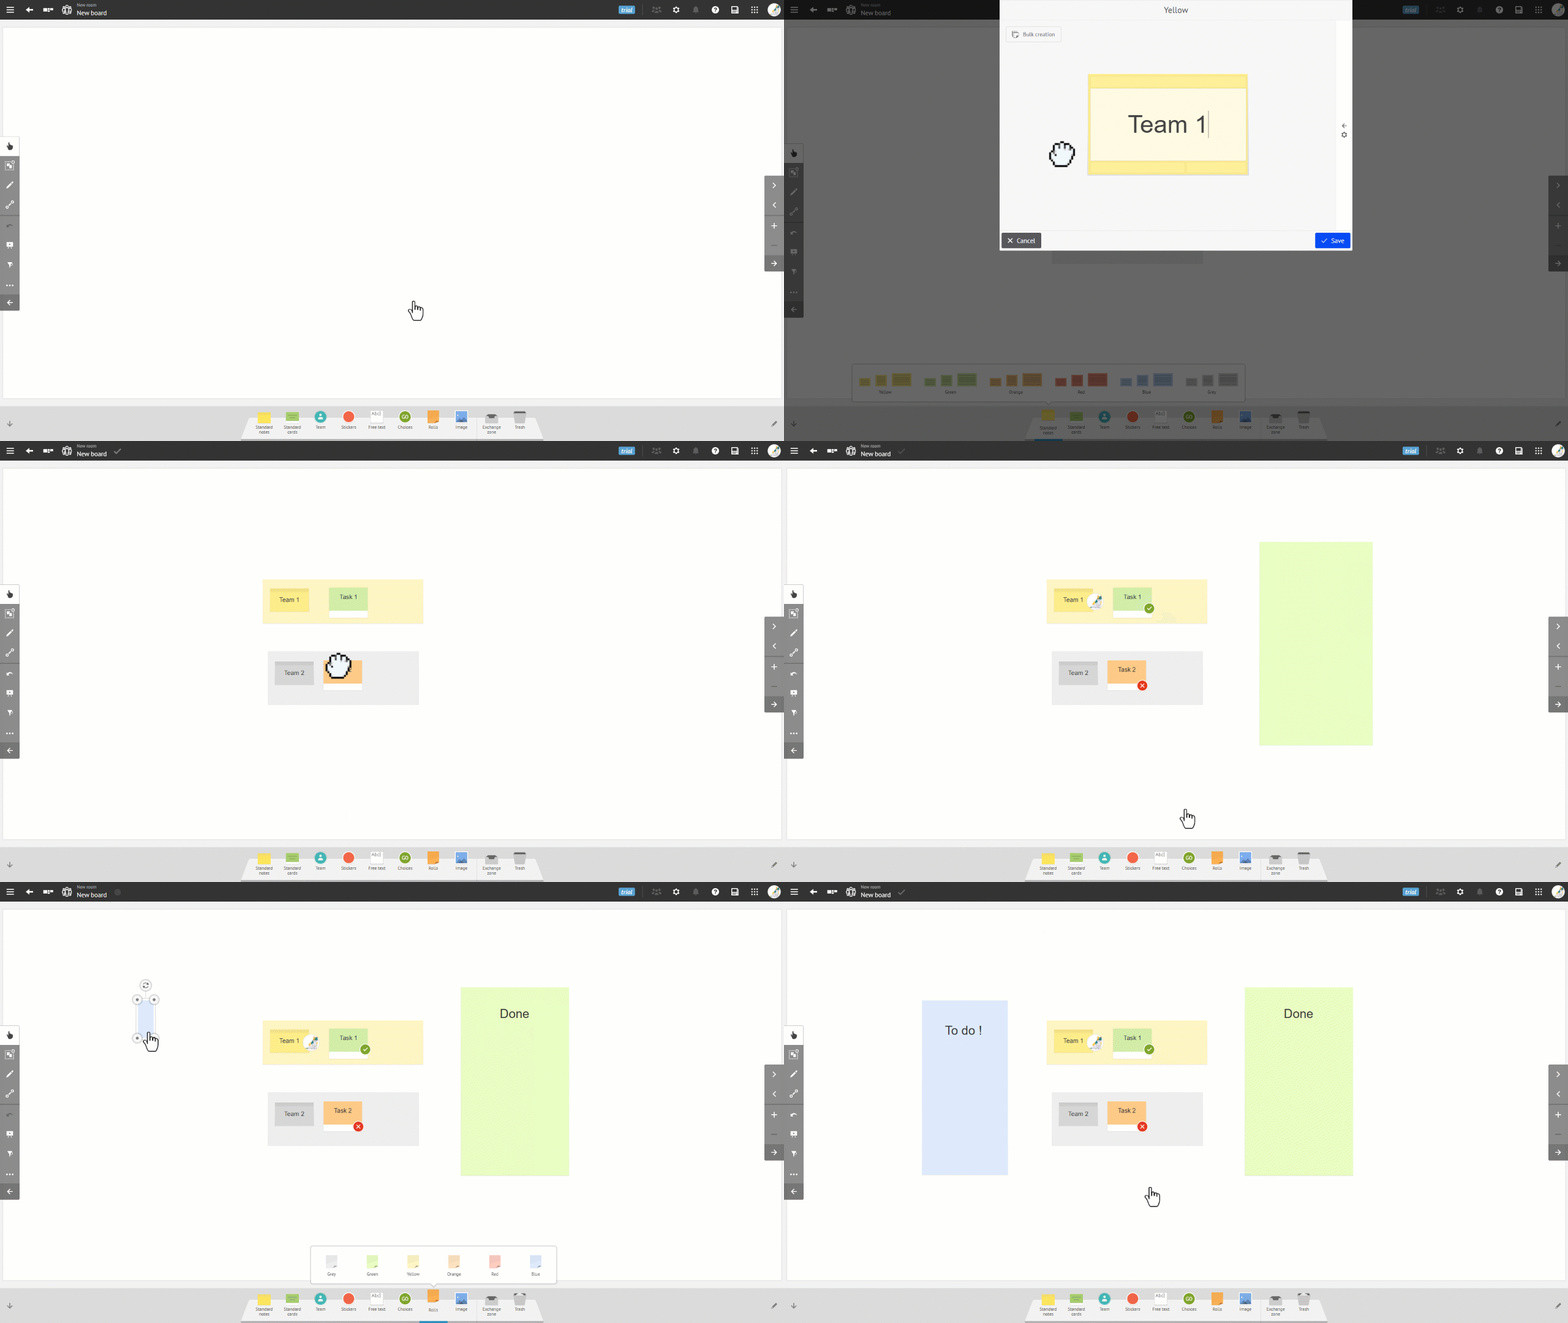
Open the board where you want to add elements.
Click the Dock tab at the bottom of your screen to display the available tools.
Note:
Your Room administrator defines these tools, based on the specific use of each board.
Click the tool you want to use (for example: note, shape, image). Then, drag and drop the selected element onto your board.
A blue shading indicates the final size and helps you position it correctly.
For certain tools, a window is displayed when you place element on the board, allowing you to enter text or configure parameters.
About Standard Elements
When you create your board, by default, you have a tool dock populated with standard tools, displayed below the screen.
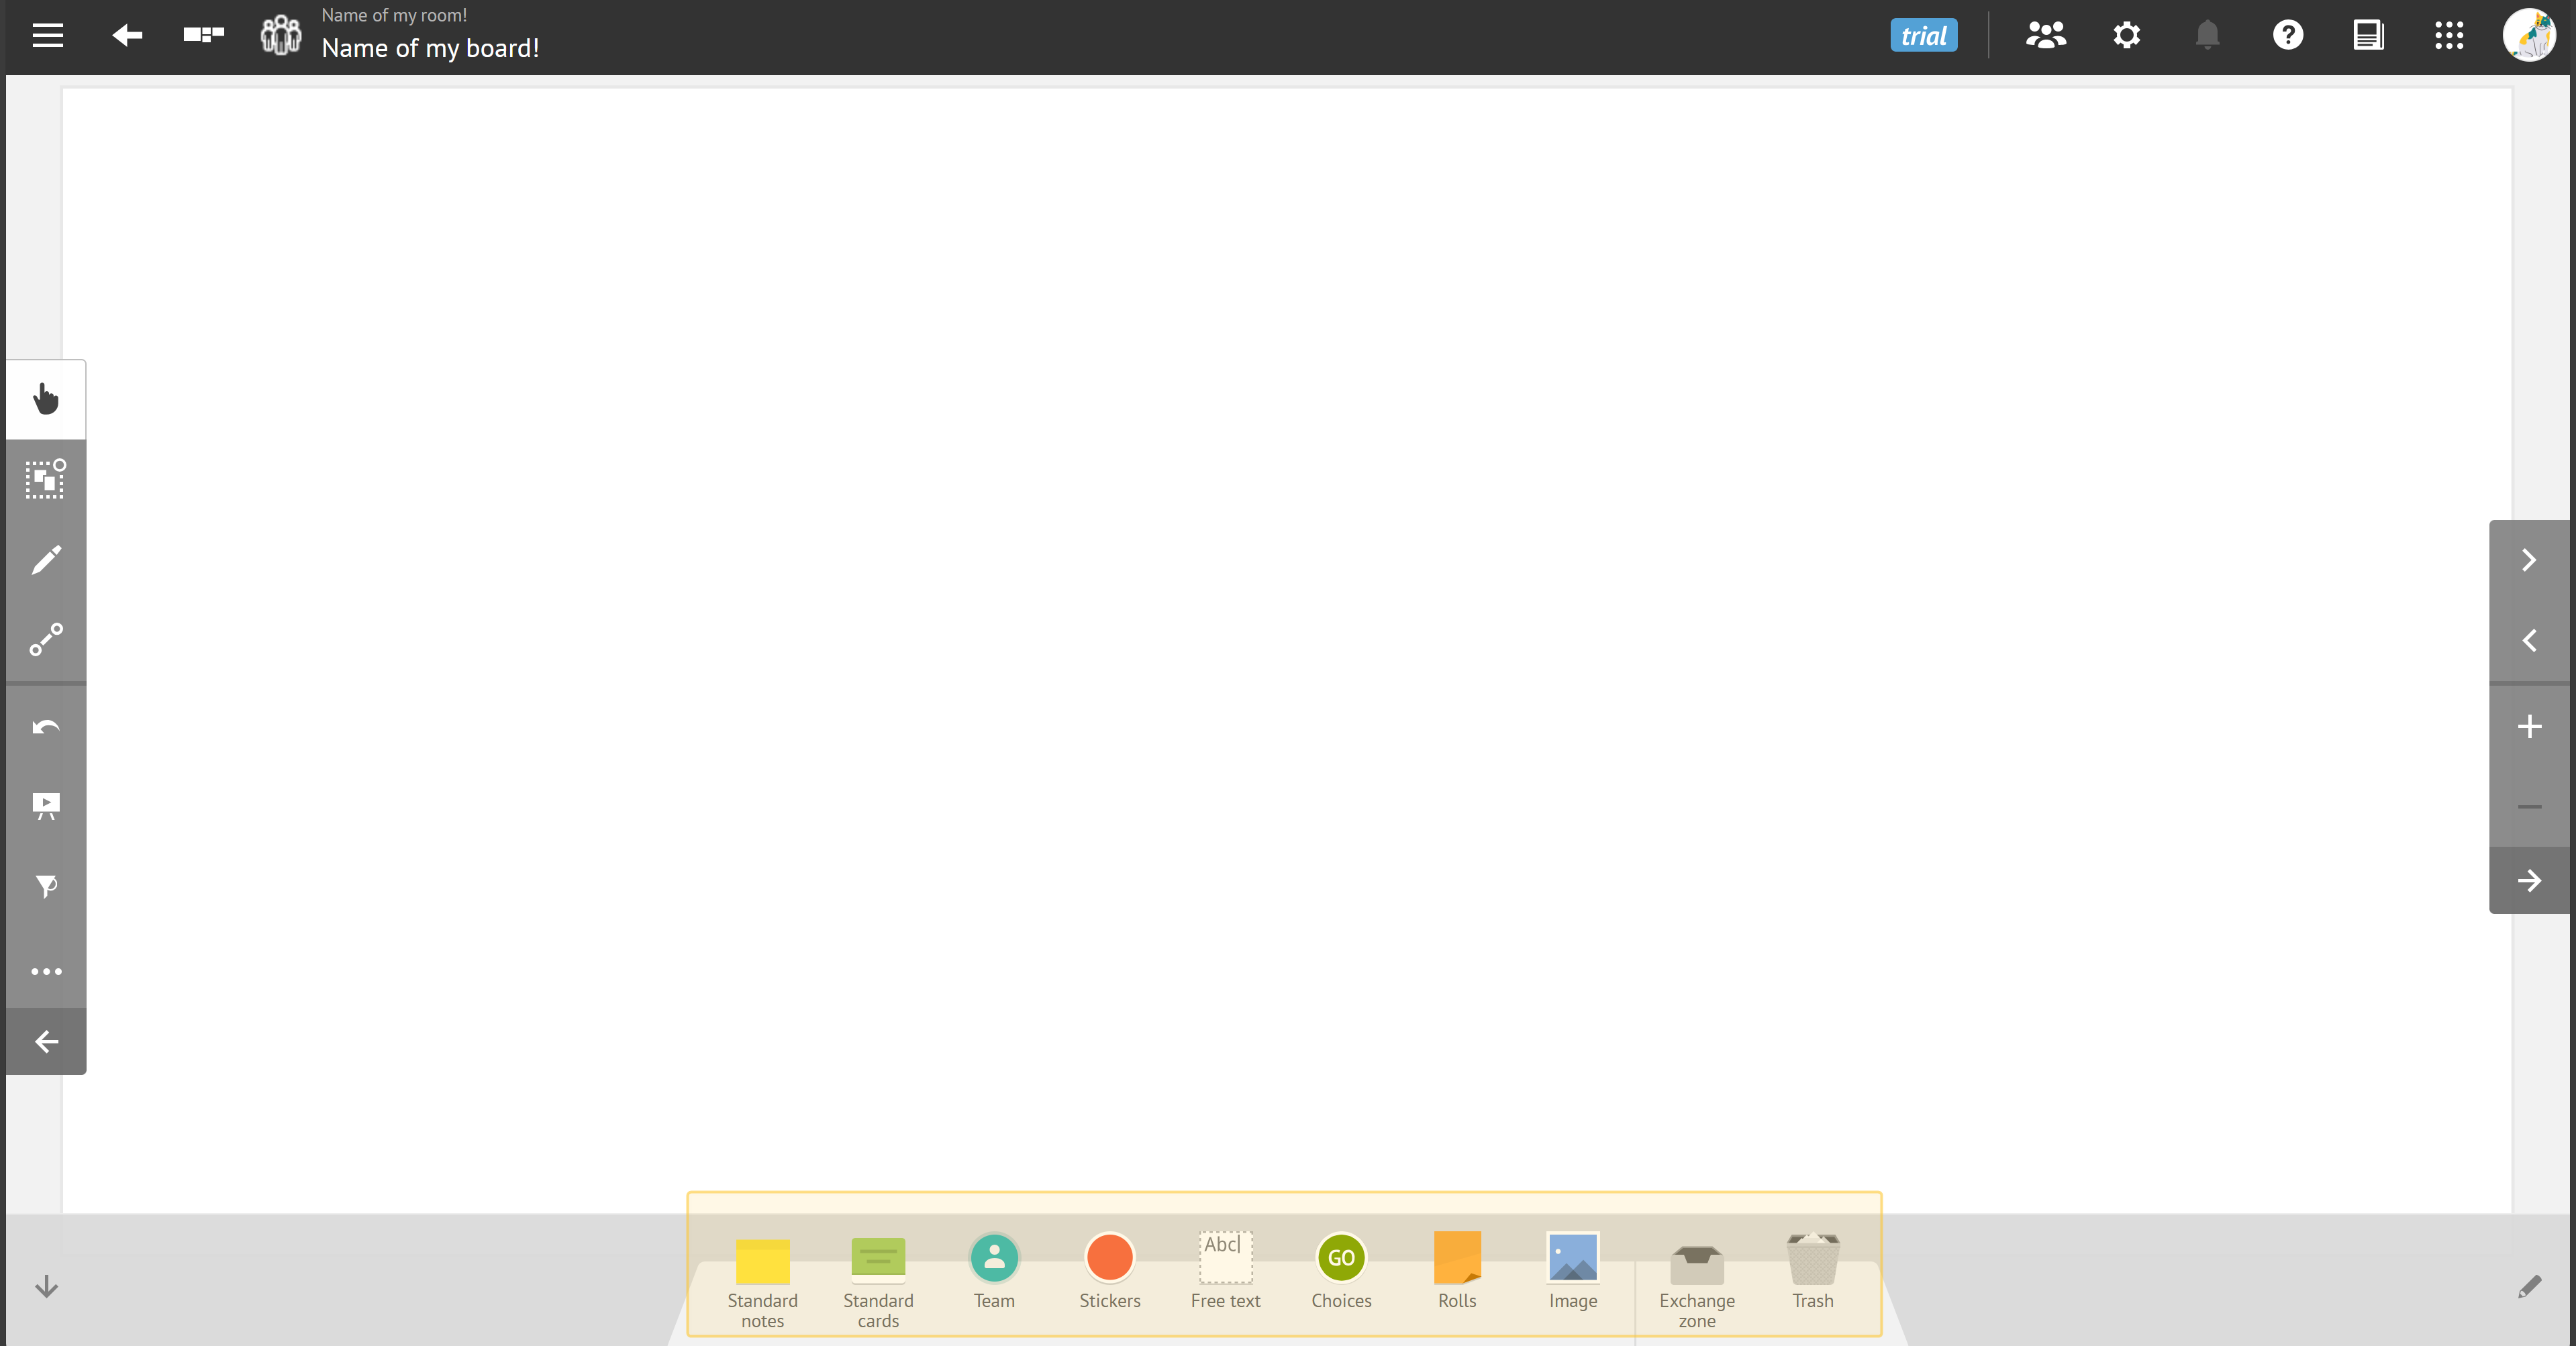
Familiarize yourself with these icons as they help you customize your board:

Standard notes: for inserting an element with the appearance of a Post-it®, containing text in one of the following configurations: their color and size are standard.
Standard cards: for visually representing and track team progress for a business activity.
Team: for inserting avatars or initials of team members on a board.
Stickers: for adding one-off information to a note or any other element present on your board.
Free text: for inserting a text, then configure it afterwards.
Choices: for annotating with “go”, “no go”, “accepted”, “question” and more.
Rolls: for placing colored bands on your board, creating groups or zones of colors.
Image: for adding images from an external source.
Standard notes
Standard notes are essential for capturing ideas, brainstorming and tracking tasks. They are versatile and you can use them to represent individual pieces of information or to facilitate discussions.
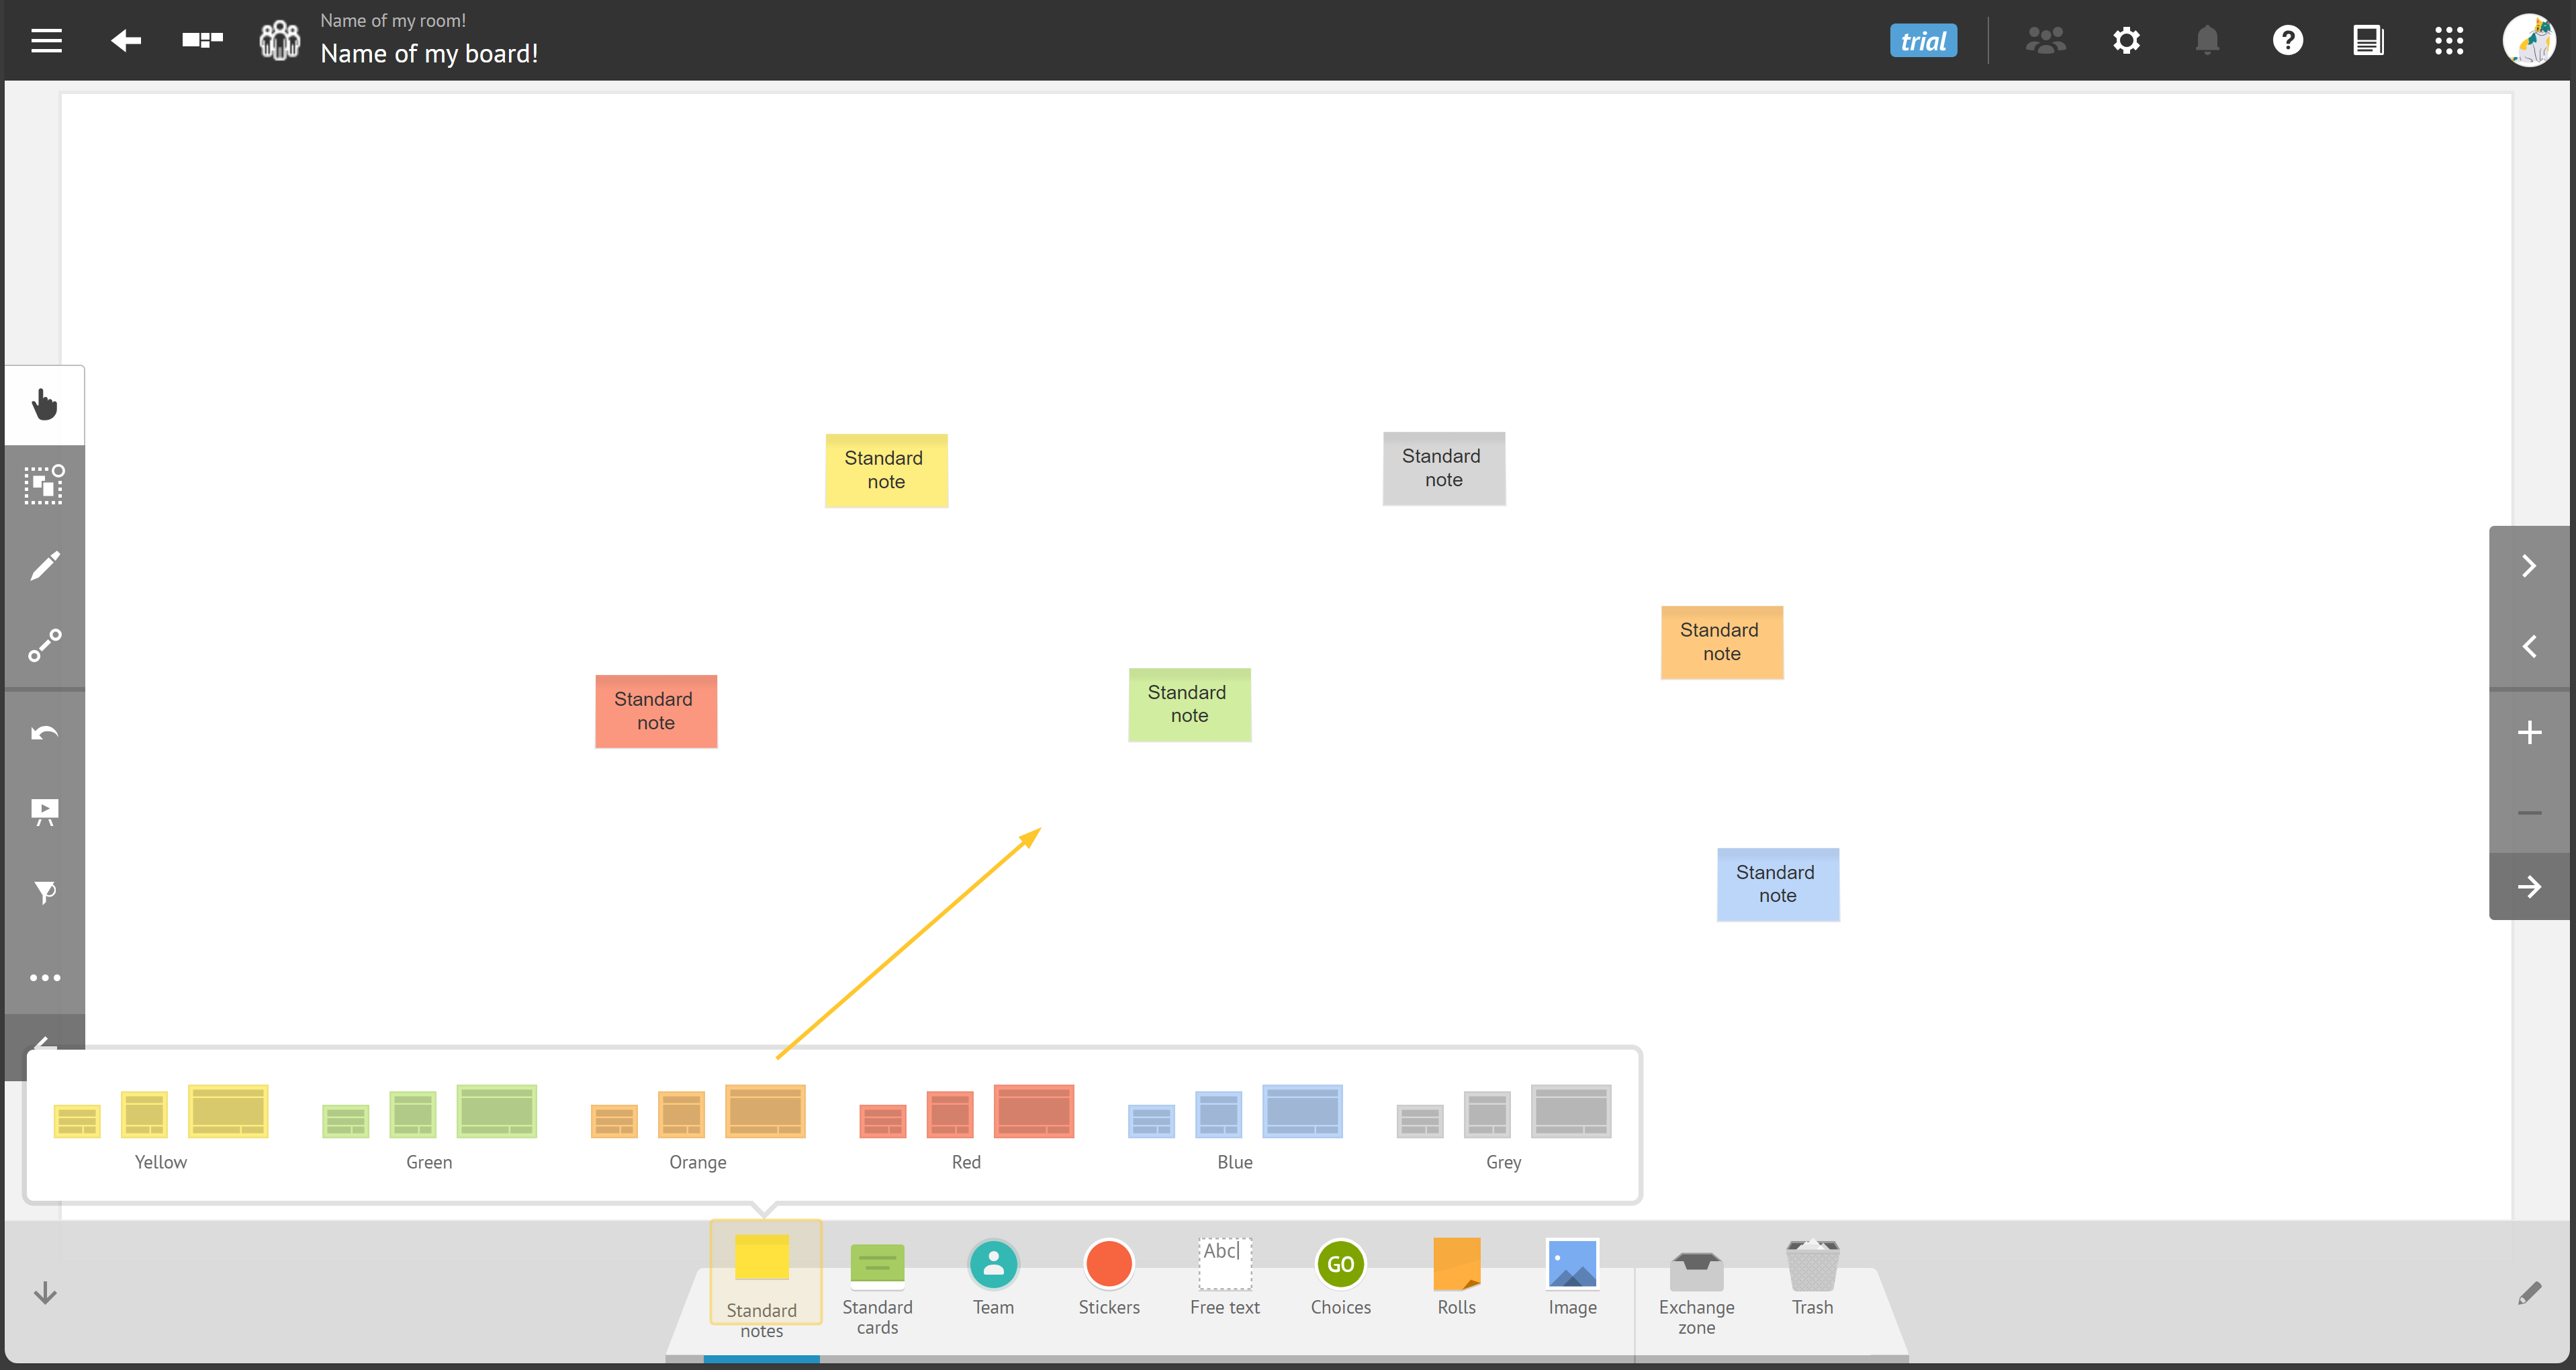
As a user, you can set:
color and layout of the note (from the defined combinations),
size of the note (from those pre-defined),
content of note.
If you are a room administrator, you can also:
set:
name of the tool,
name of the elements,
size of the elements -from 1 to 3),
layout of the note (from those pre-defined),
color of the elements,
add additional standard notes.
Tip:
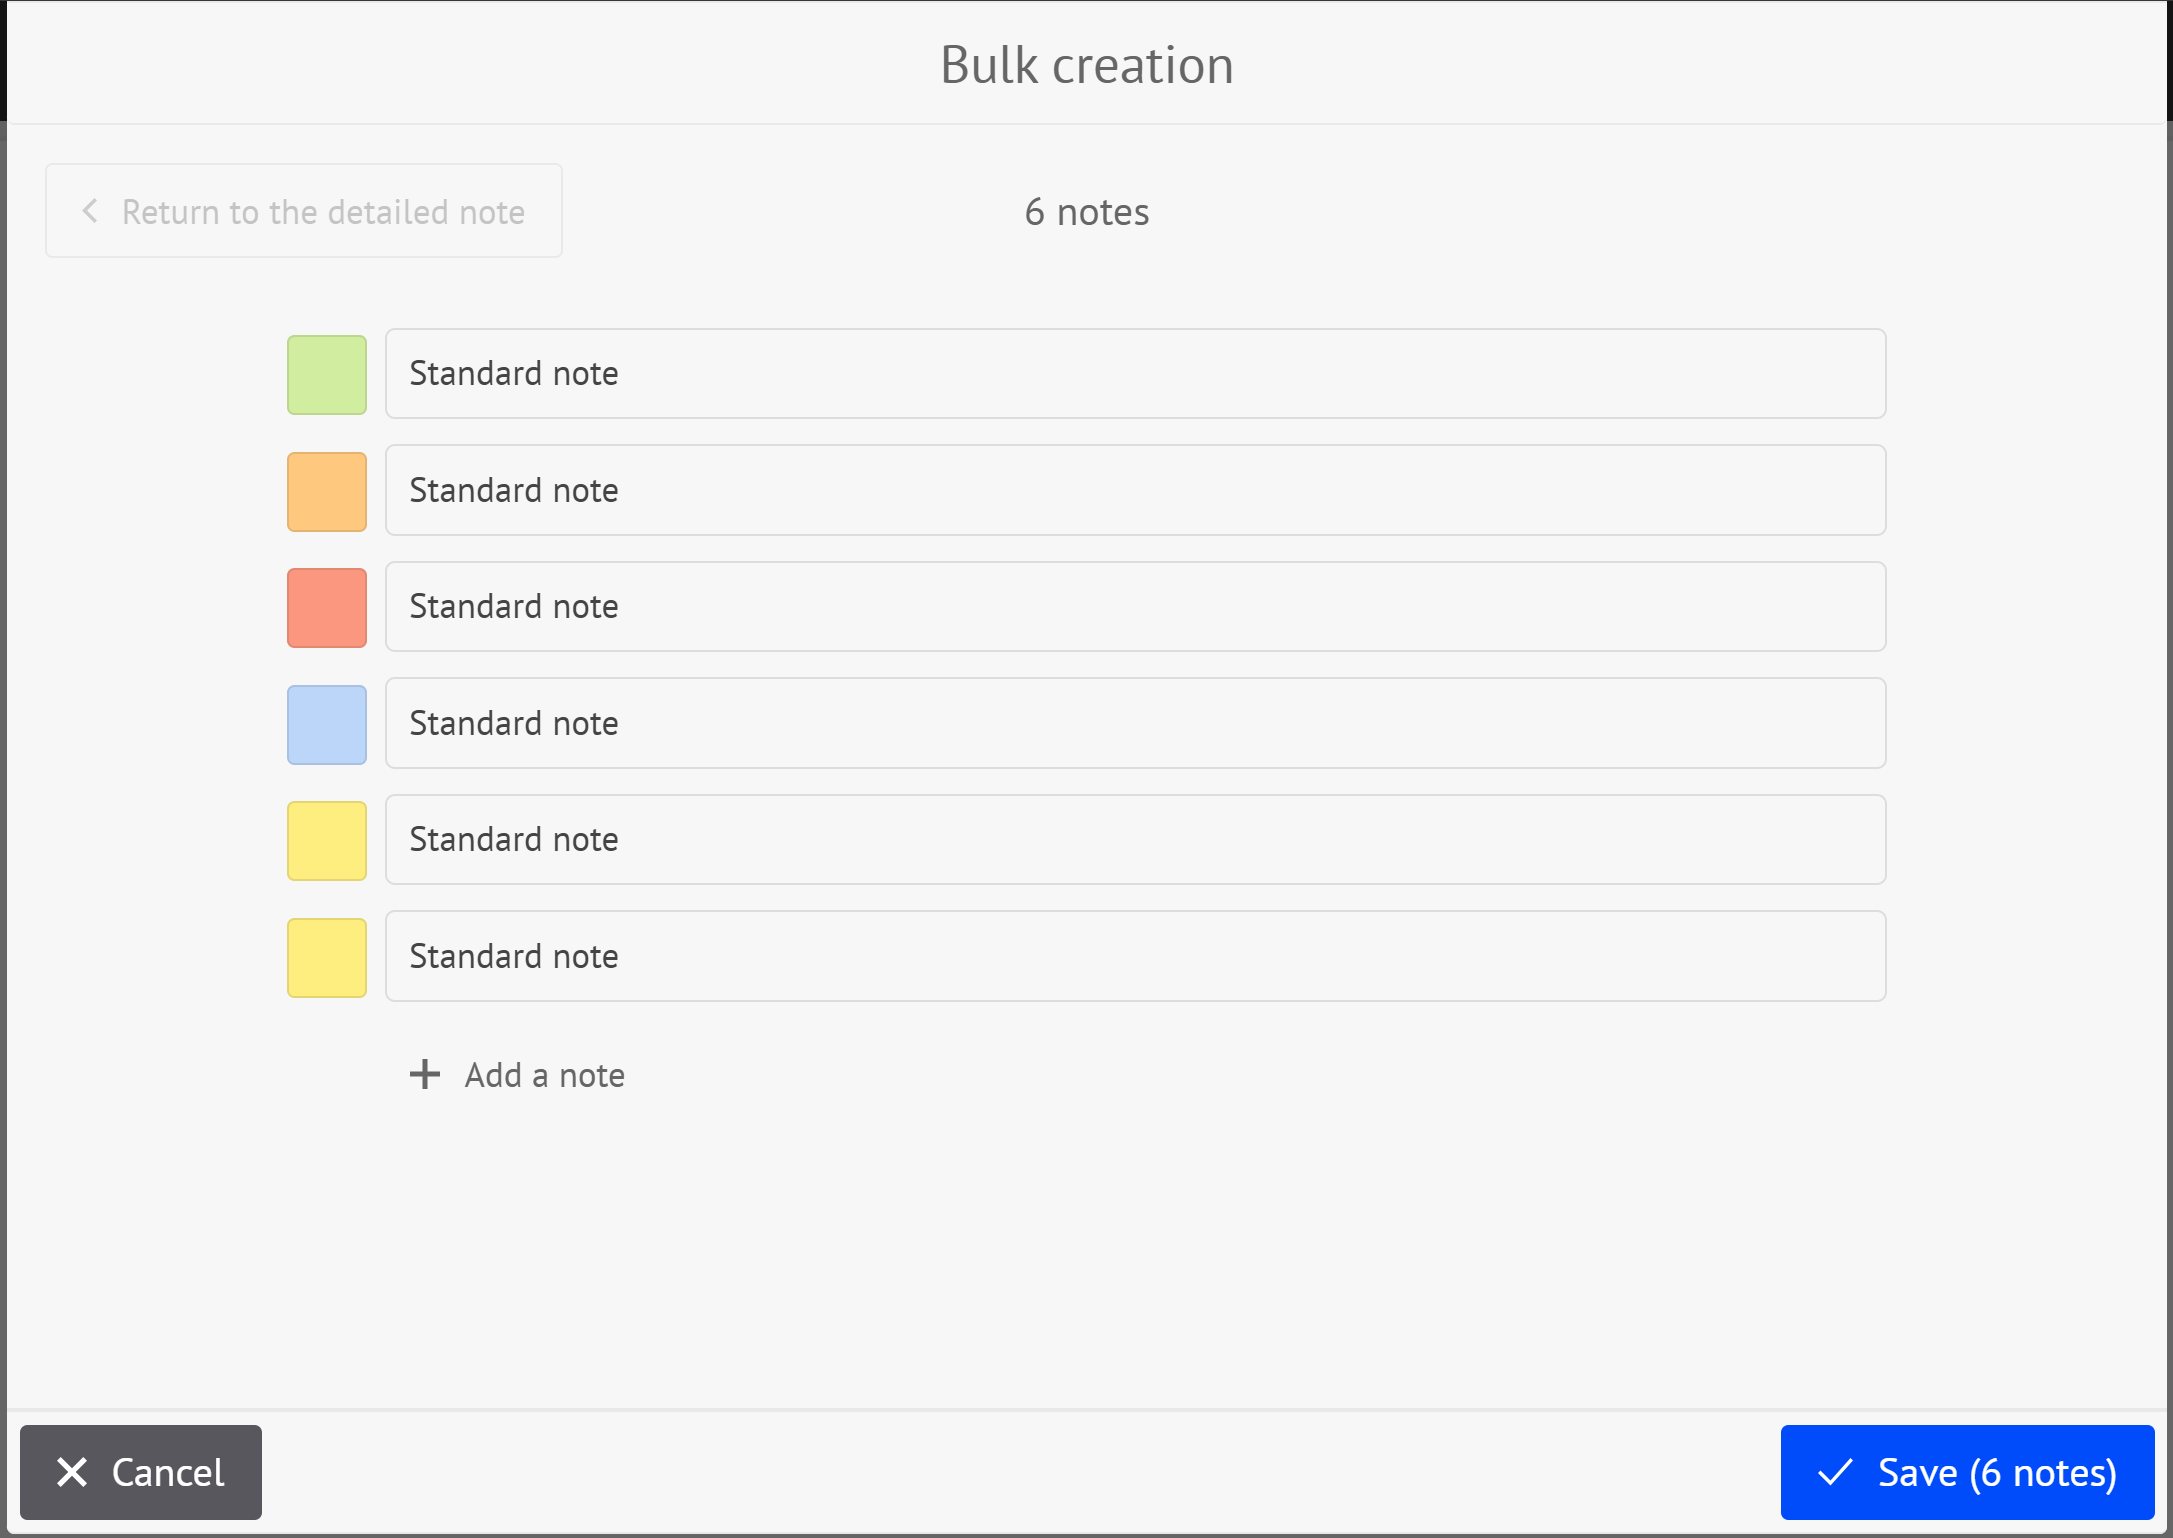
To help you quickly add ideas, you can create multiple notes at once.
Just add a note to your board, then click Bulk creation in the window that is displayed.
Standard cards
Standard cards allow to visually represent and track team progress for a business activity.
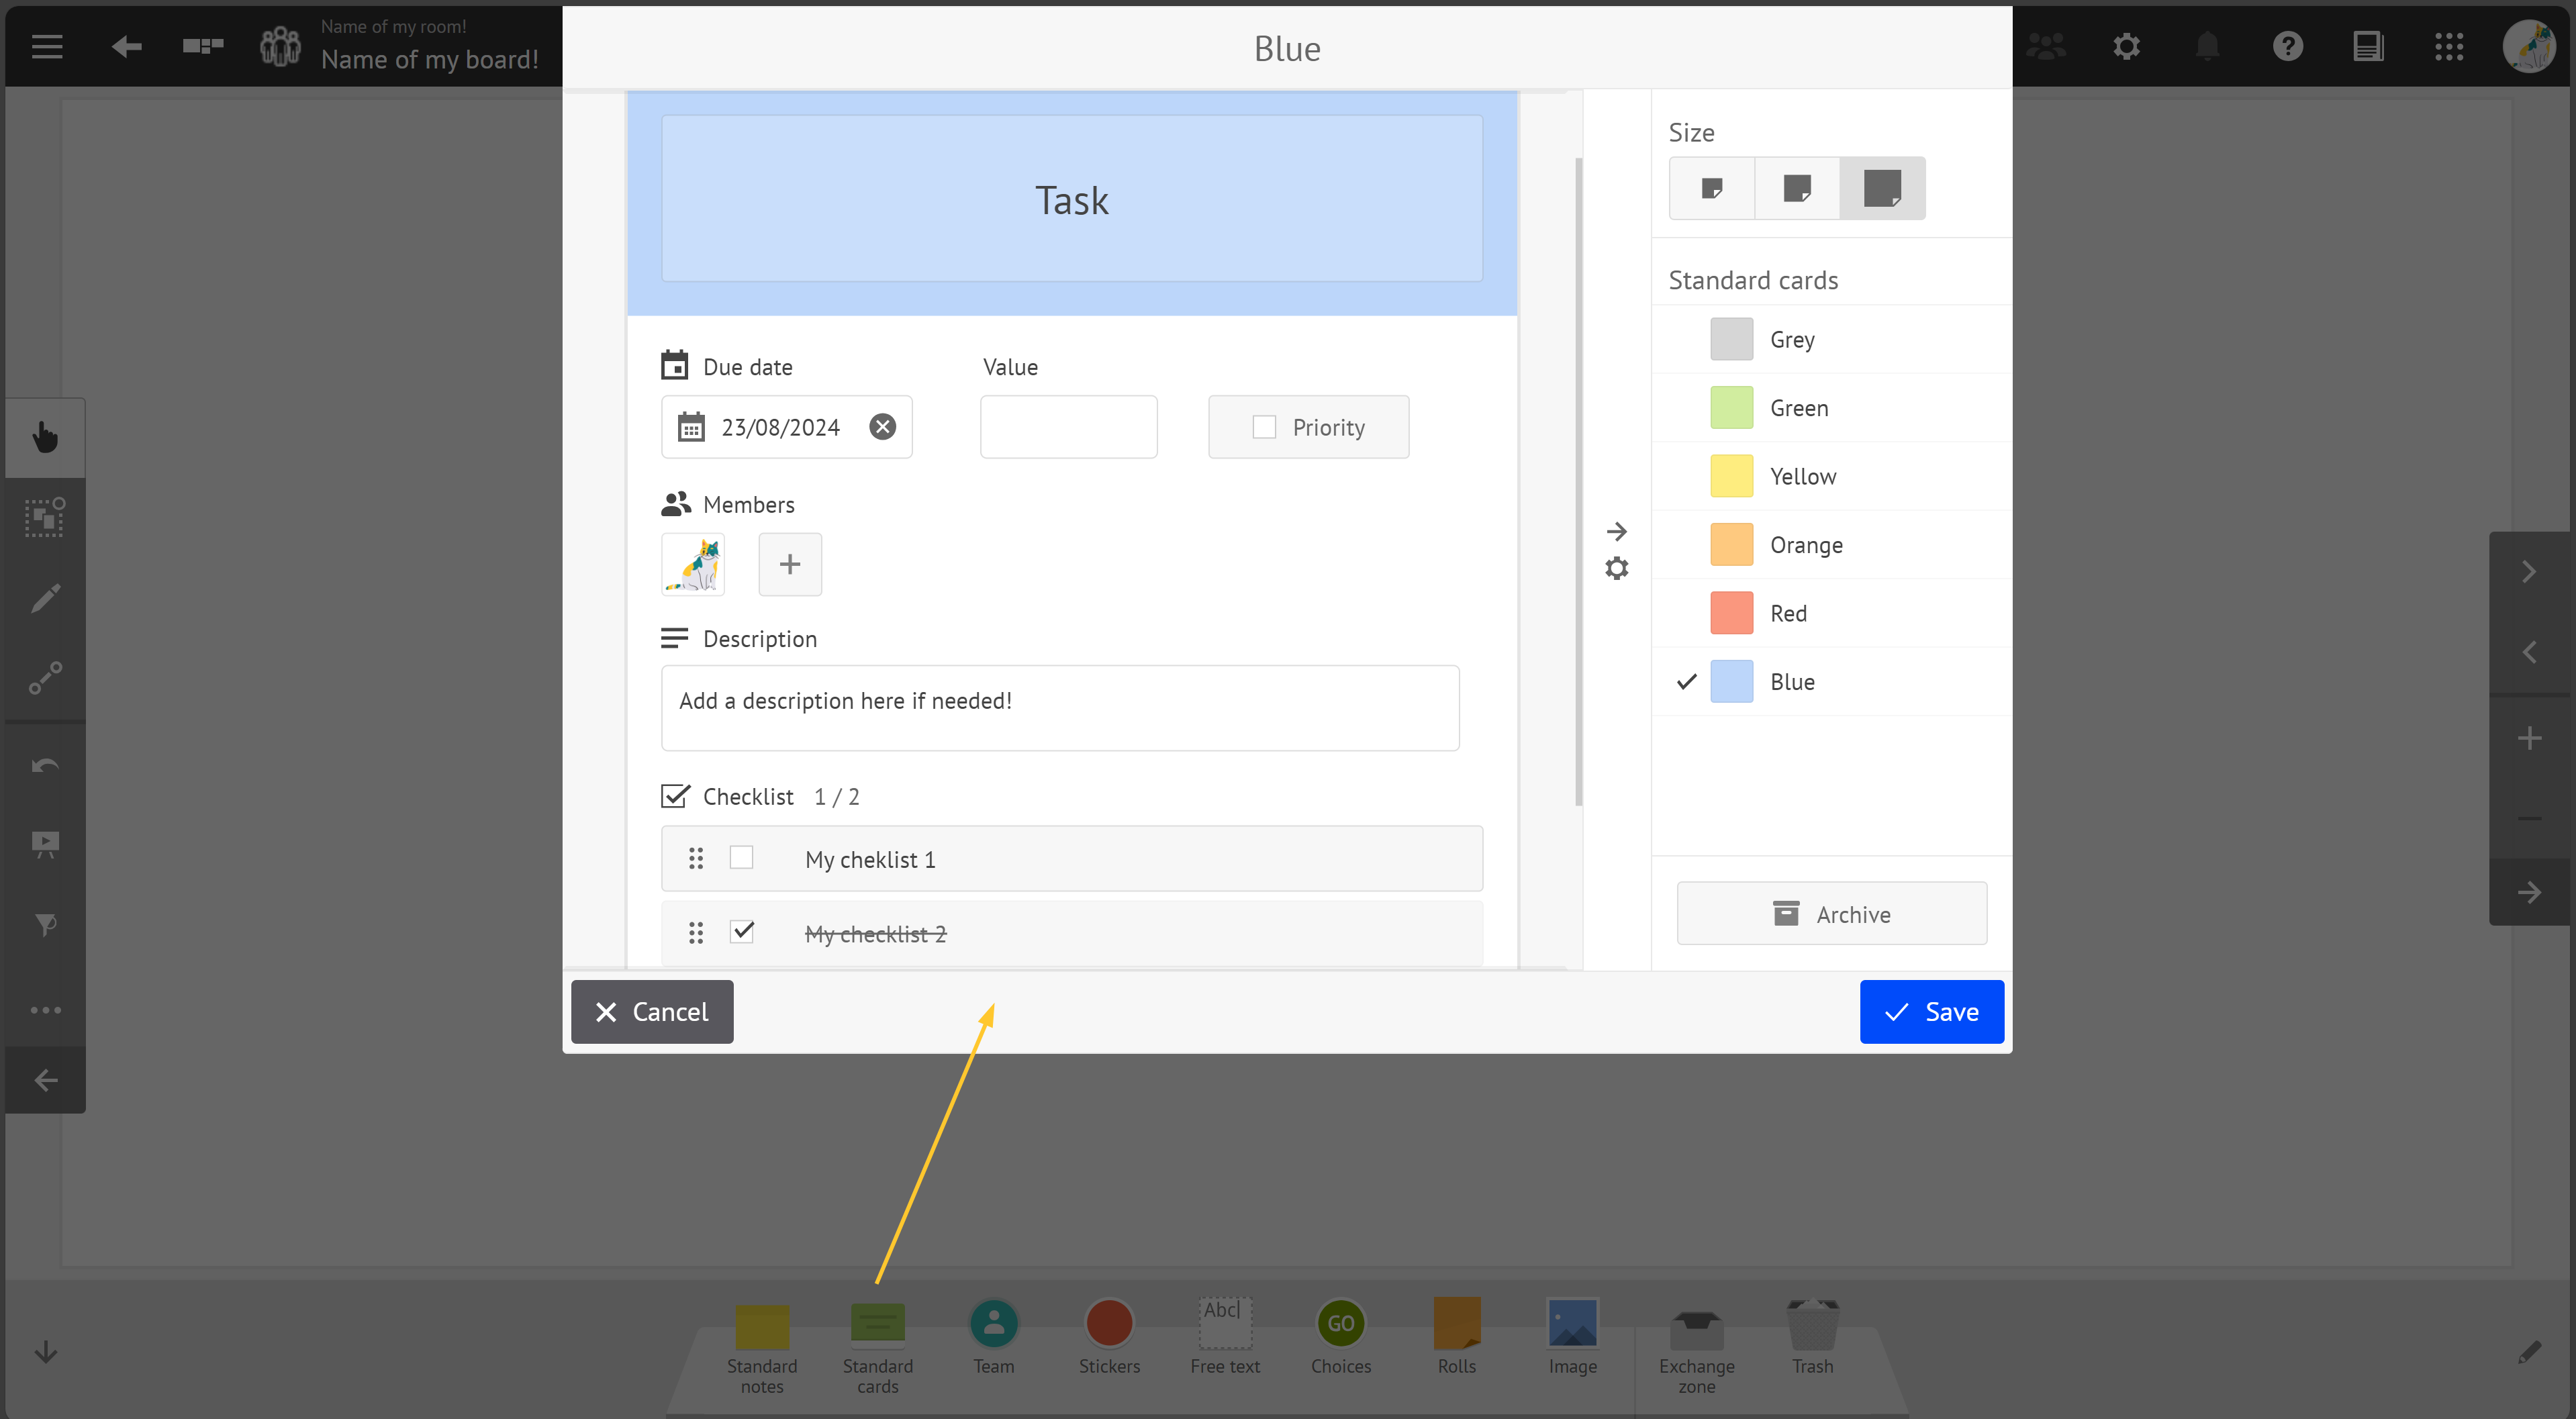
Enter details such as title, description, due date and assignees.
As a user, you can set:
color of the card (from those pre-defined),
size of the card (from those pre-defined),
title and description of the card,
due date of the card,
numerical value of the card,
priority of the card,
members of the card,
checklist of the card,
archiving / retrieval of the card,
Synchronized card.
If you are a room administrator, you can also:
set:
name of the tool,
name of the elements,
size of the elements -from 1 to 3),
color of the elements,
add additional standard cards.
Stickers
Stickers allow to add one-off information to a note or any other element present on your board.
You can use stickers for highlighting important information, making key points, drawing attention to specific areas and more.
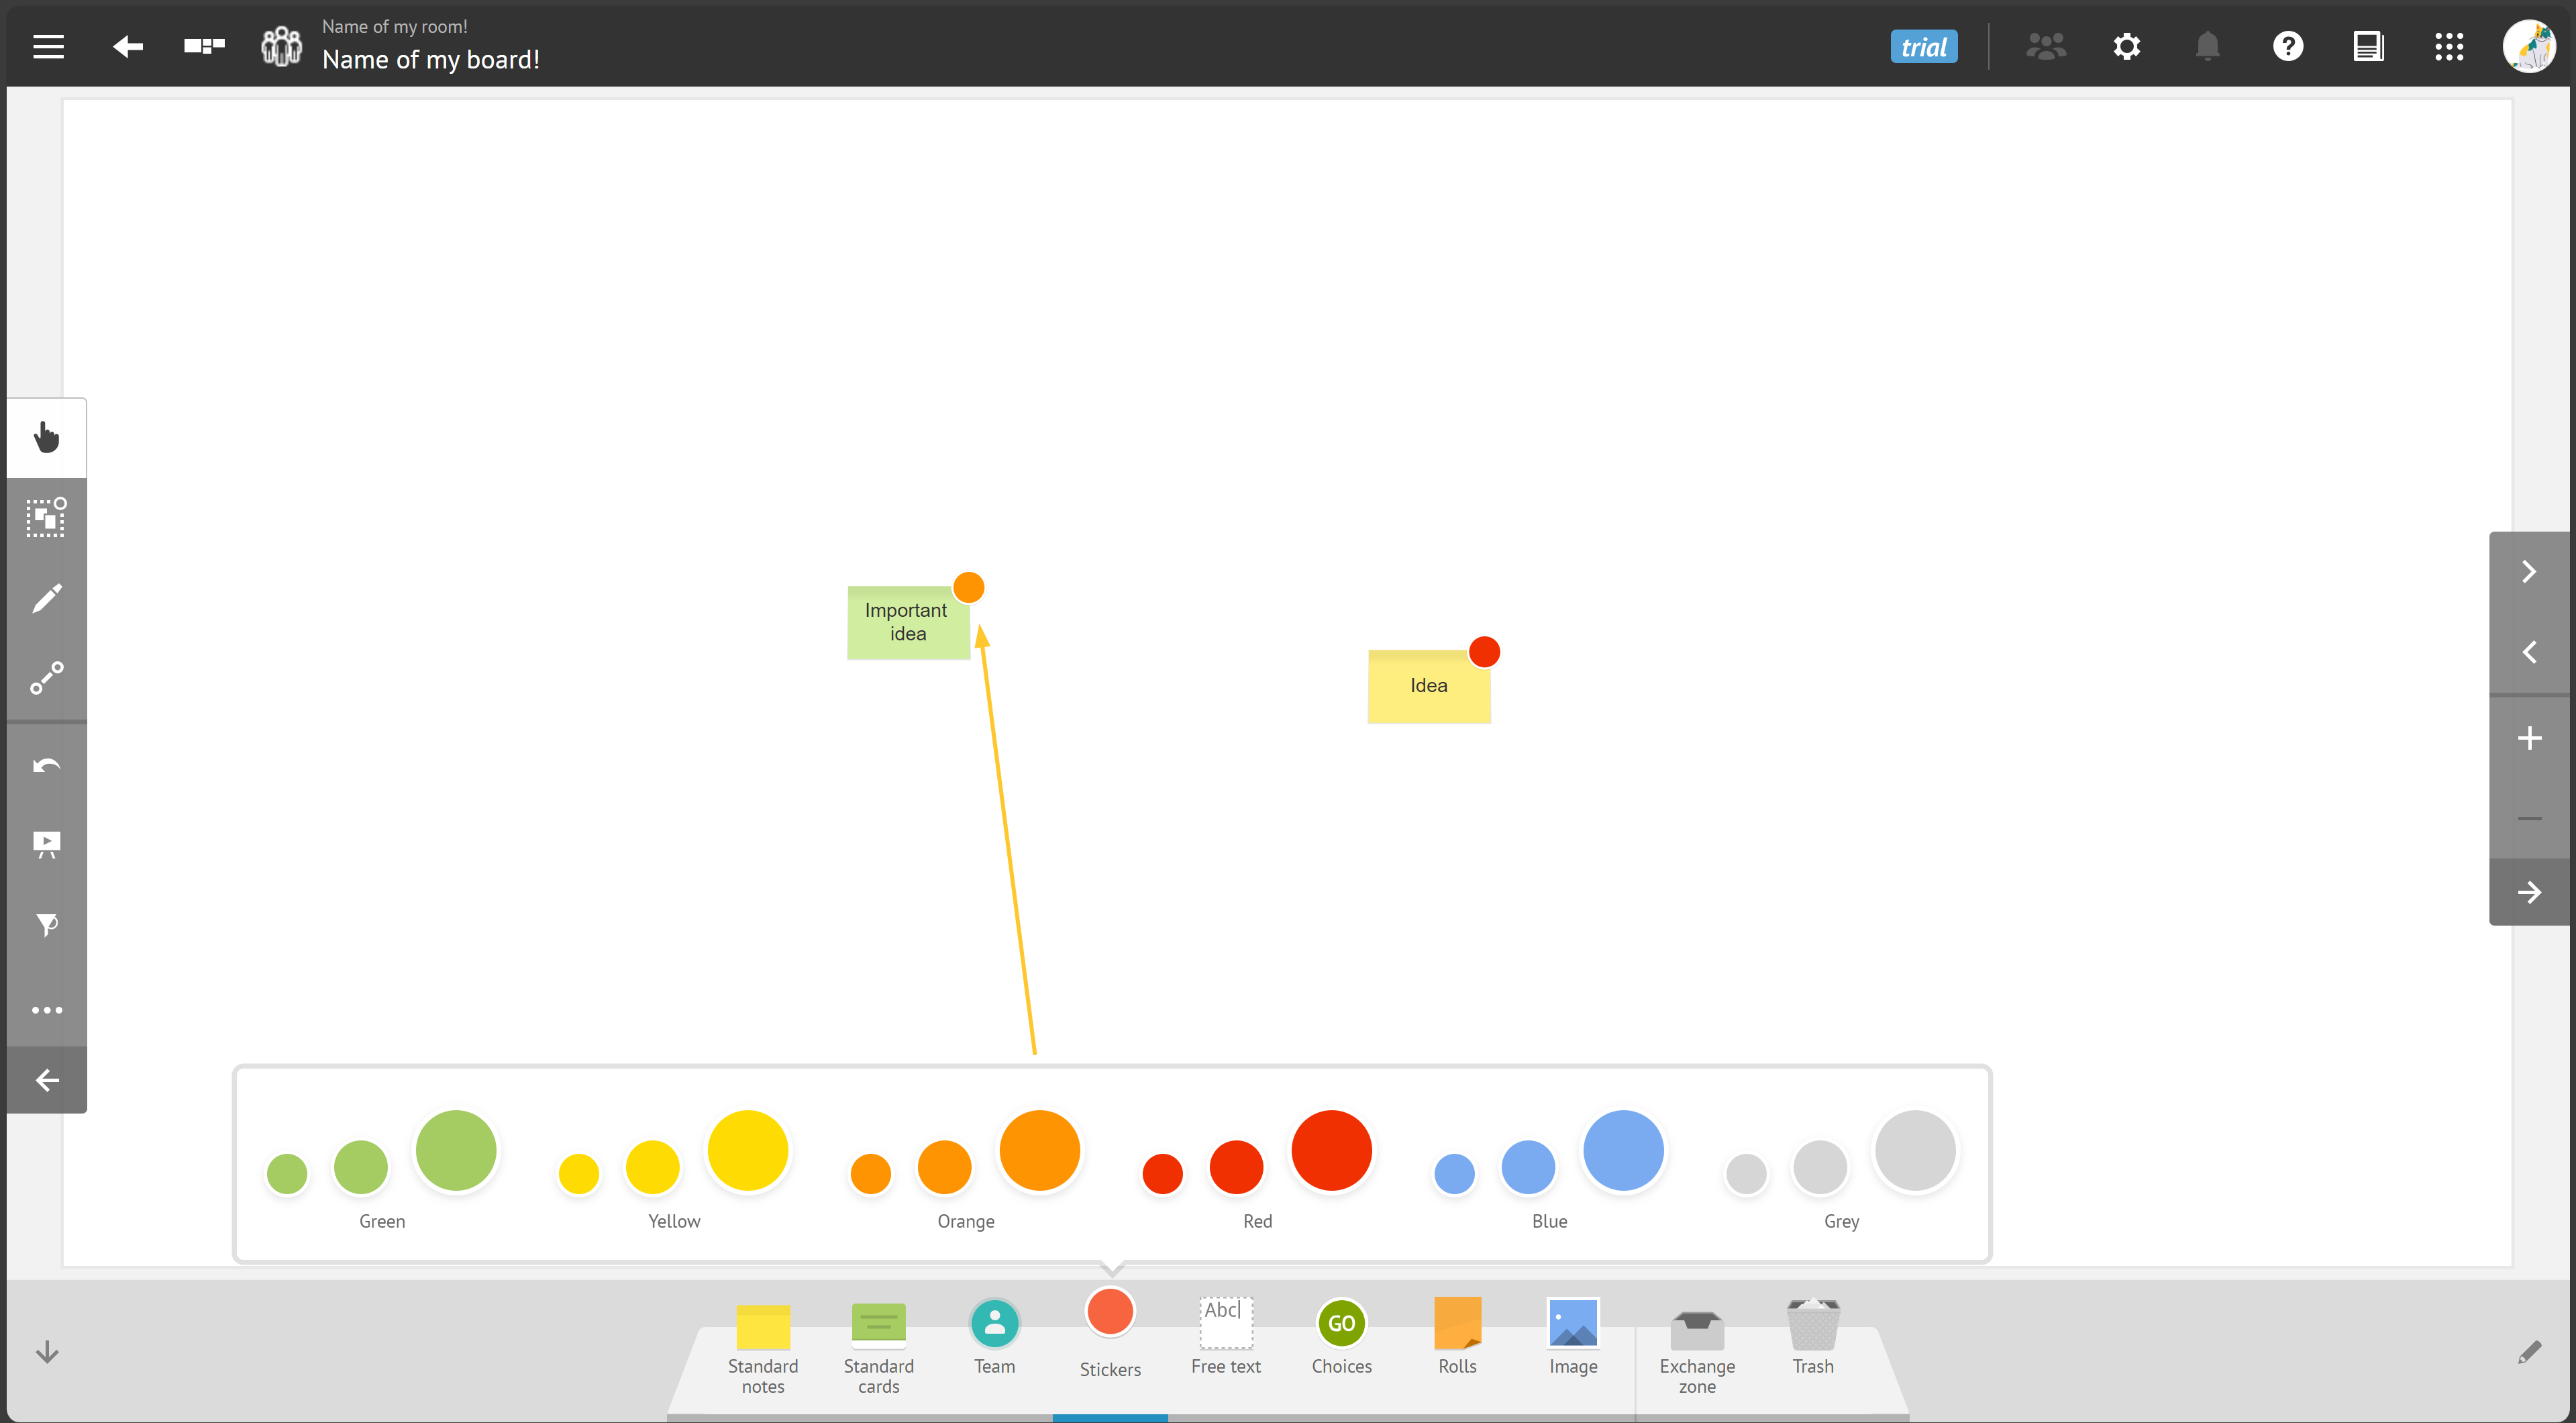
Customize your stickers if needed.
As a user, you can set:
color of the sticker (from those pre-defined),
size of the sticker (from those pre-defined).
If you are a room administrator, you can also:
set:
name of the tool,
name of the elements,
size of the elements -from 1 to 3),
color of the “color type” elements,
add additional stickers.
Choices
Choices are essential for helping teams make decisions, prioritize tasks and gather feedback in a structured and visual manner.
This tool is particularly useful in collaborative environments where input from multiple team members is needed to guide project direction or select between different options.
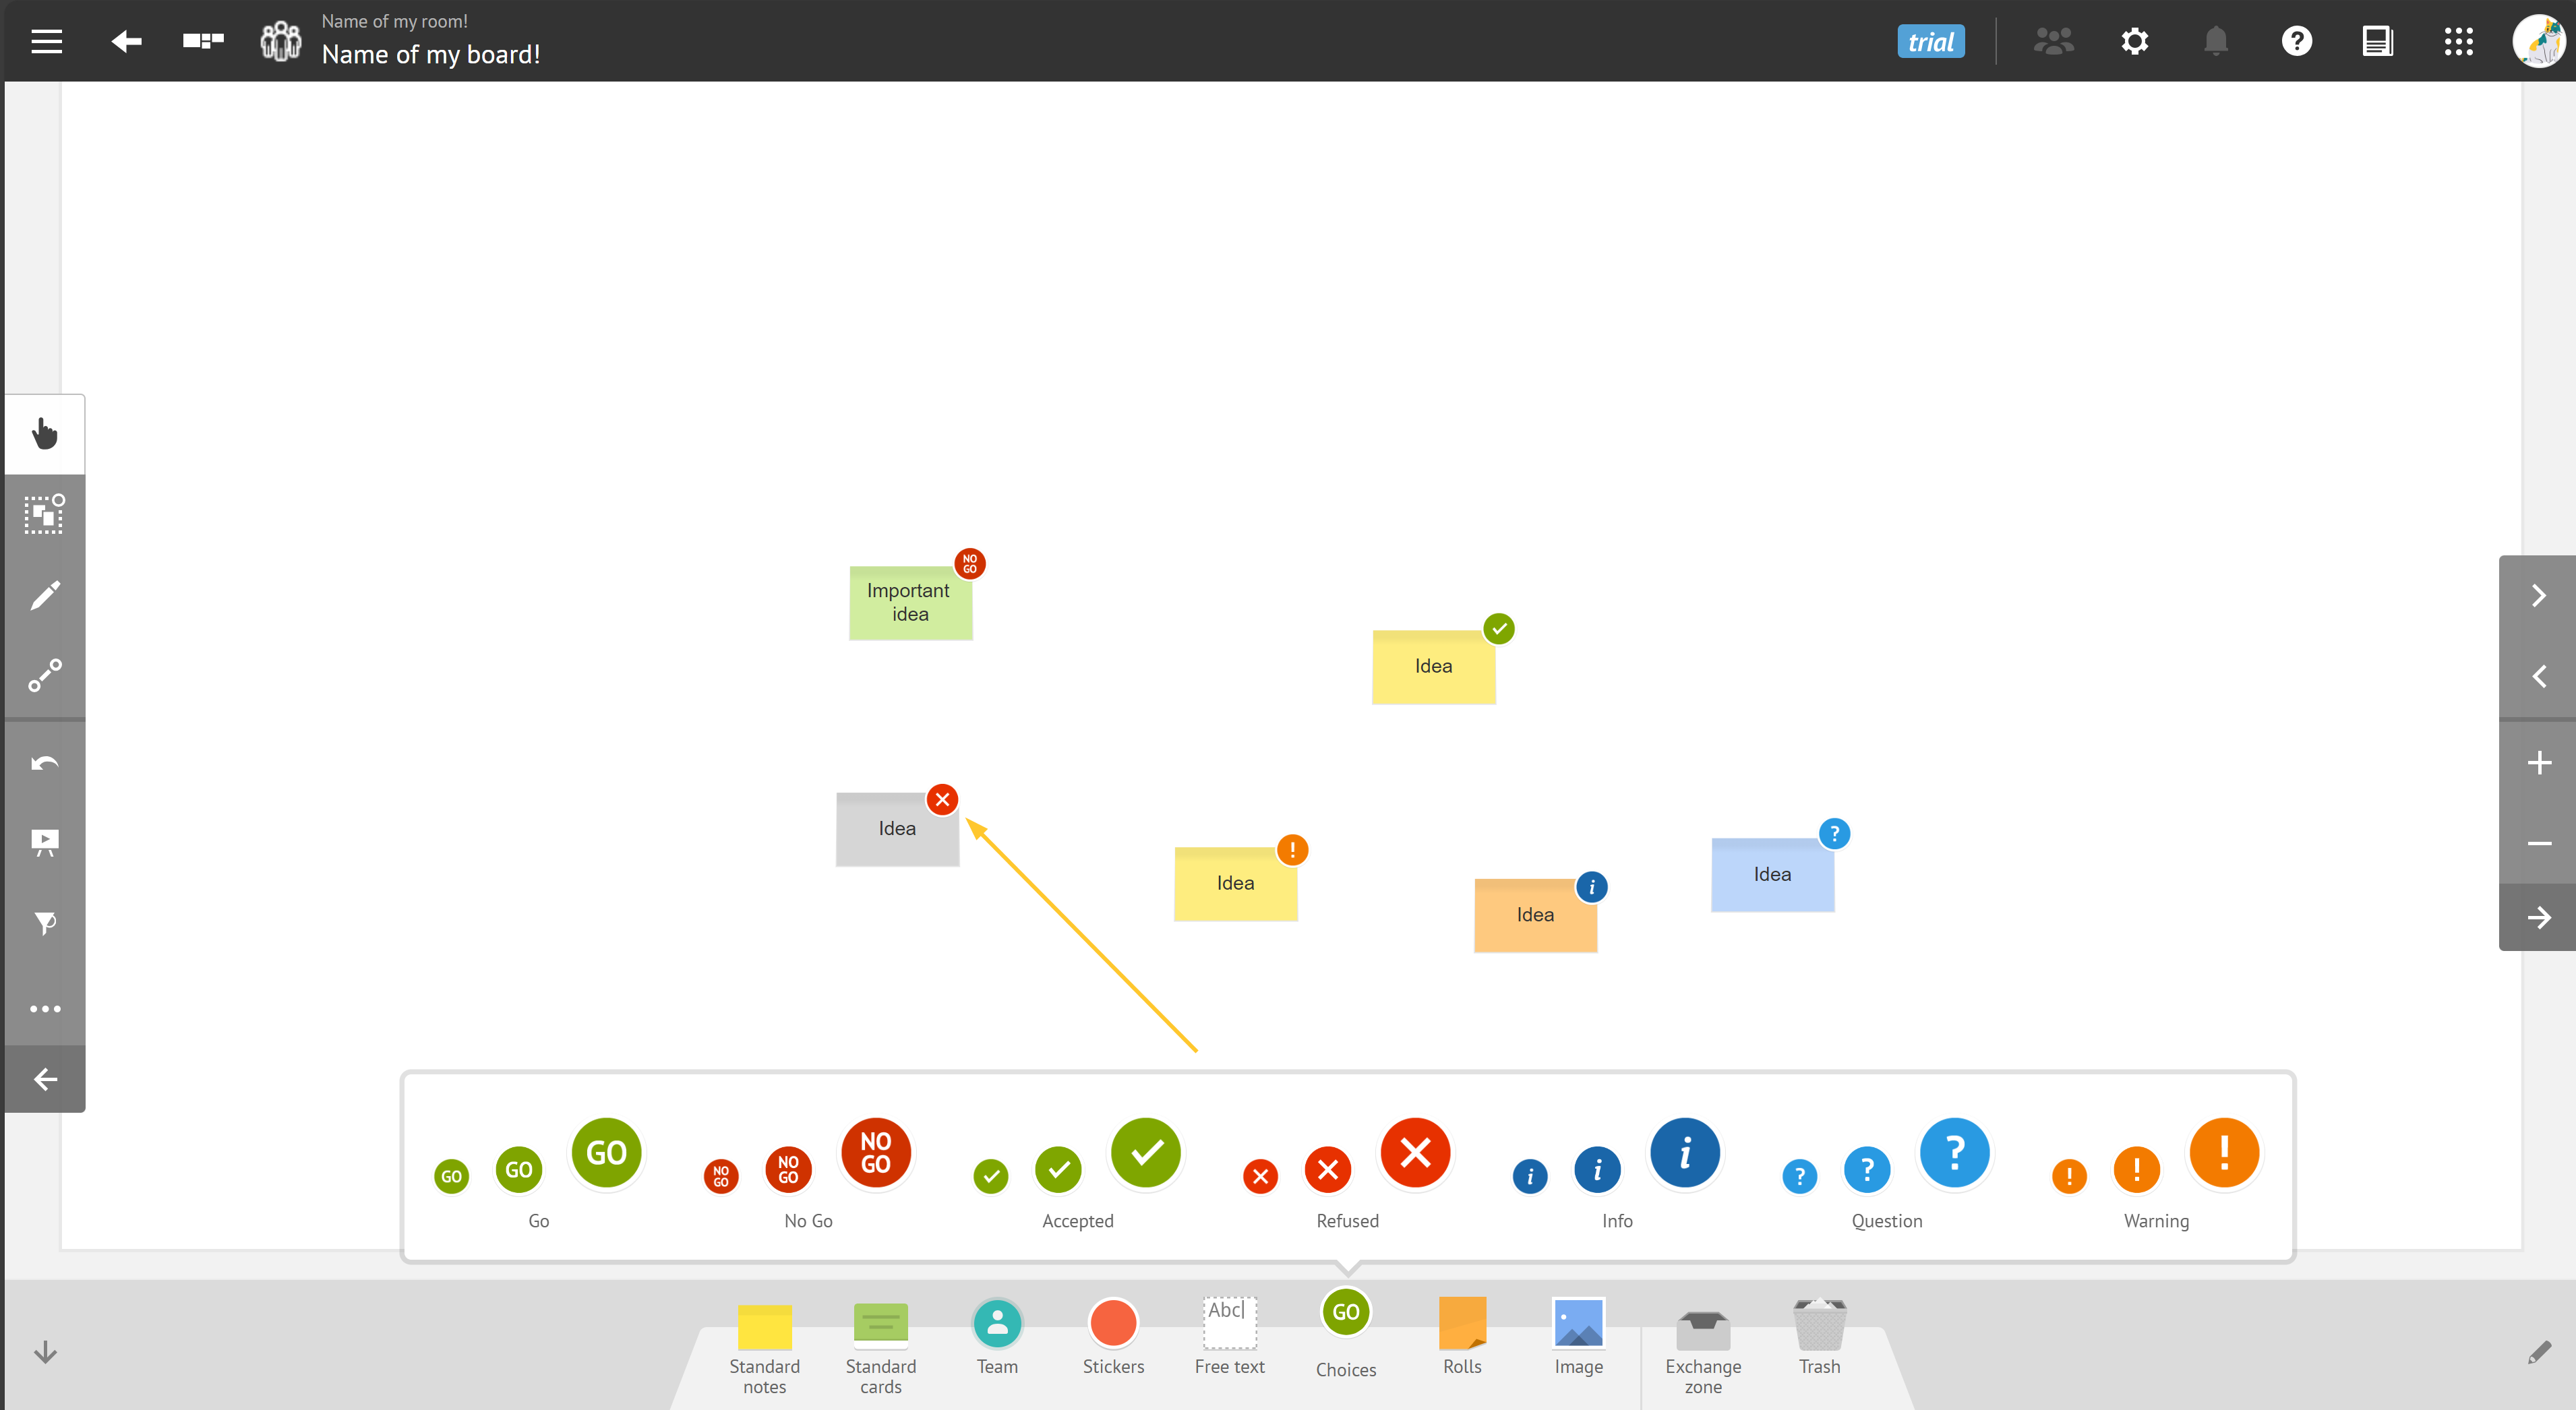
Customize your choices if needed.
As a user, you can set:
color of the choice (from those pre-defined),
size of the choice (from those pre-defined),
content of the choice.
If you are a room administrator, you can also:
set:
name of the tool,
name of the elements,
size of the elements (from 1 to 3),
icon of the elements,
color of the elements,
add additional choices.
Rolls
Rolls allow to place colored bands on your board, creating groups or zones of colors.
Use this tool for managing tasks that need to be revisited regularly or for keeping track of items that follow a specific order.
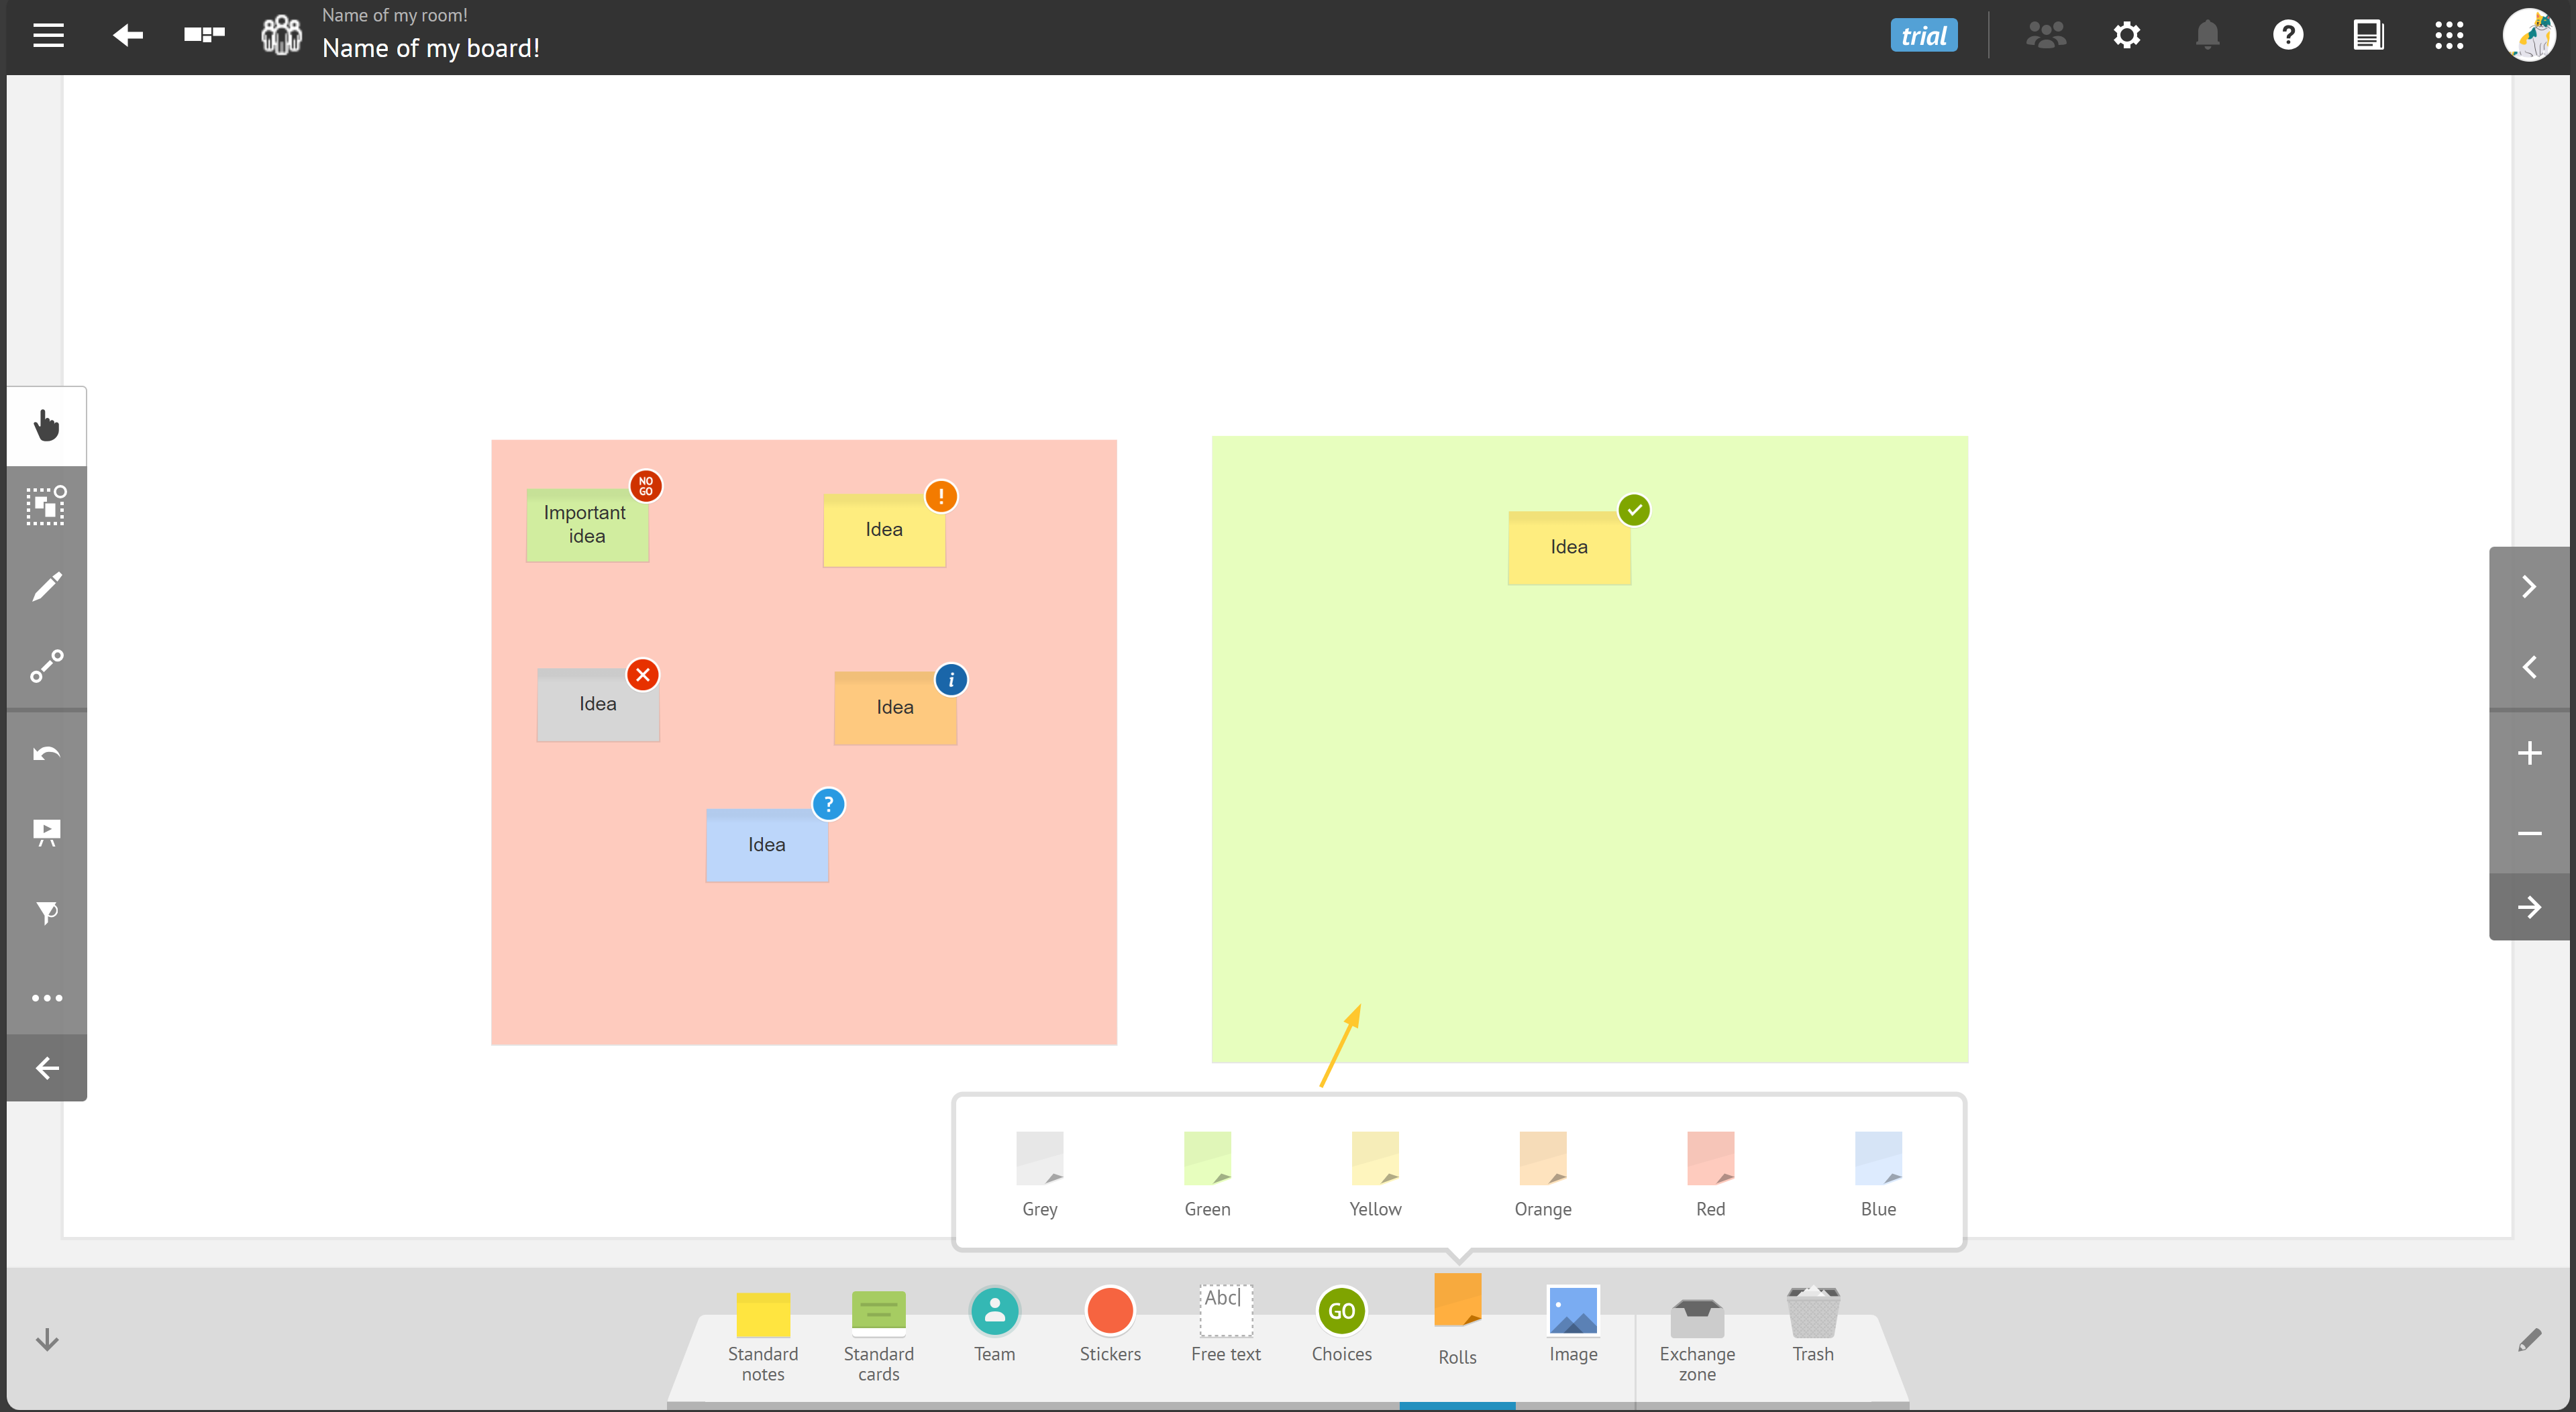
Customize your rolls if needed.
As a user, you can set:
color of the roll (from those pre-defined).
If you are a room administrator, you can also:
set:
name of the tool,
name of the elements,
color of the elements,
add additional rolls.
About Advanced Elements
For more complex board setups, iObeya offers advanced elements. You need to add them to your dock to use them.
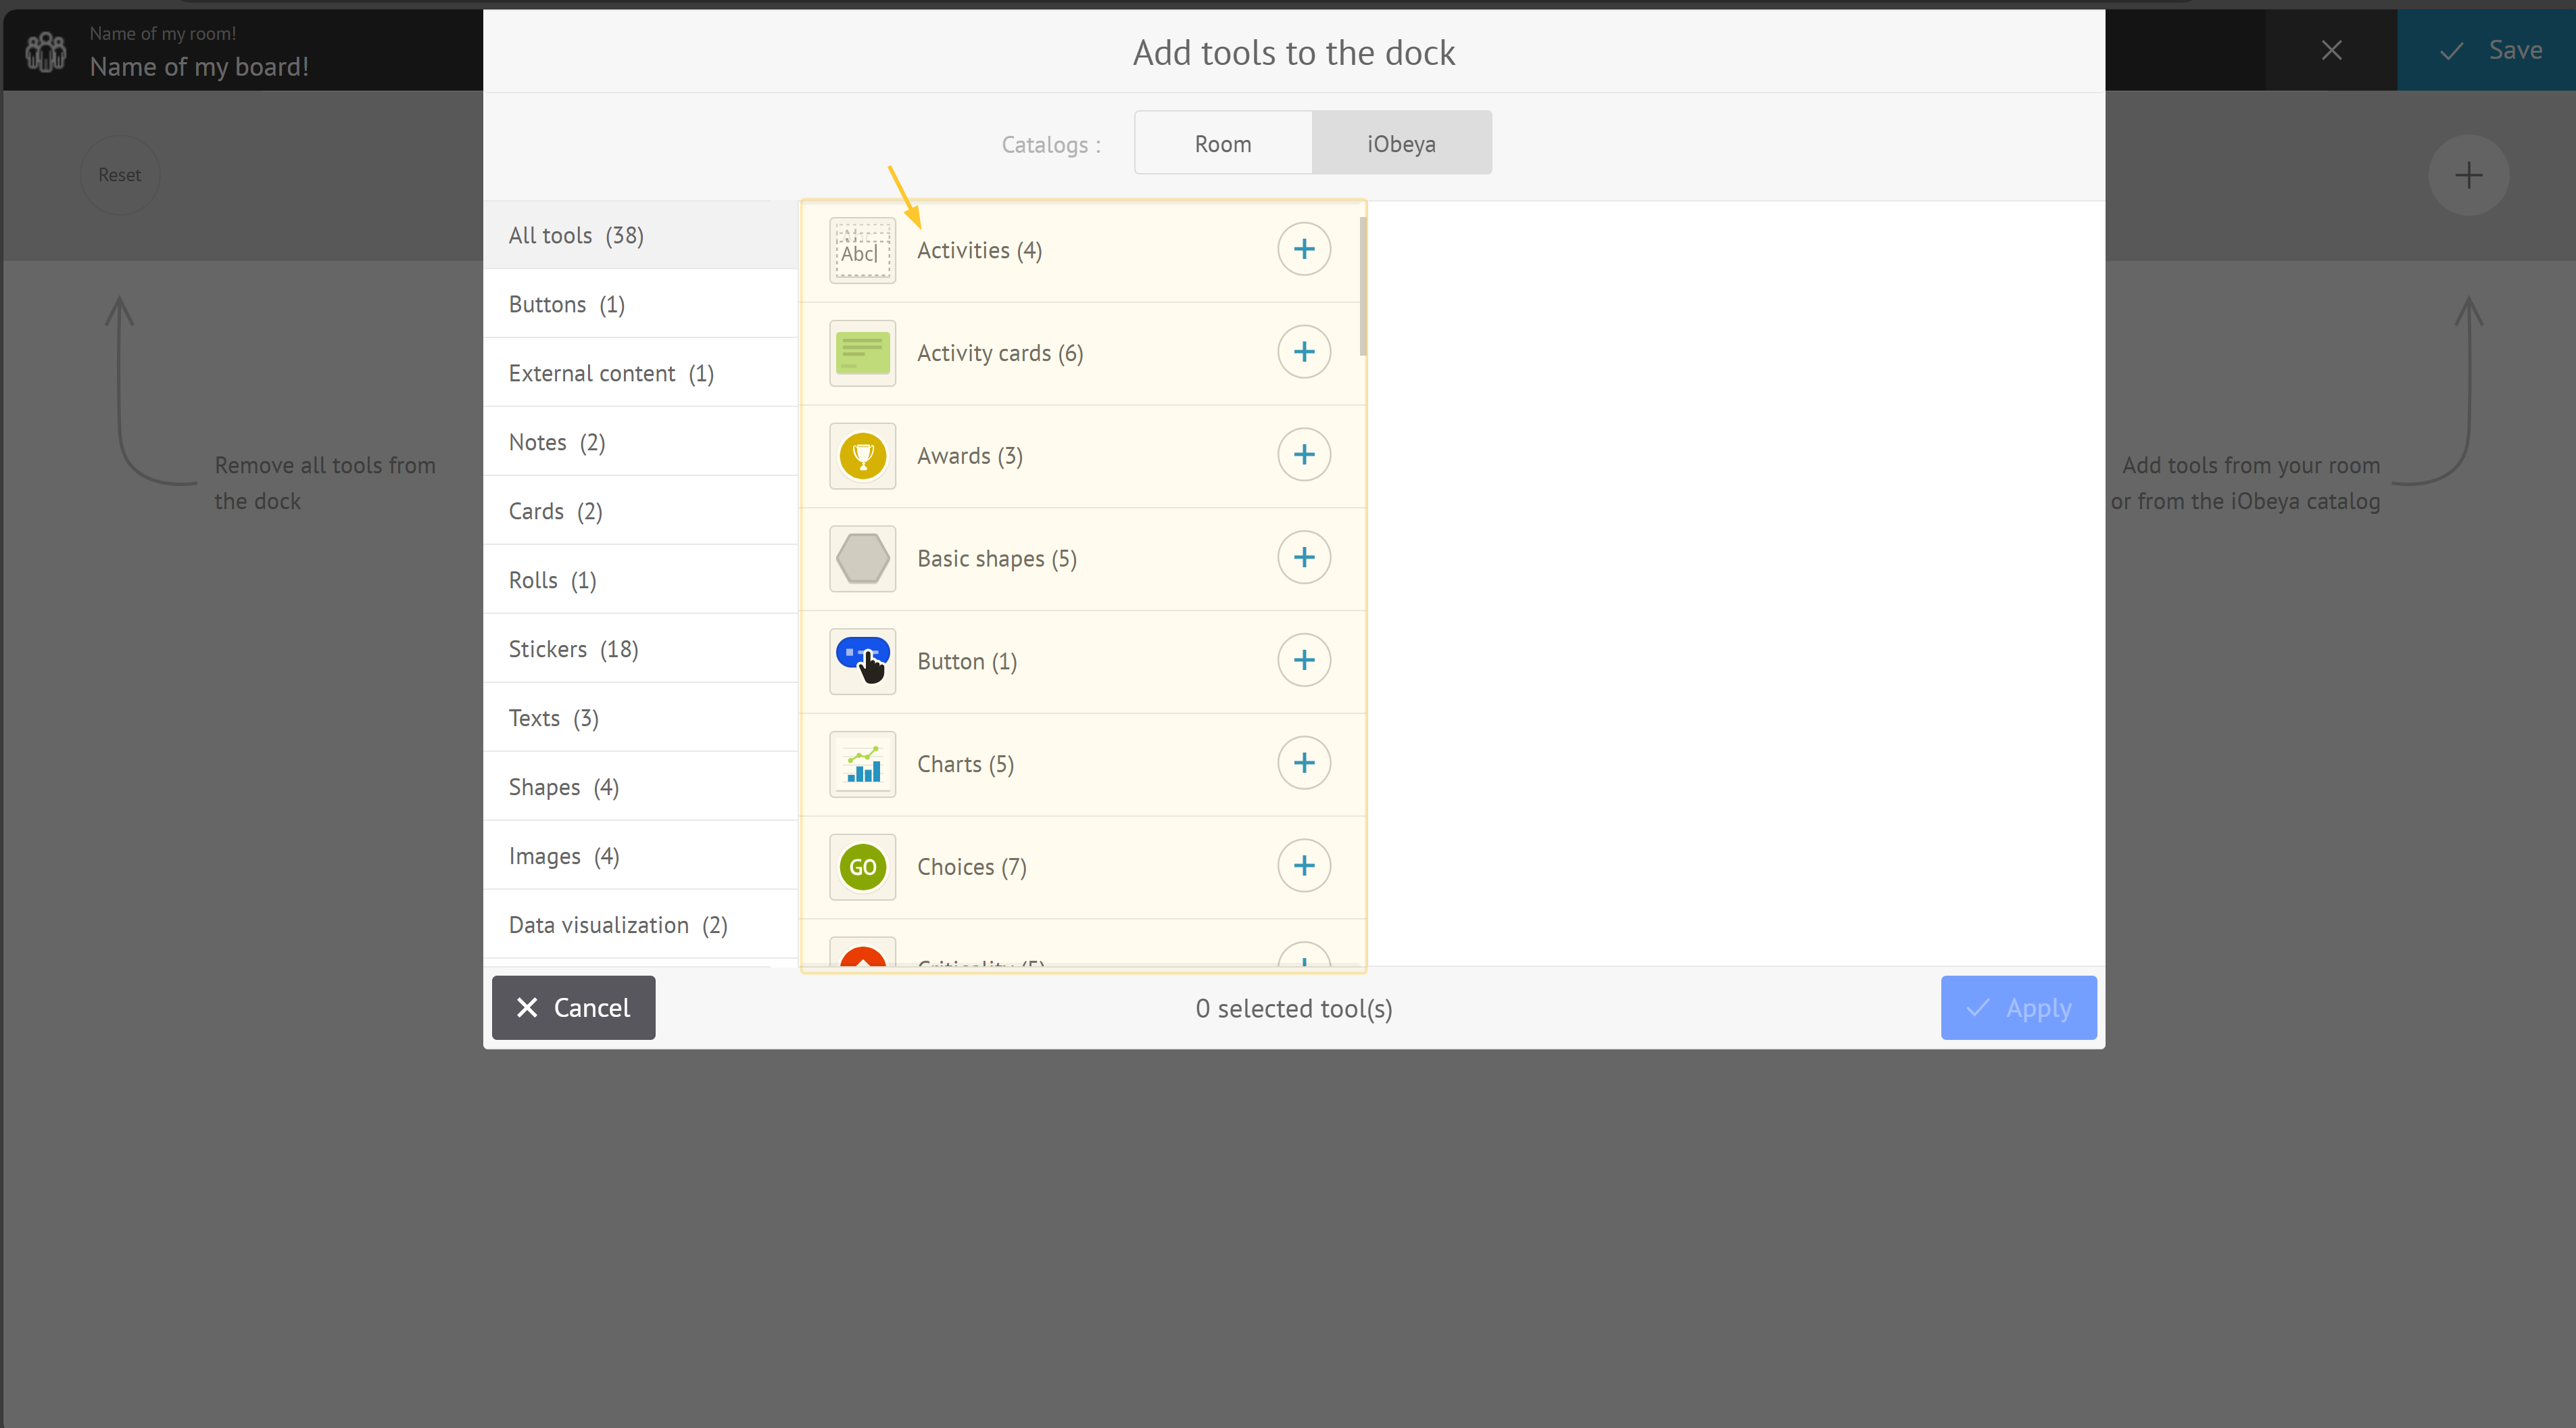
Activity cards
Activity cards allow to visually represent and track team progress for an activity on a schedule.
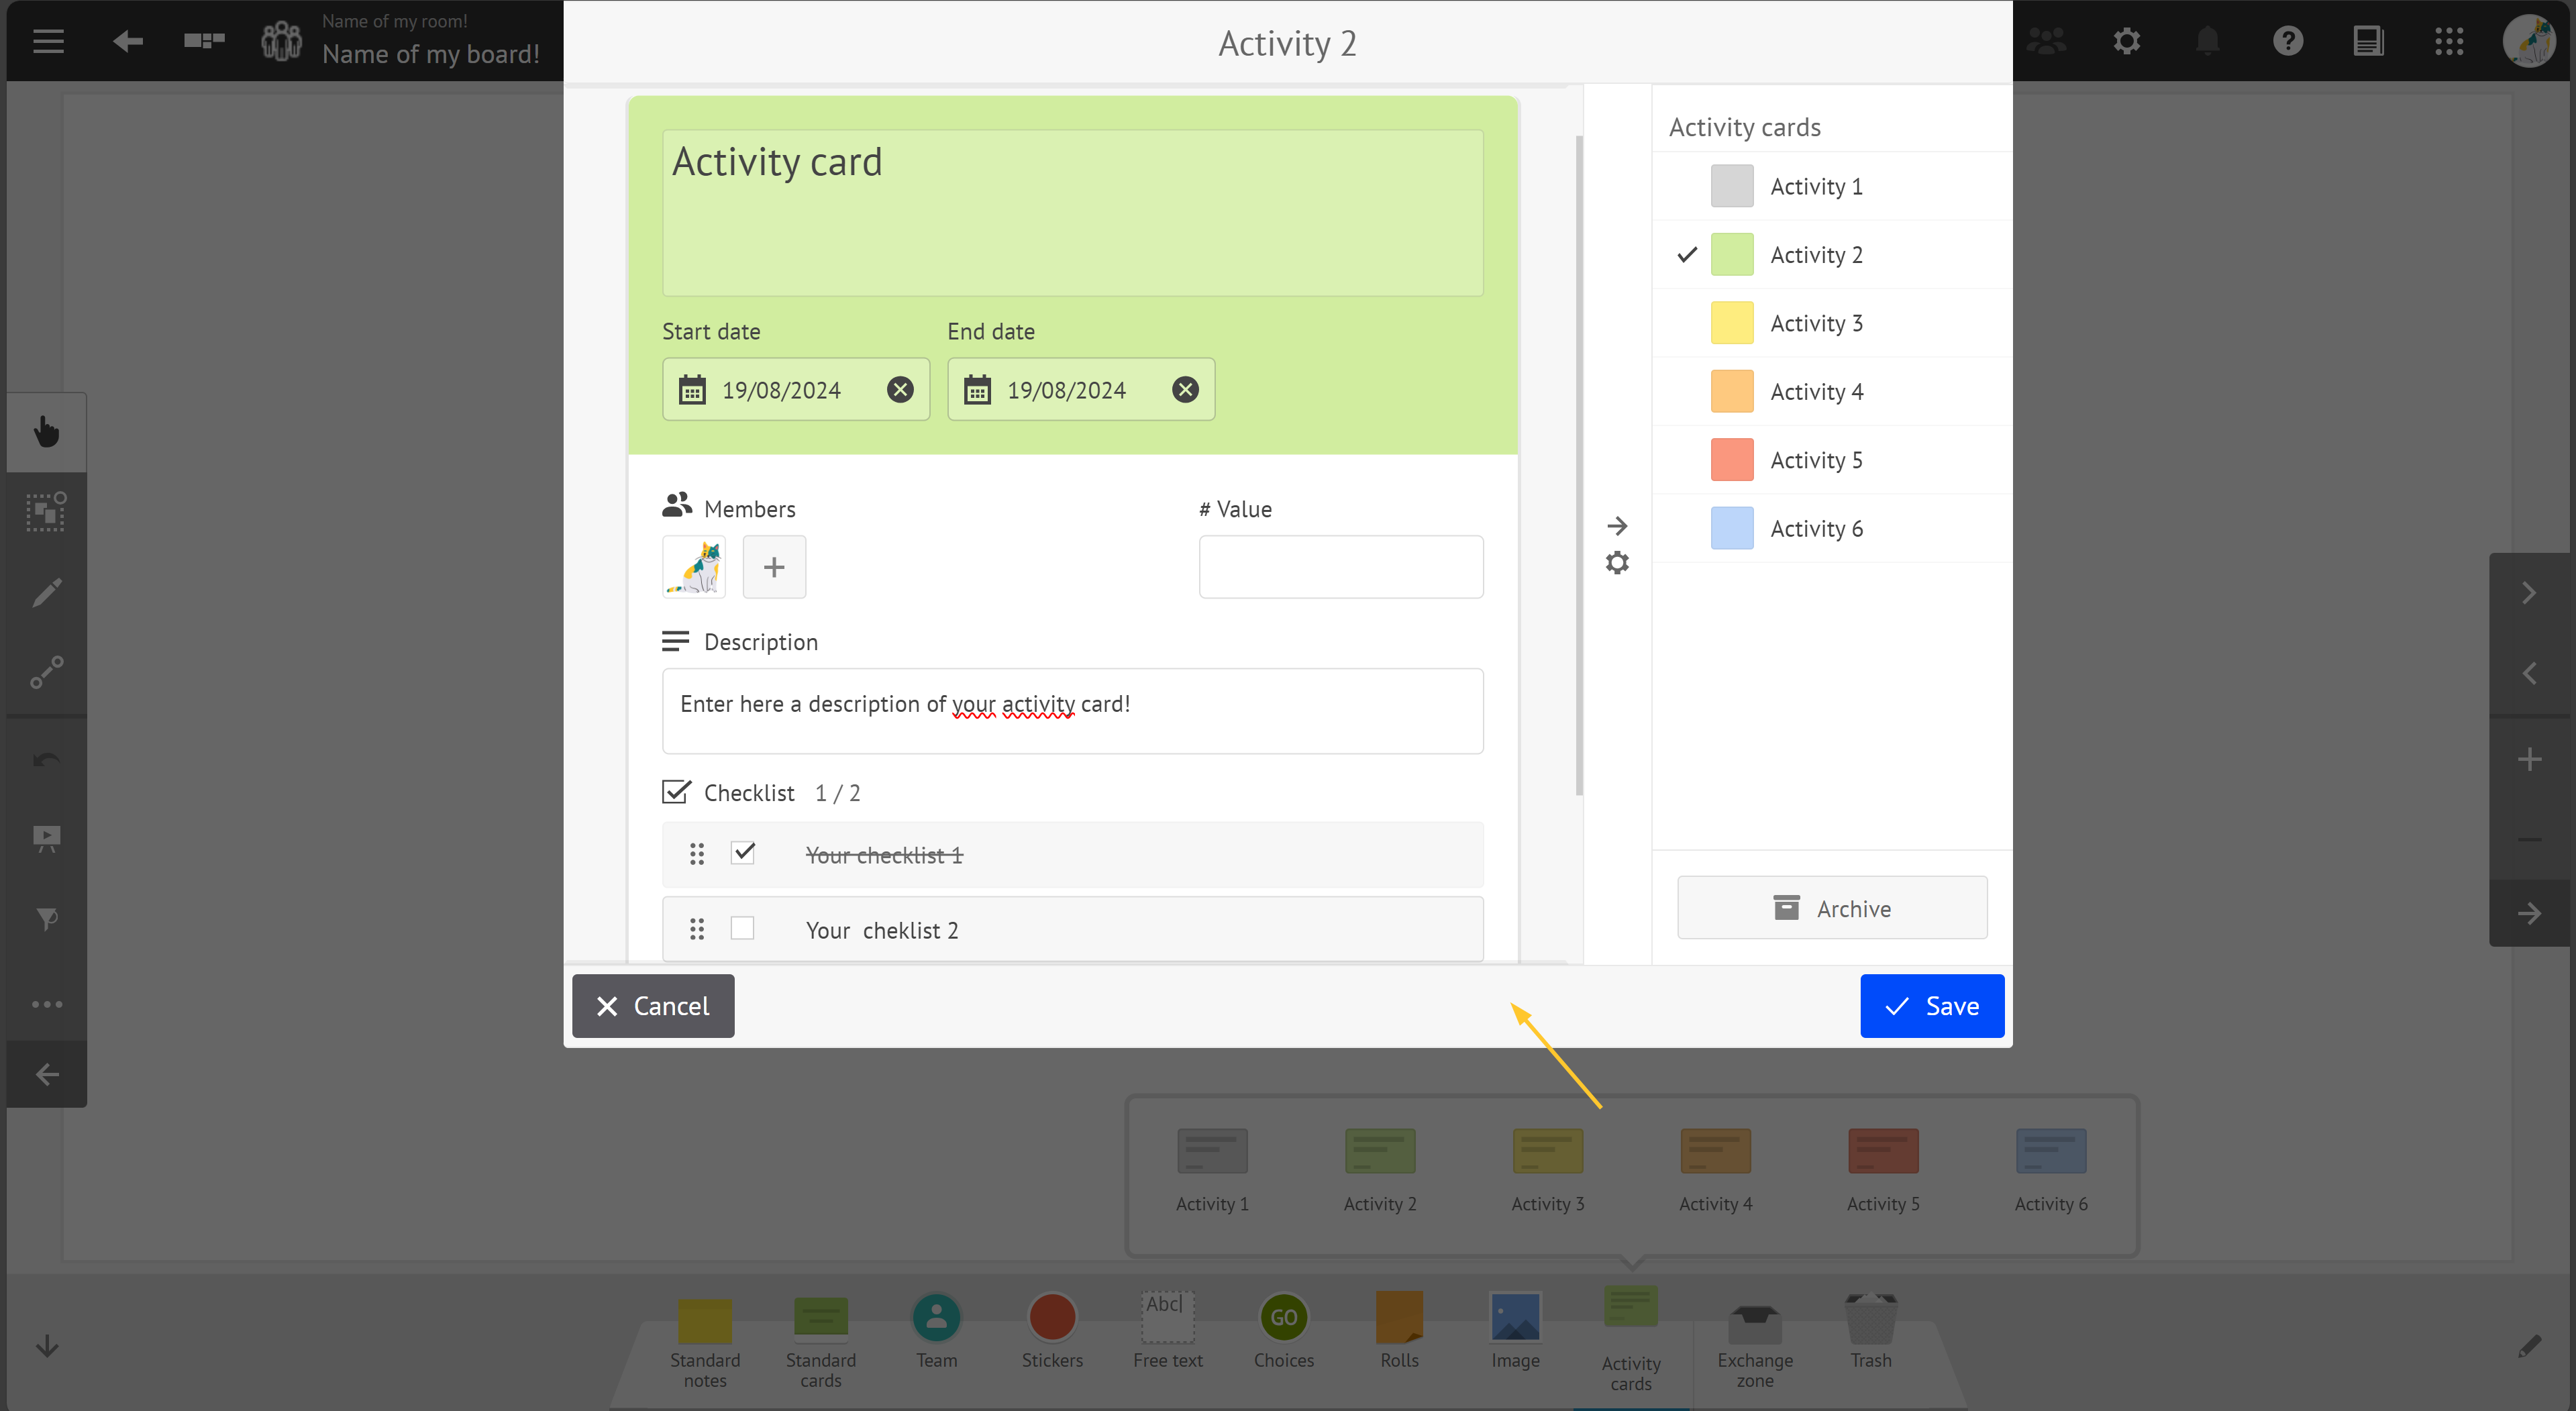
As a user, you can set:
color of the card (from those pre-defined),
size of the card (from those pre-defined),
title and description of the card,
due date of the card,
numerical value of the card,
priority of the card,
members of the card,
checklist of the card,
archiving / retrieval of the card,
Synchronized card.
If you are a room administrator, you can also:
set:
name of the tool,
name of the elements,
size of the elements (from 1 to 3),
color of the elements,
add additional cards.
Button
Button allows to trigger events from your boards. You can use this tool to provide links to external documents or to trigger integration scenarios for instance.
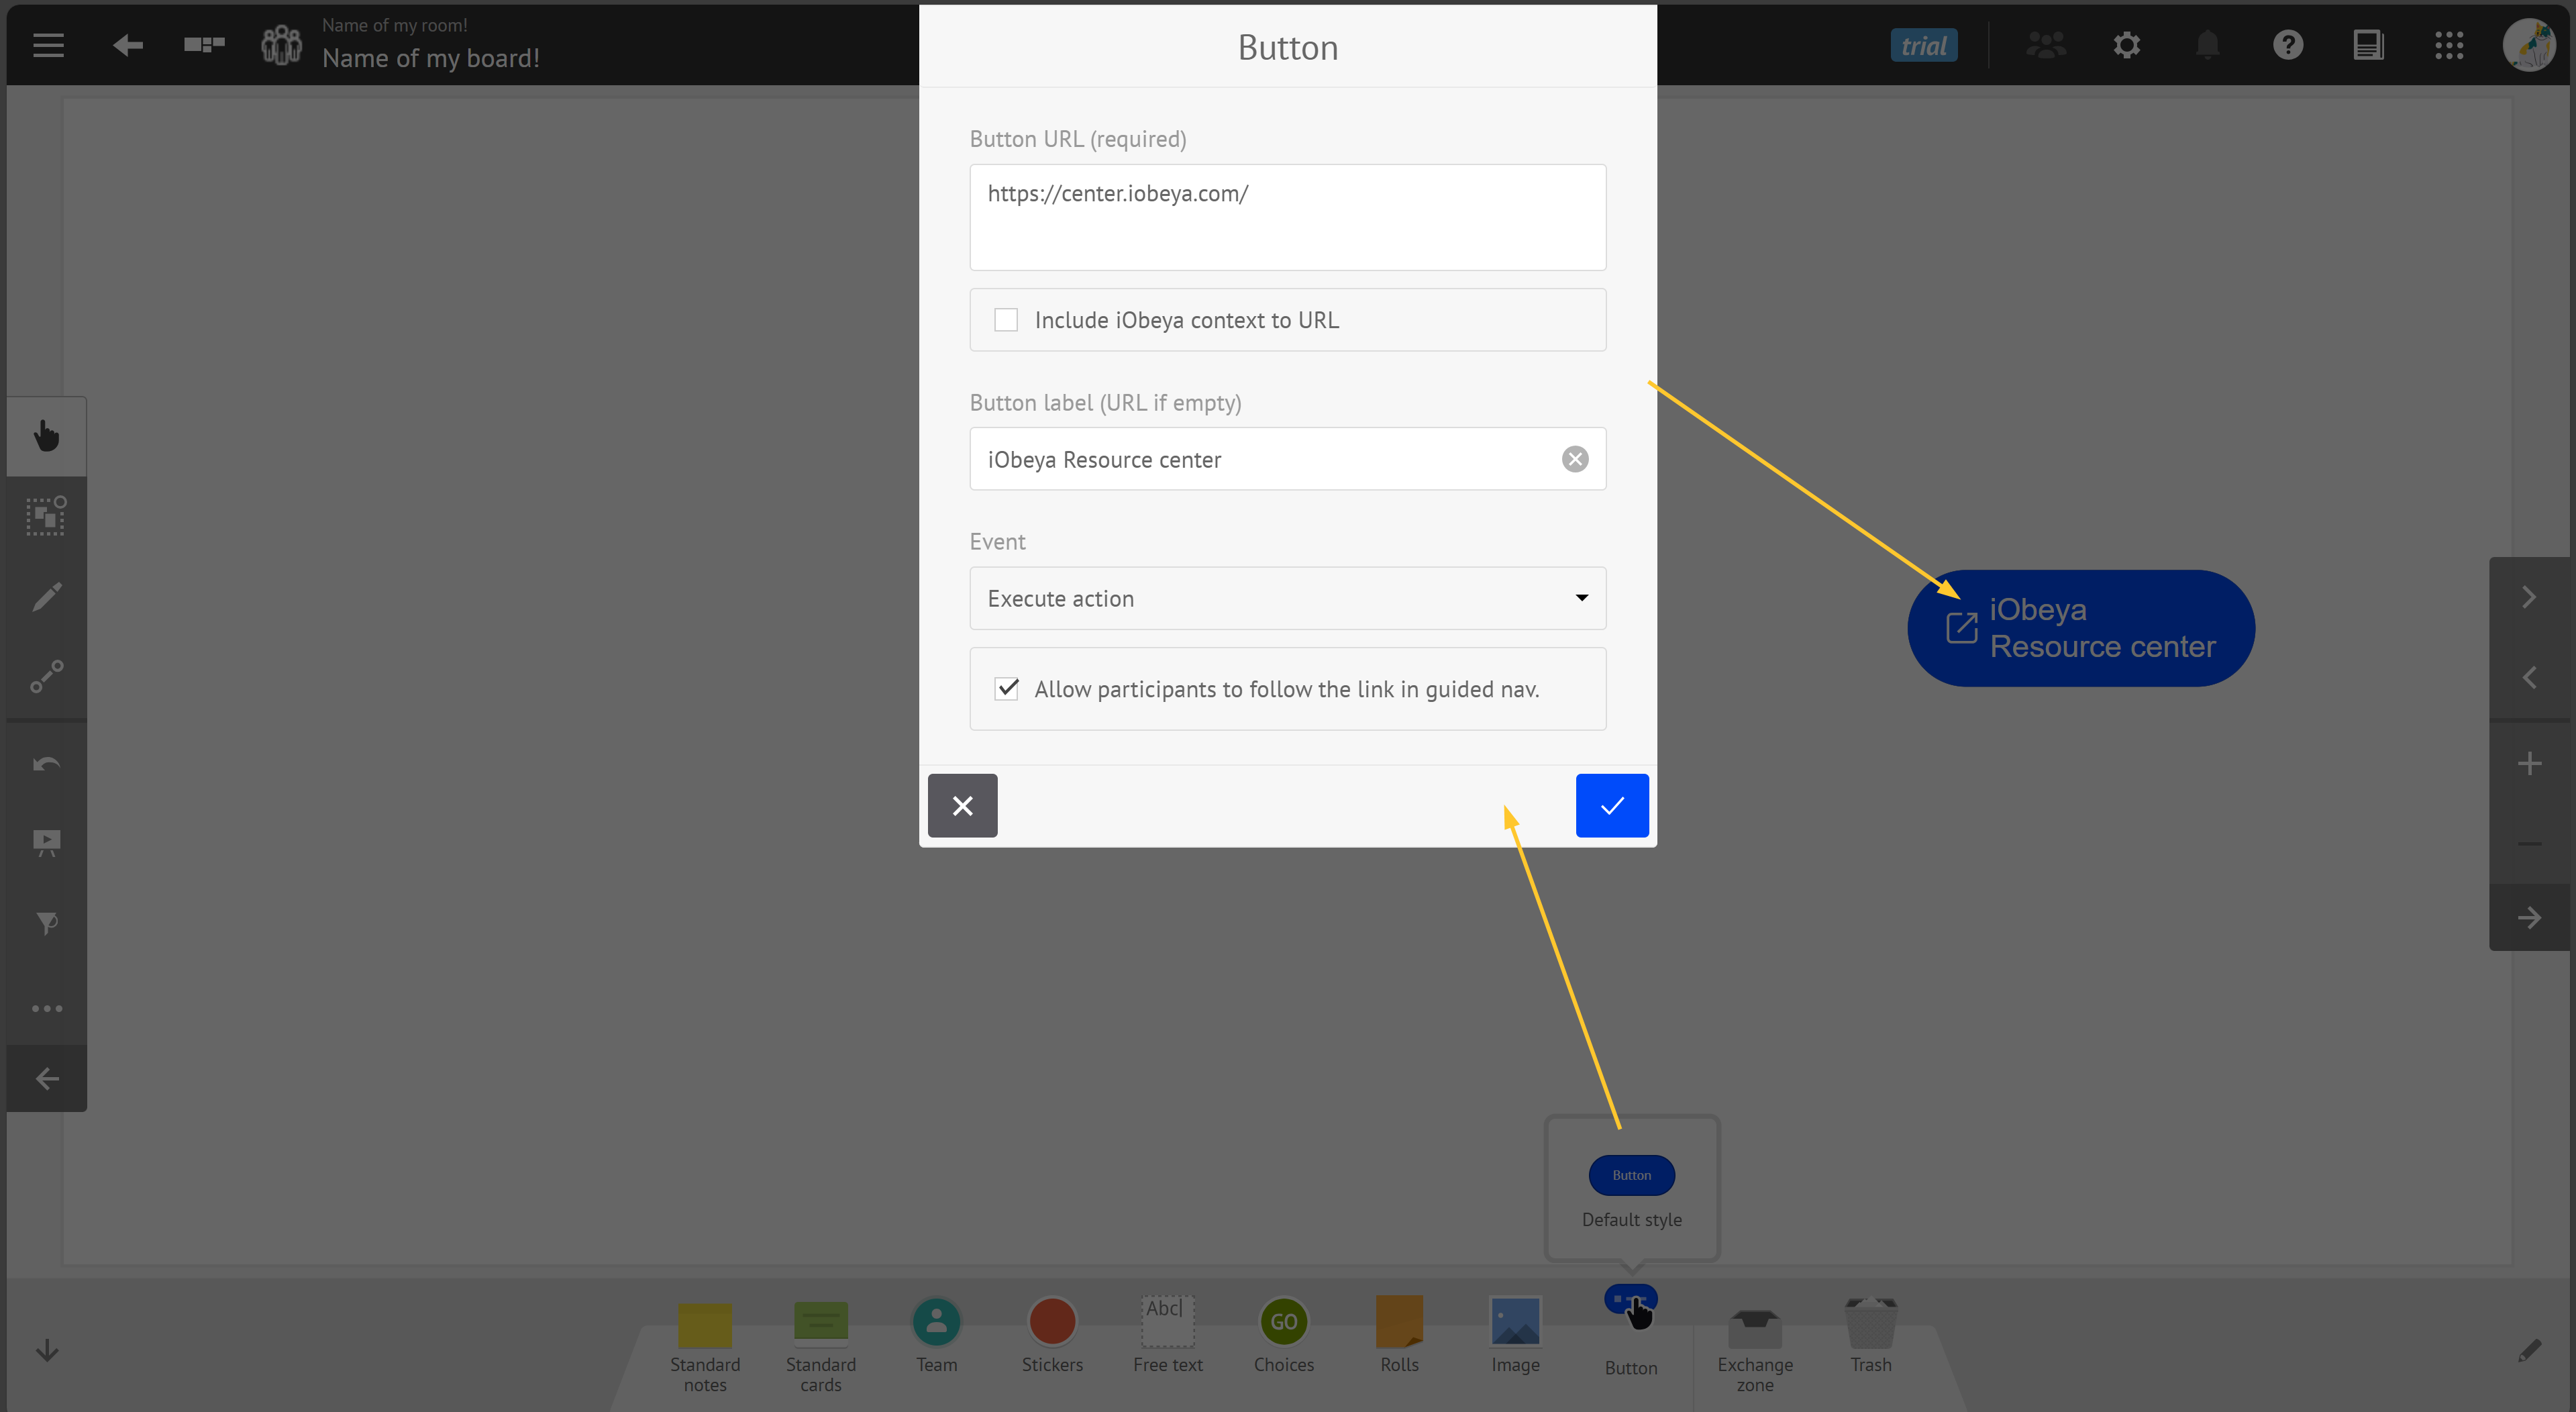
As a user, you can set:
link URL,
button label,
include context to the URL,
Note:
The option Include context to URL allows to send technical information from iObeya to the external system, which is often necessary to trigger integration scenarios via a button.
When you check this option, iObeya automatically adds 2 pieces of information to the specified URL:
roomId: unique ID of the room on which the button is located
boardId: unique ID of the board on which the button is located
In this case, the external service called by clicking the button can use this information, for example, to call out to the iObeya API for interacting with the relevant room or board or to store this information as a unique reference for later reuse.
event type,
event options,
and then:
text color,
fill color,
border color,
text horizonal alignment.
Charts
Charts allow to represent series of data in a Bar, Stacked Bar, Line, Area or Pie chart.
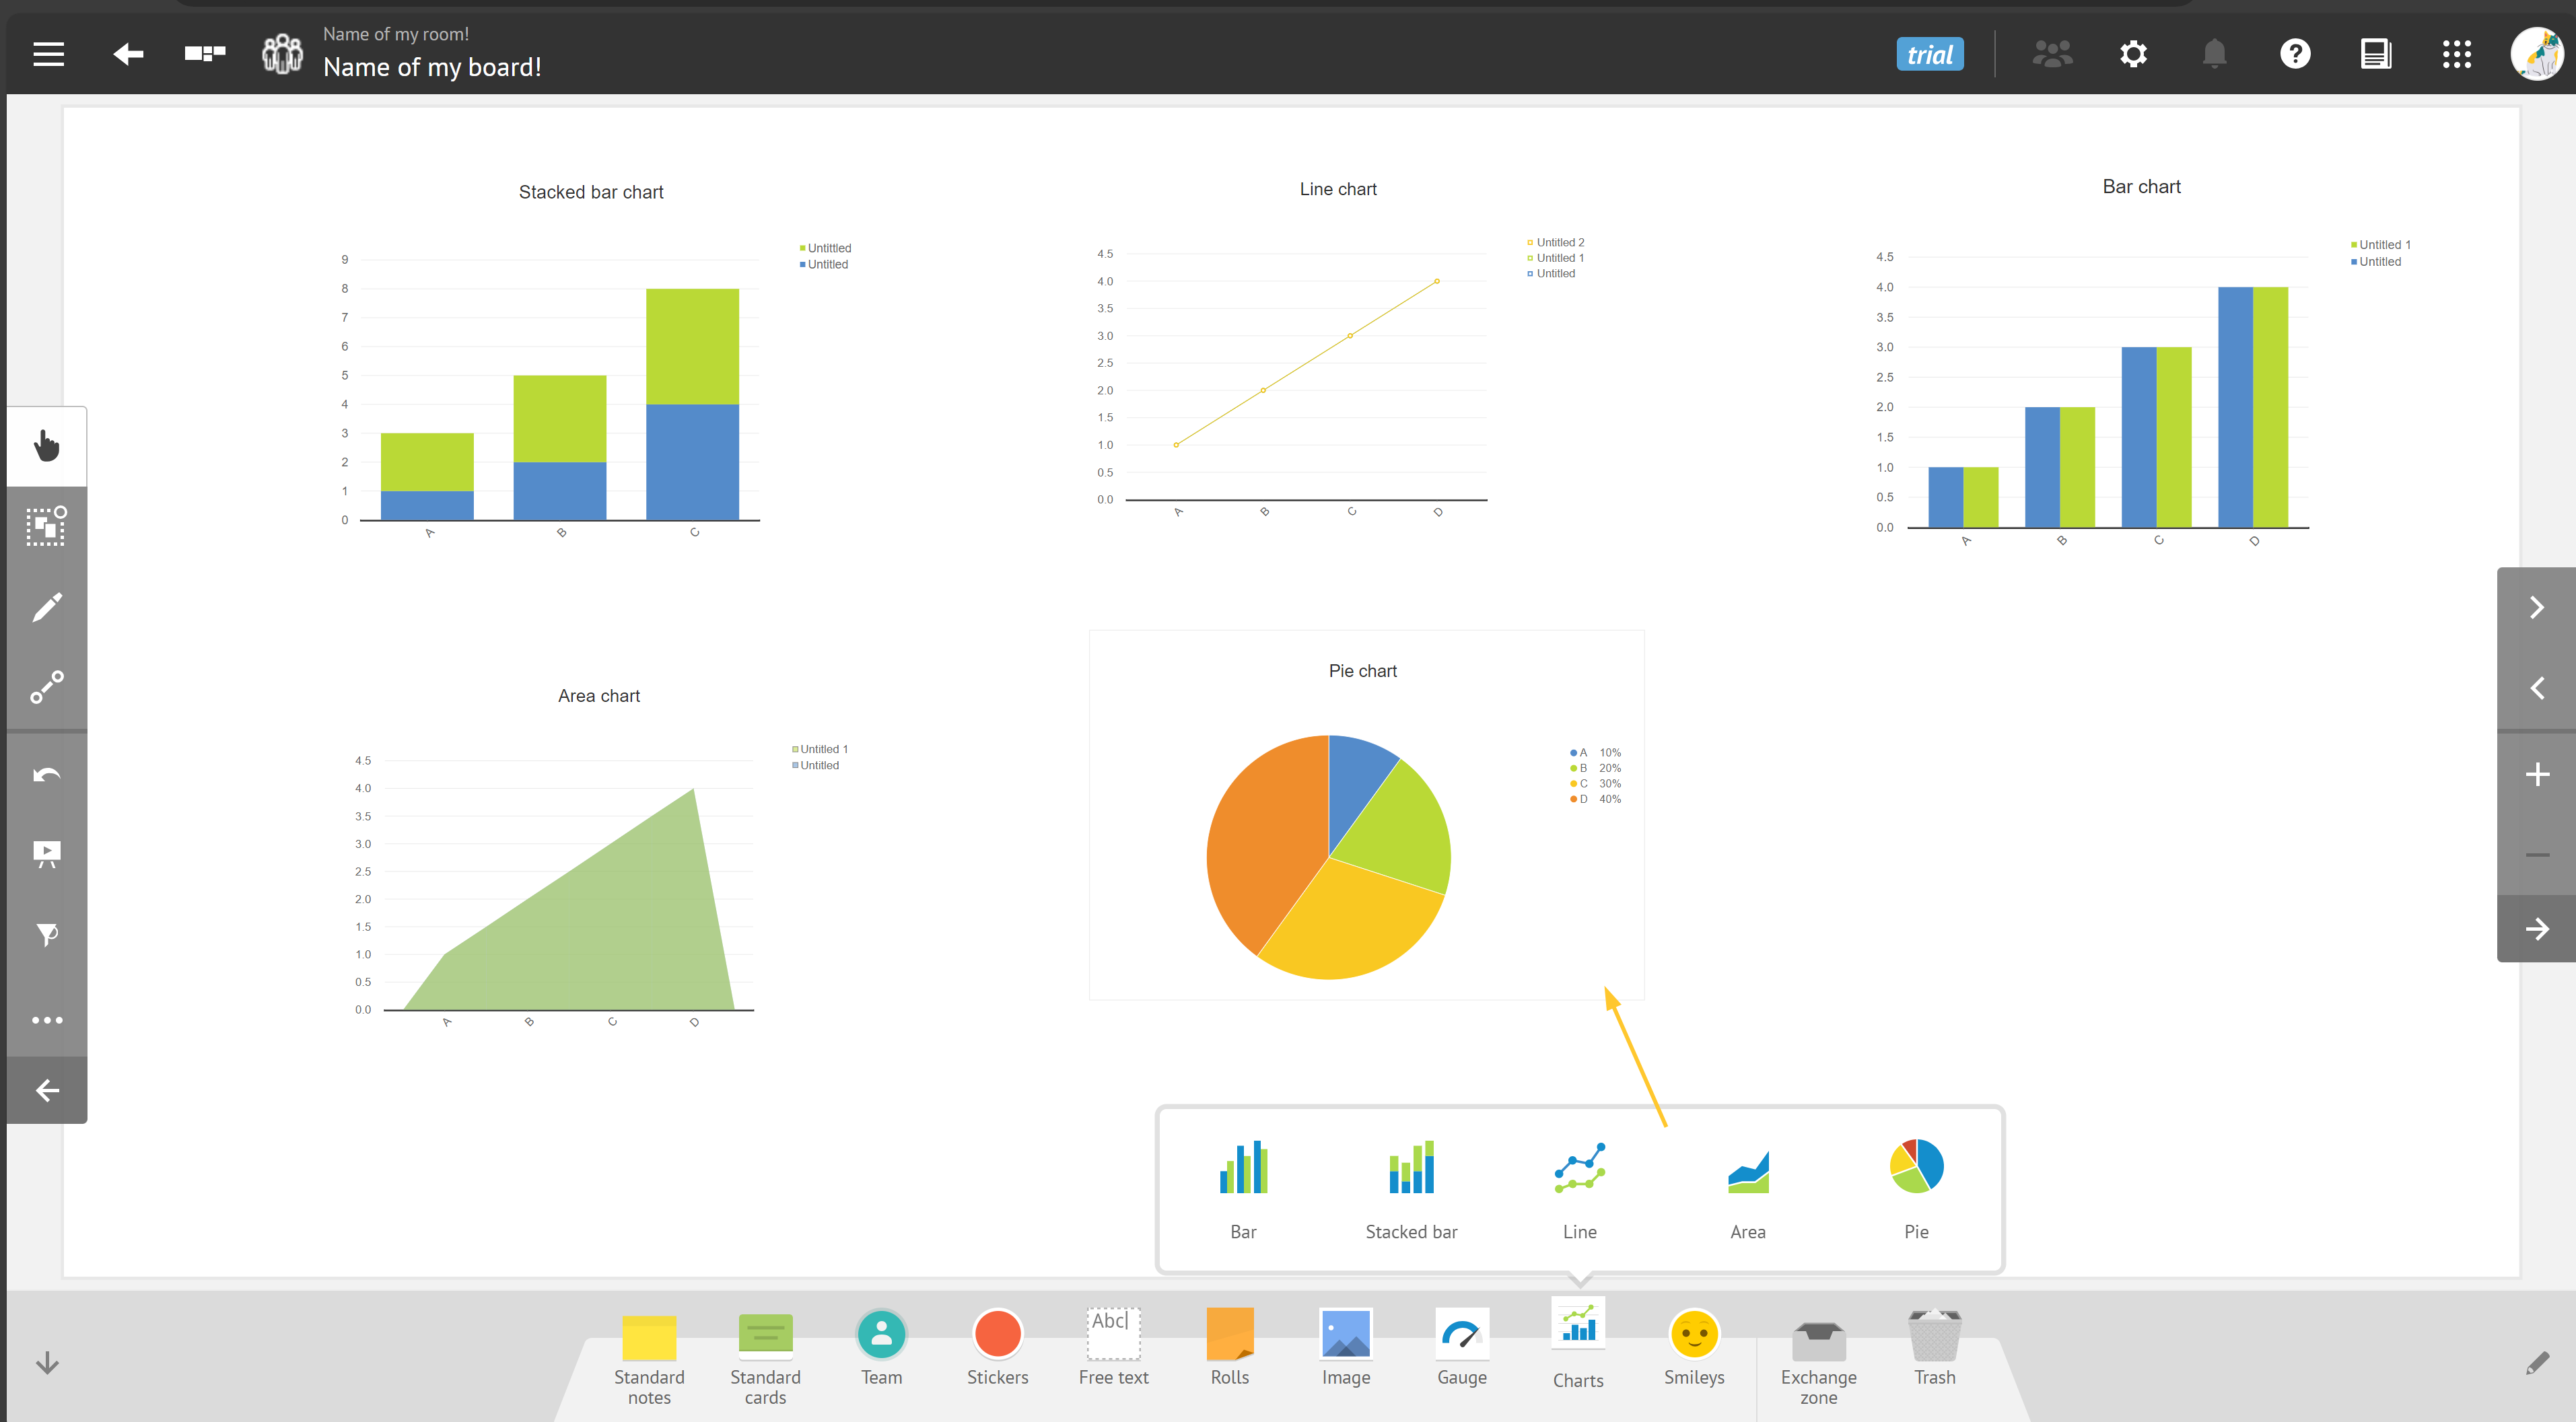
As a user, you can set:
chart title,
series values,
chart type,
series’color scheme (monochrome or multicolor scheme),
series organization (row or columns),
bar orientation,
unit of measure,
hide/ show values on the gauge.
Gauge
Gauges allow to create a visual representation of a current value, with respect to pre-defined thresholds.
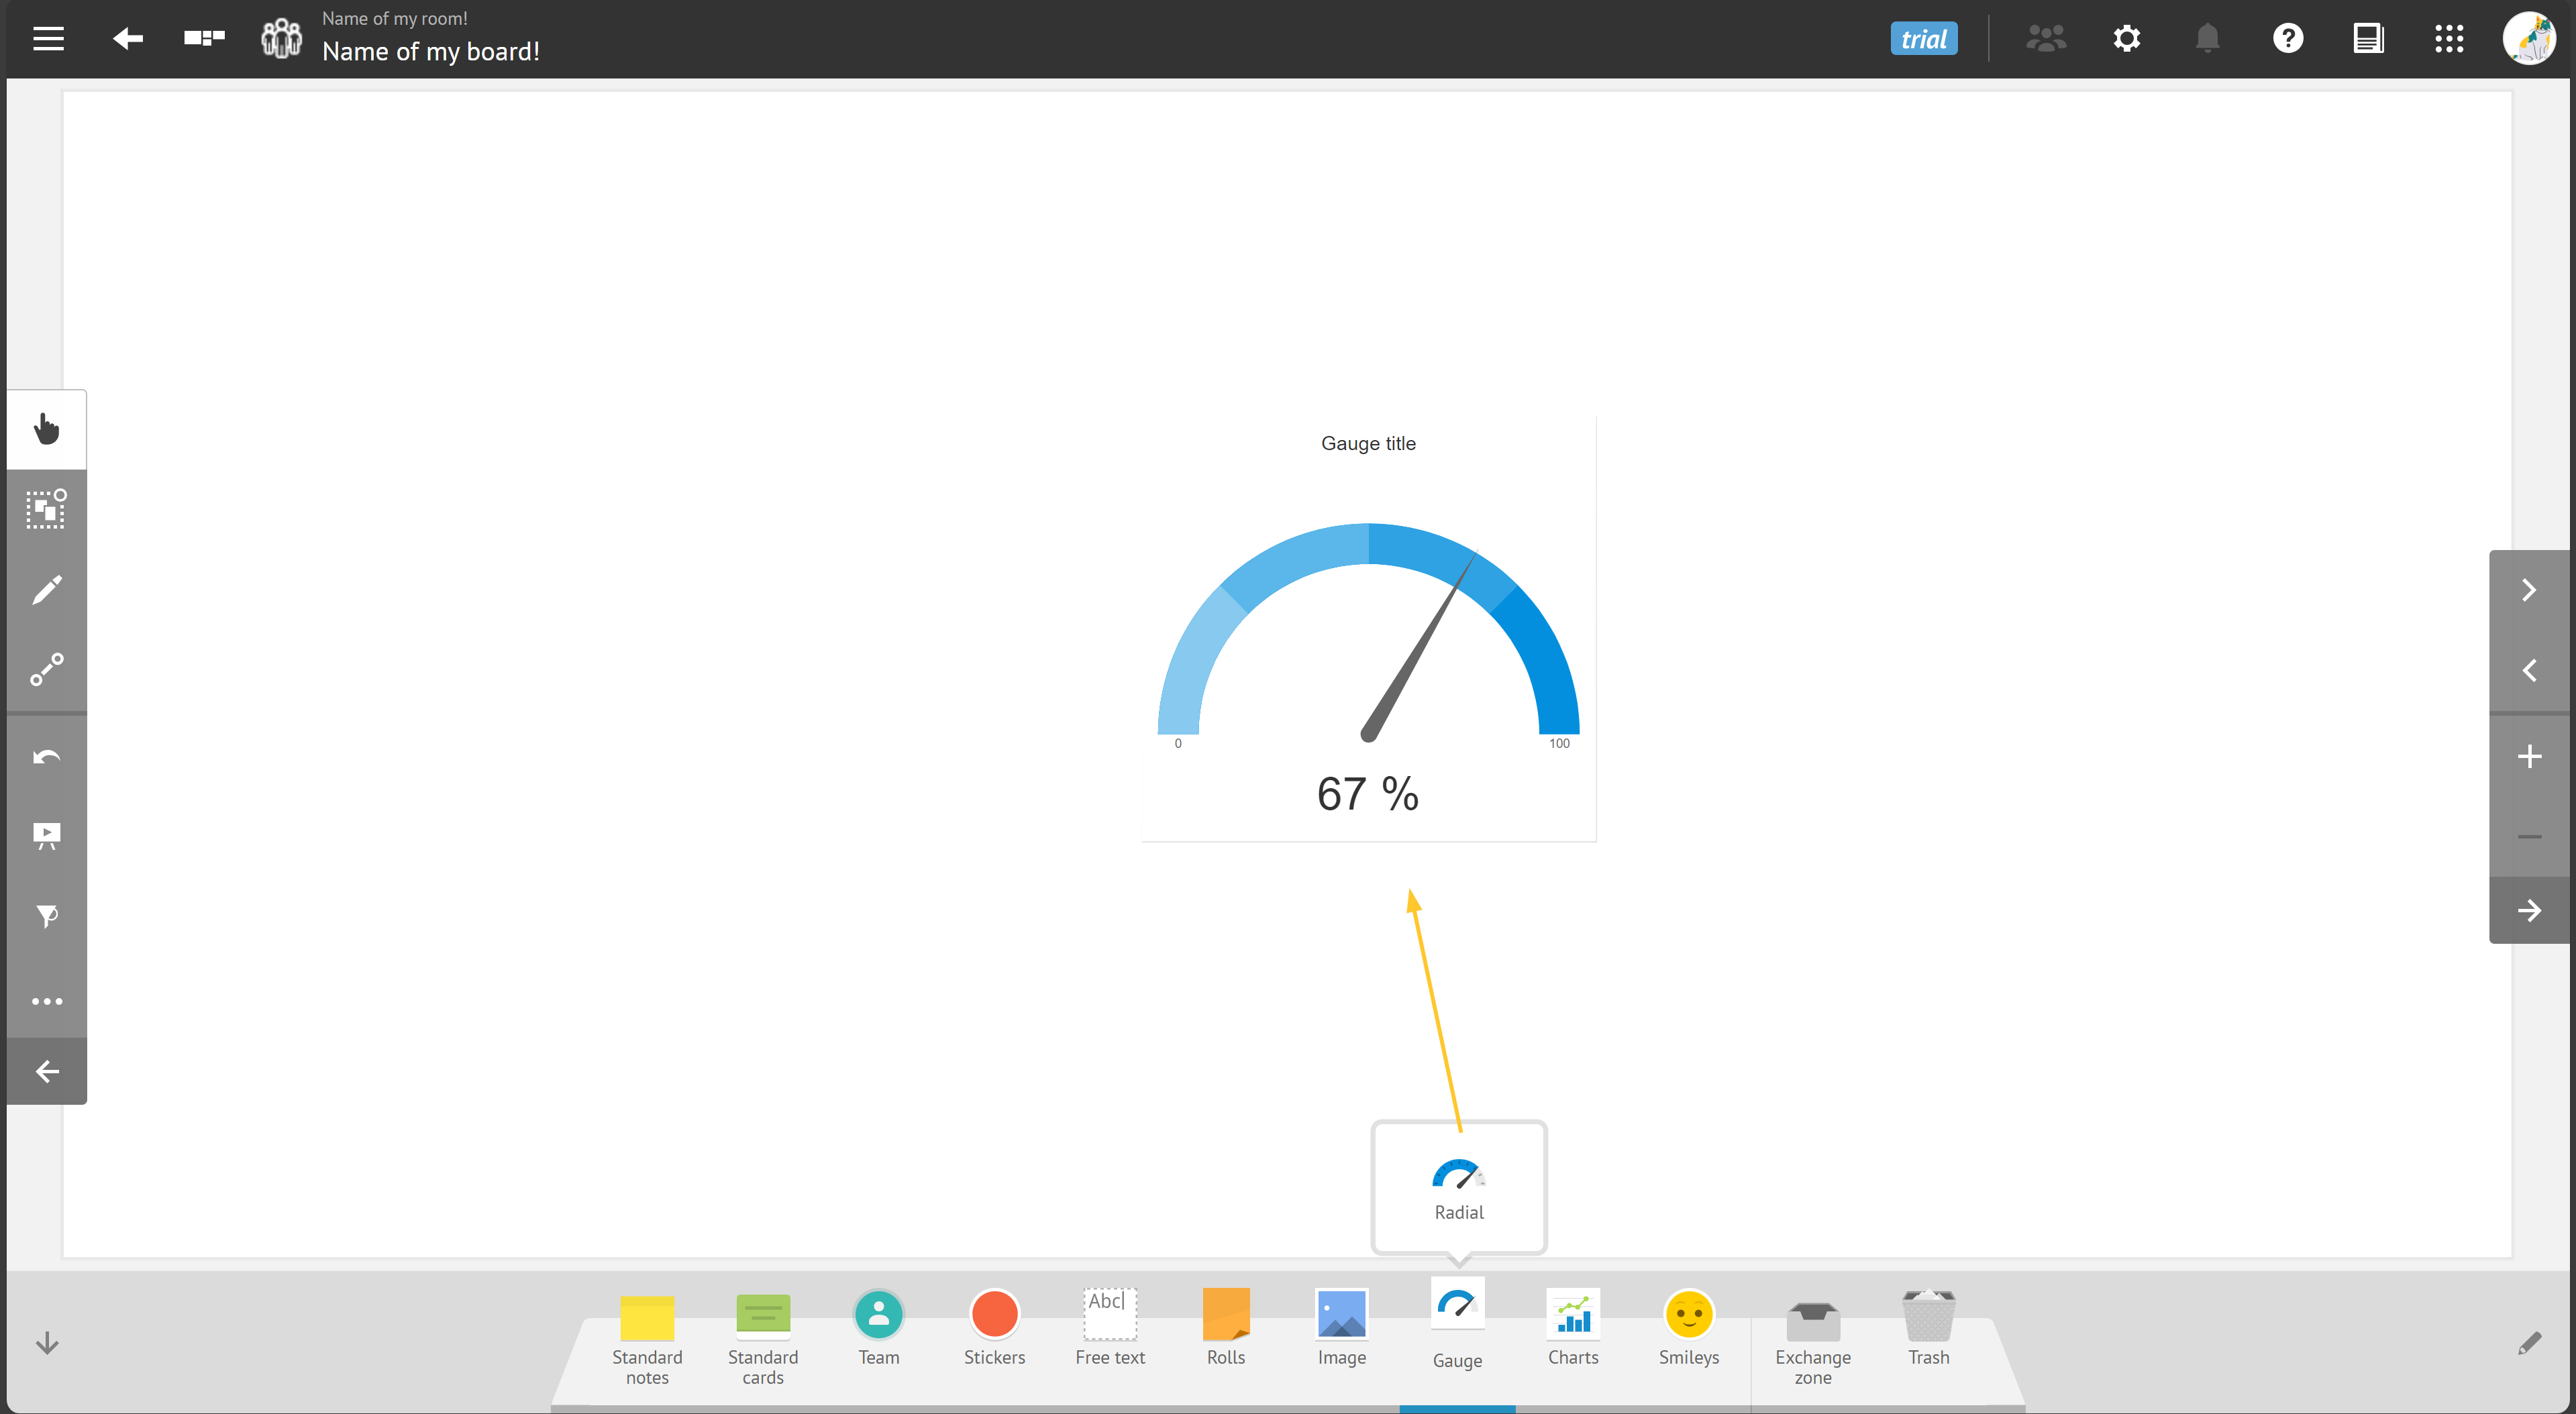
As a user, you can set:
gauge title,
scale and threshold values,
gauge current value,
content of the label,
number of colors,
color scheme (monochrome or multicolor scheme),
unit of measure,
hide/ show values on the gauge.
Labels
Labels allow to insert a text, with a specific appearance.
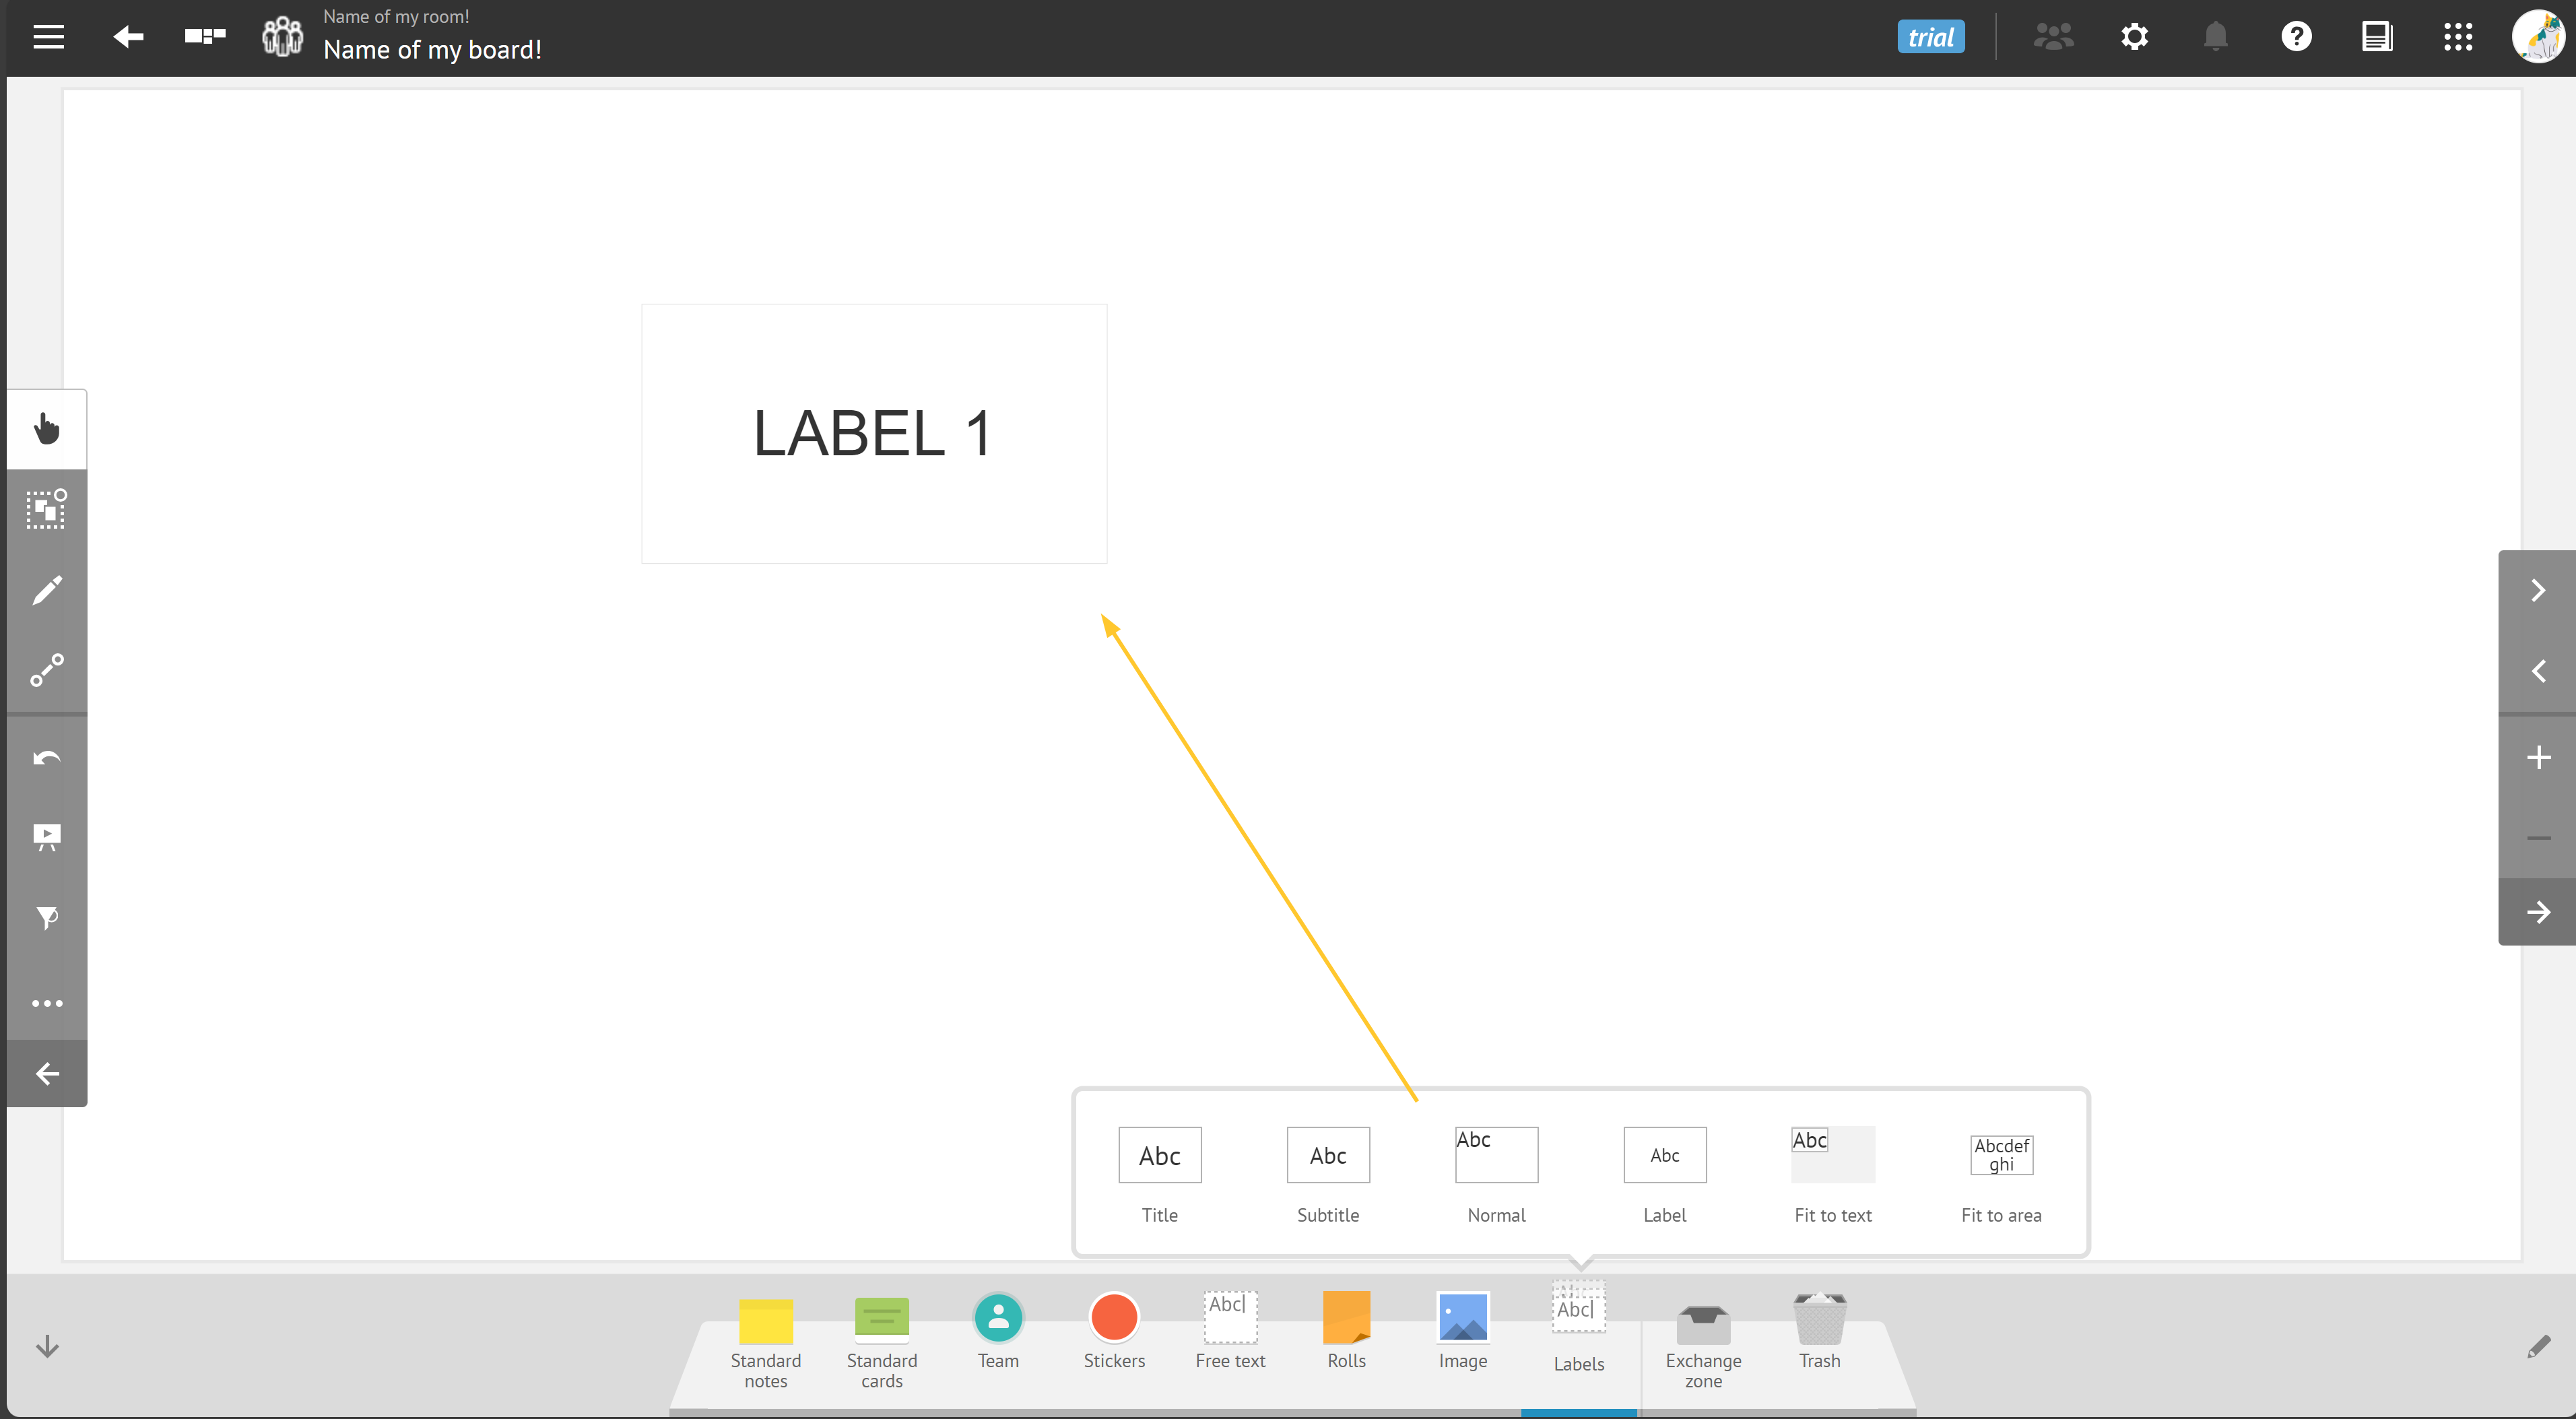
As a user, you can set:
color of the label (from those pre-defined),
size of the label,
text size of the label (from those pre-defined),
content of the label.
If you are a room administrator, you can also:
set:
name of the tool,
name of the elements,
size of the text,
color of the text,
background color,
types of formatting and alignment.
add additional labels.
Shapes
Shapes allow to to add visual symbols that can include text.
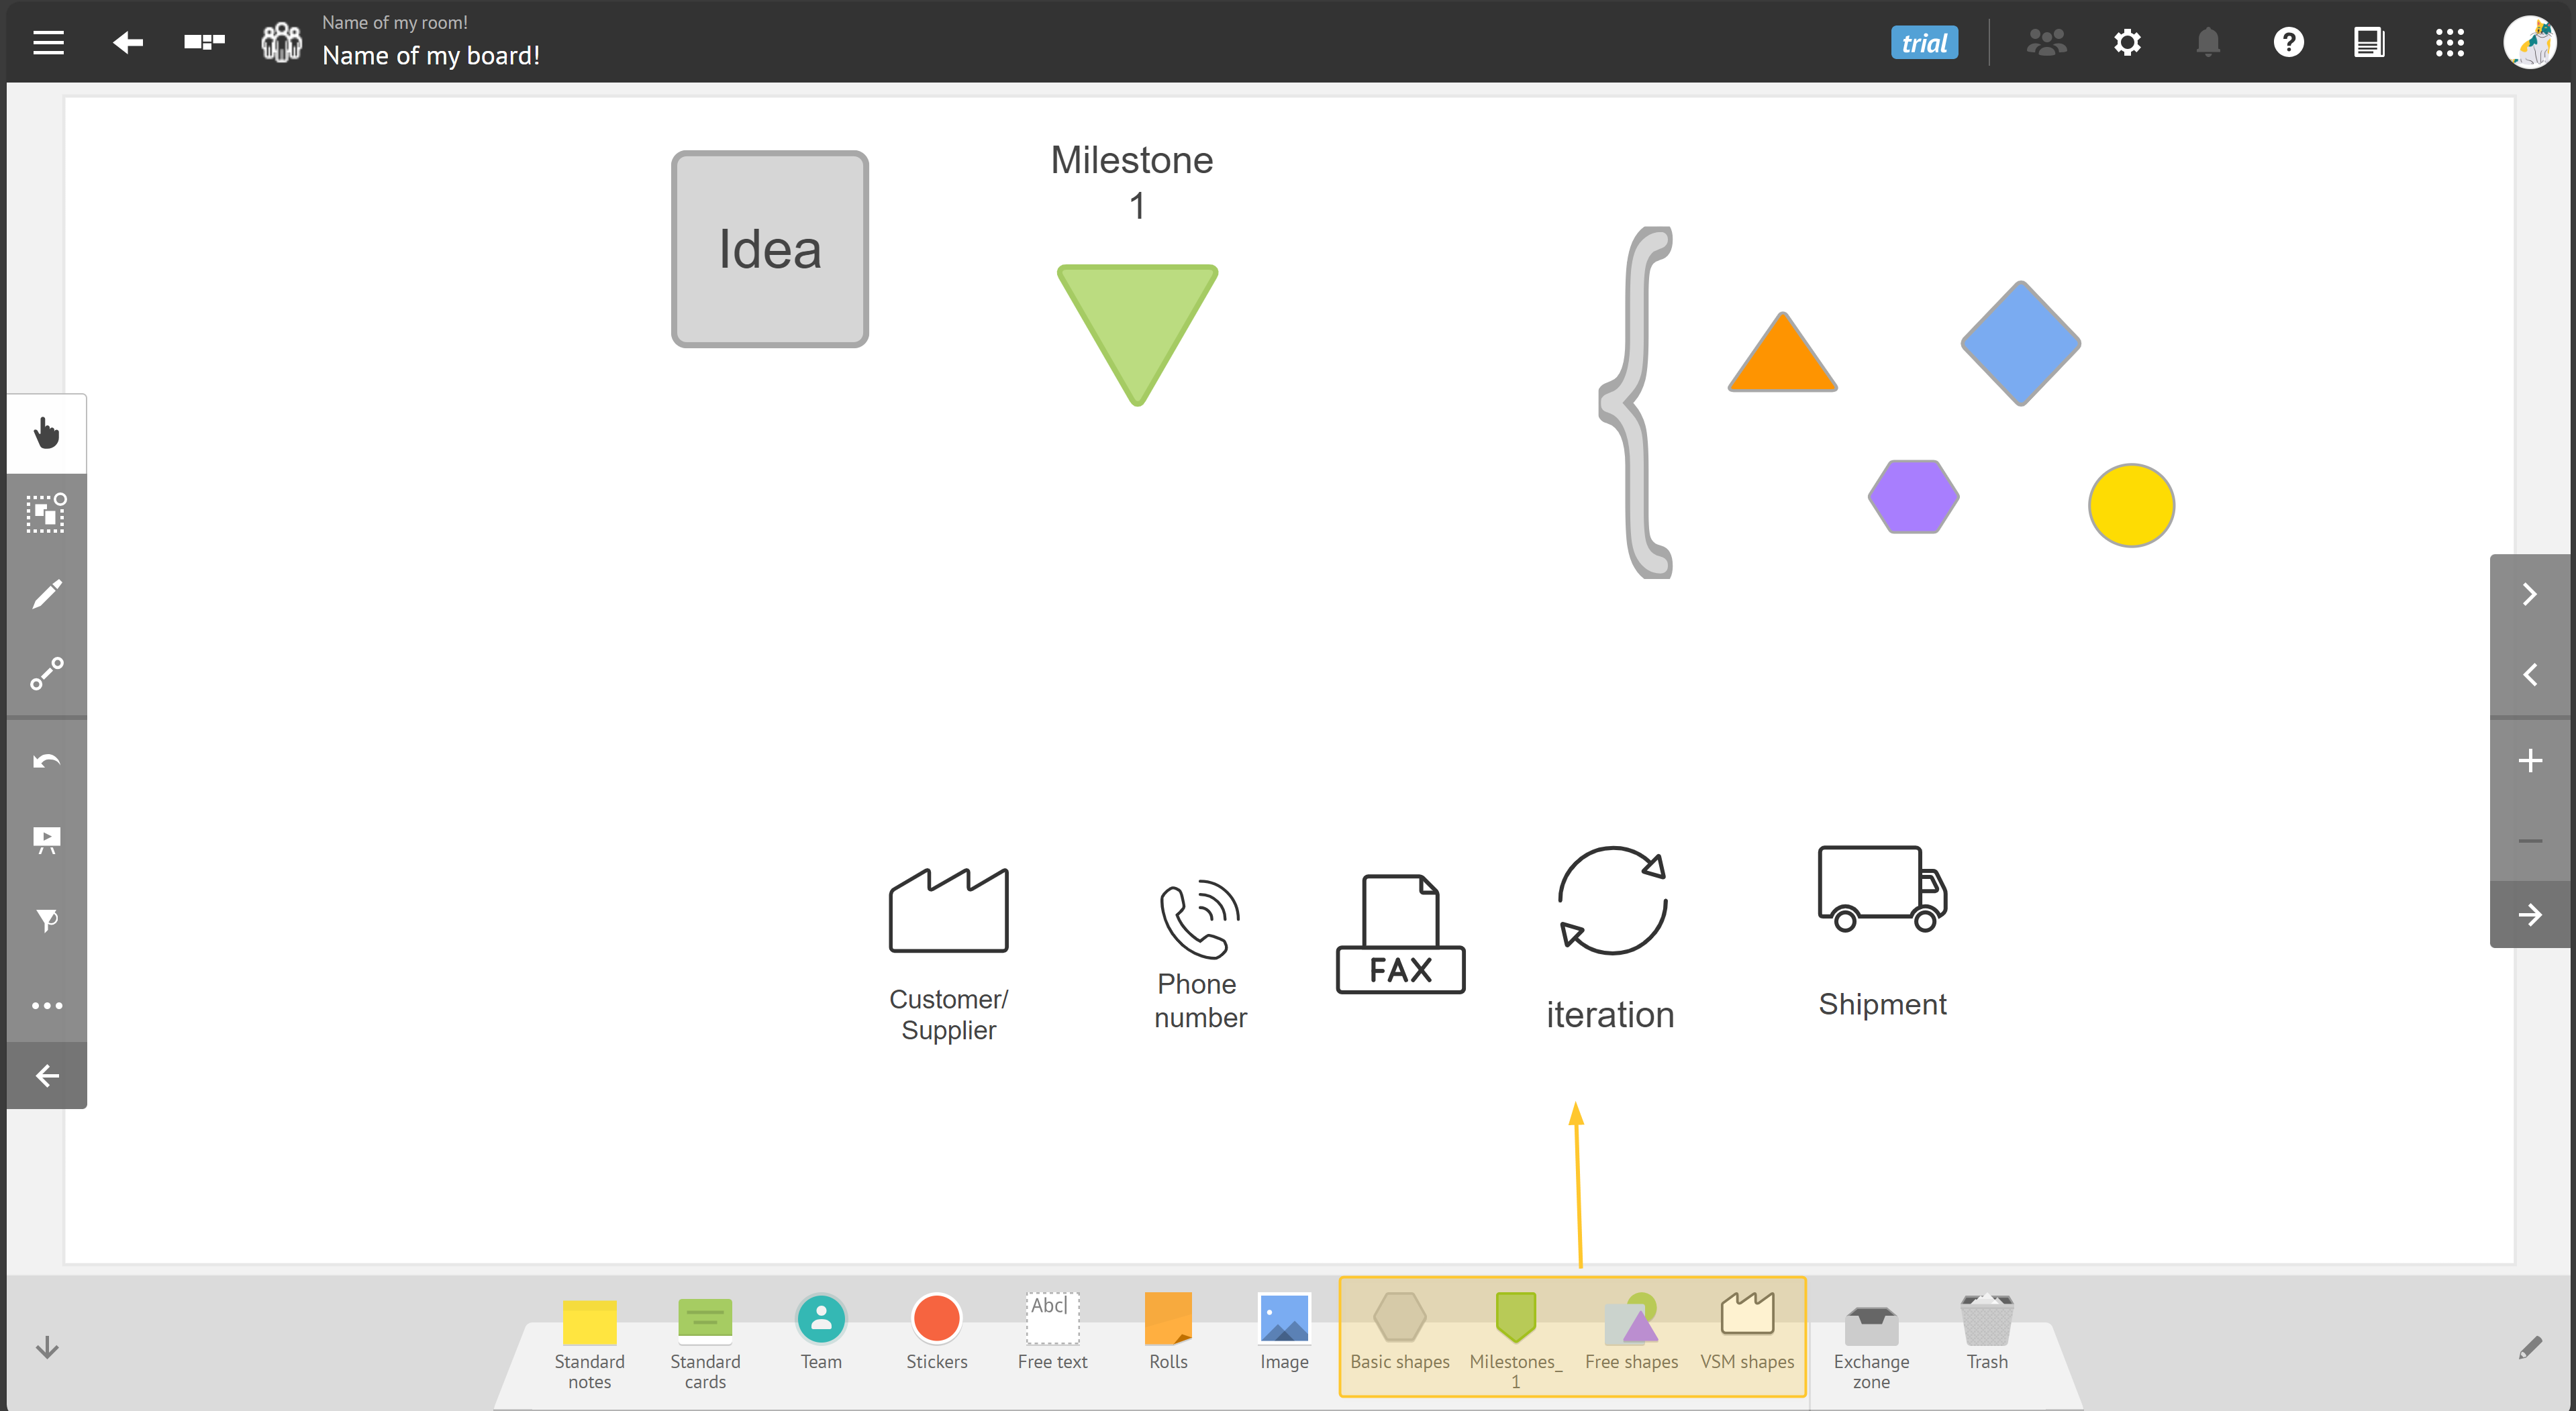
As a user, you can set:
shape of the shape (from those pre-defined),
content of the shape,
position of the text,
size of the shape.
If you are a room administrator, you can also:
set:
name of the tool,
name of the elements,
shape of the shape (from the catalog),
color of the border,
color of the filler,
default position of the text.
add additional shapes.
Find the full iObeya shapes available in the catalog.
VSM notes
VSM (Value Stream Mapping) notes are specific to this practice and allow to visualize processes and flows, as well as describe any associated information.
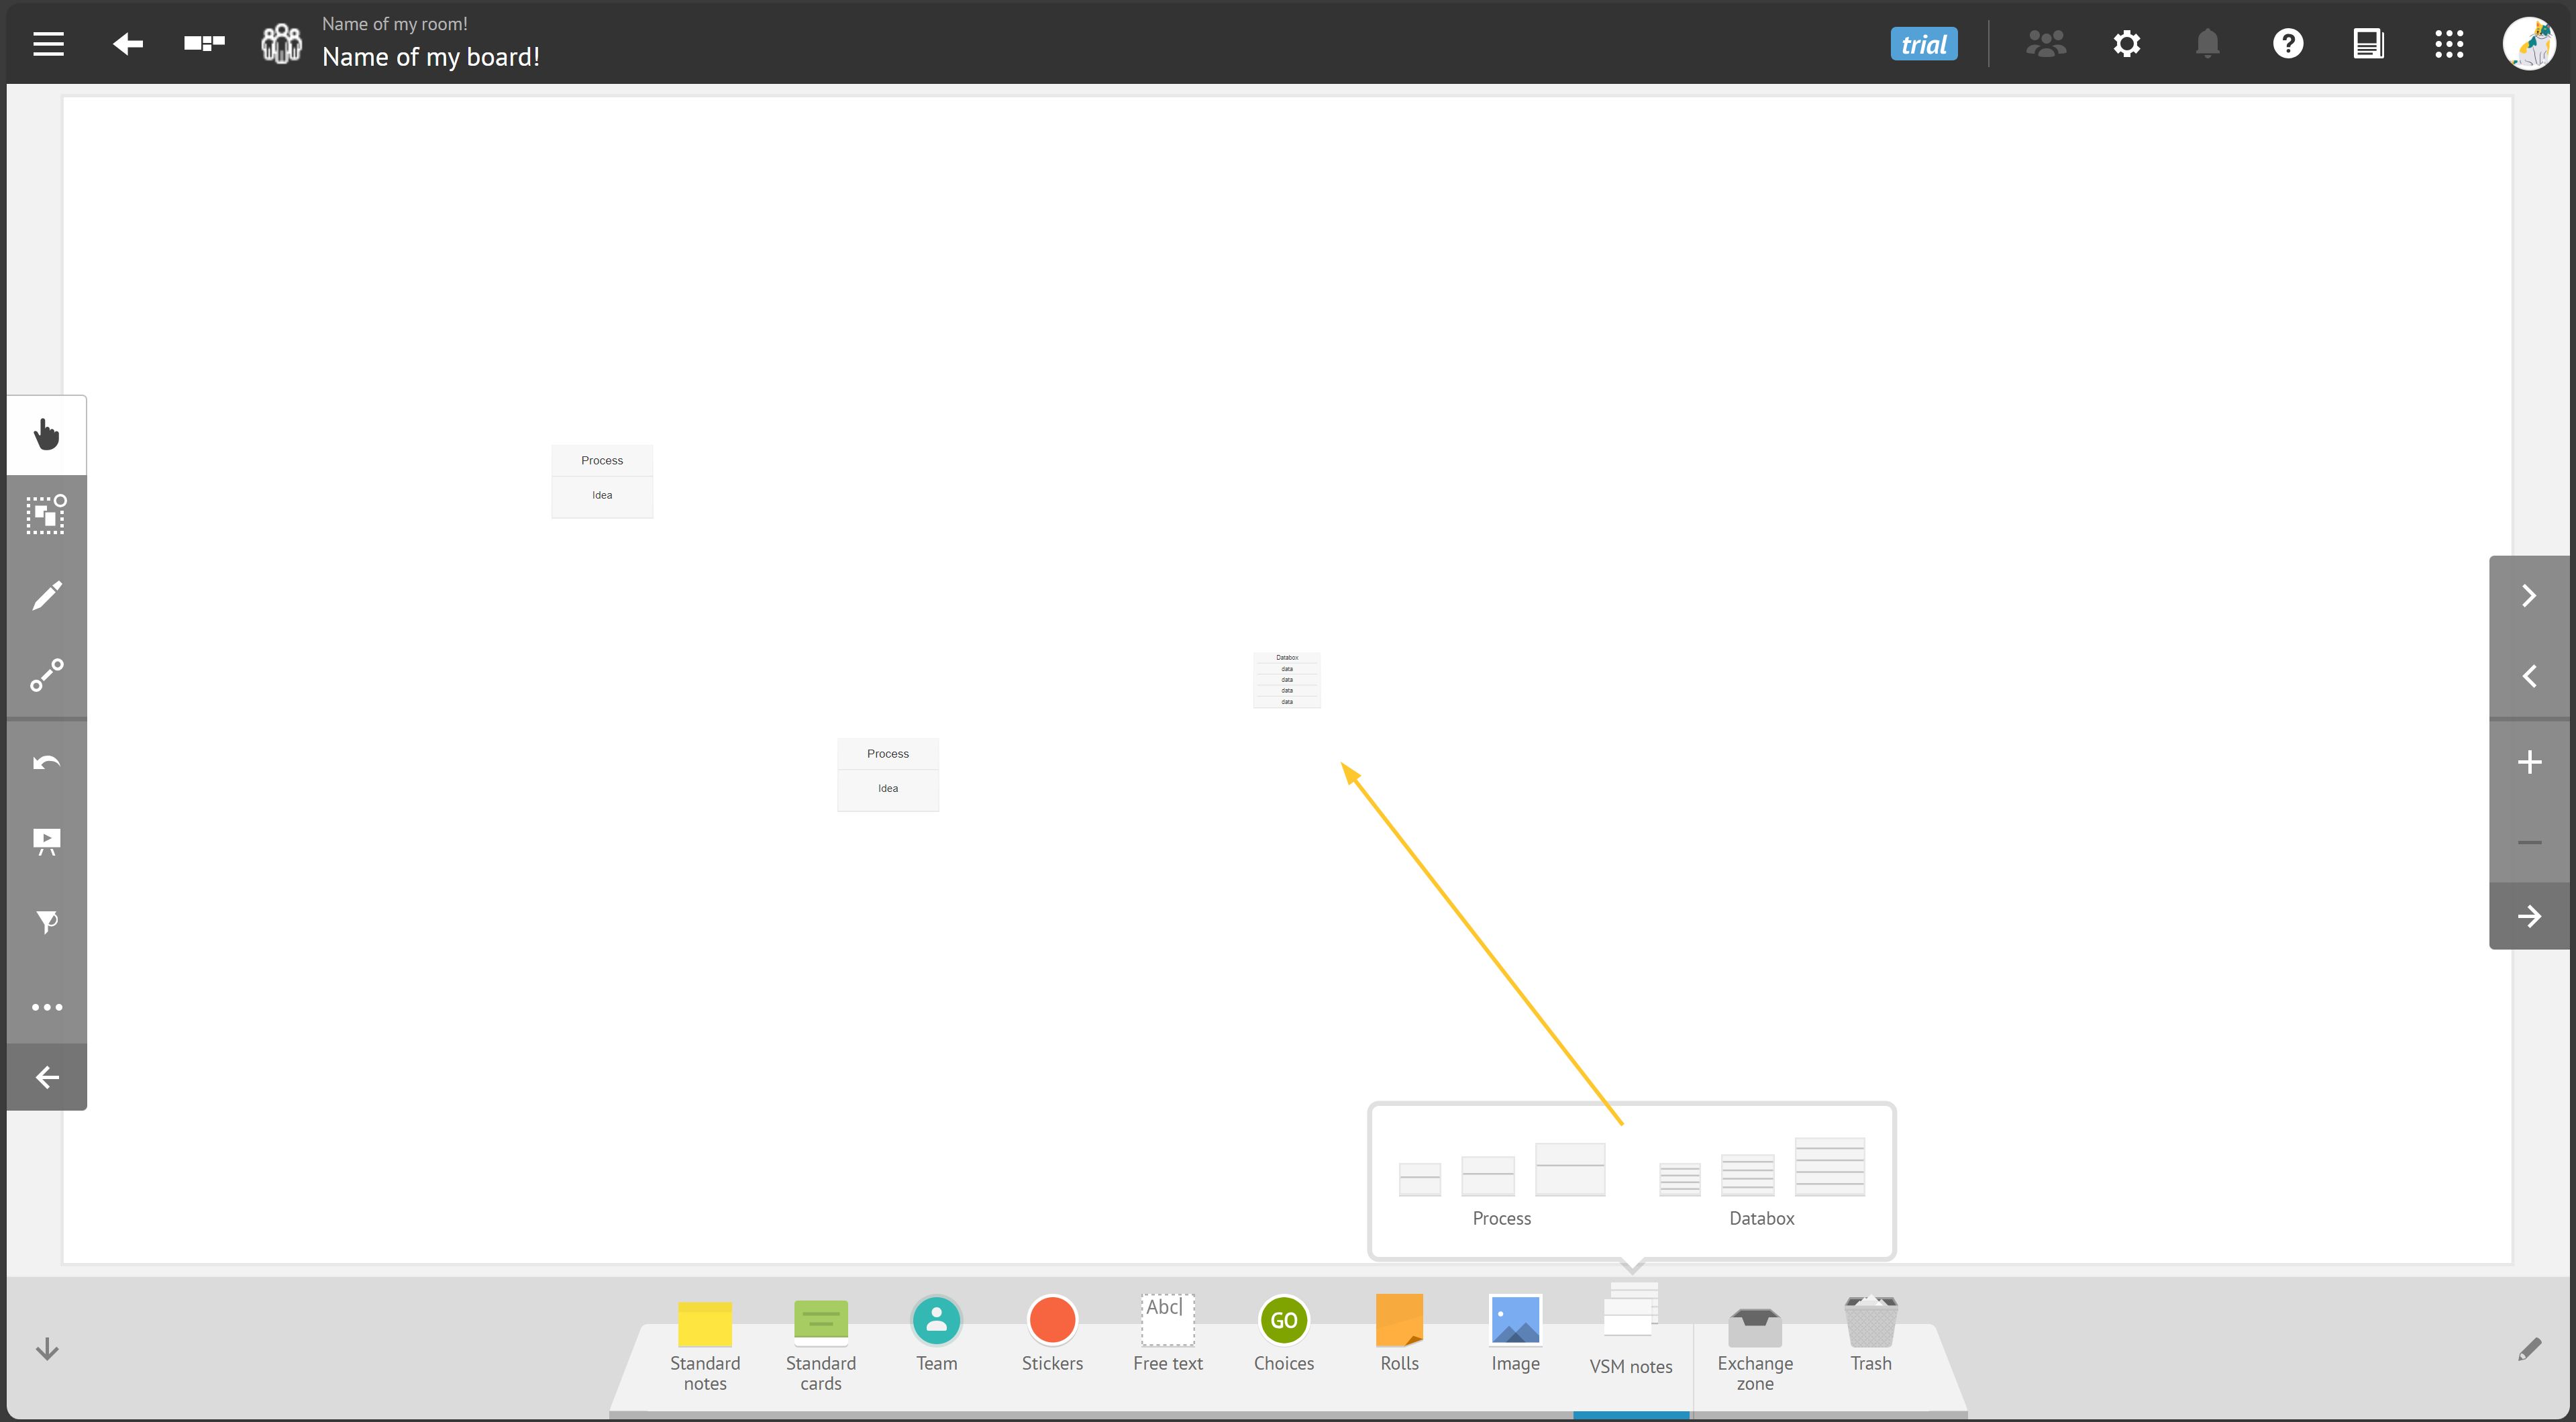
Customize your VMS notes if needed.
As a user, you can set:
color and layout of the note (from the defined cominations),
size of the note (from those pre-defined),
content of the note.
If you are a room administrator, you can also:
set:
name of the tool,
name of the elements,
color of the elements,
size of the elements (from 1 to 3),
layout of the elements (from those pre-defined).
add additional notes.
Web content
Web content allows to embed web-based content onto your boards. This could include websites, online documents, multimedia content and more, providing easy access to external resources directly within your virtual workspace.
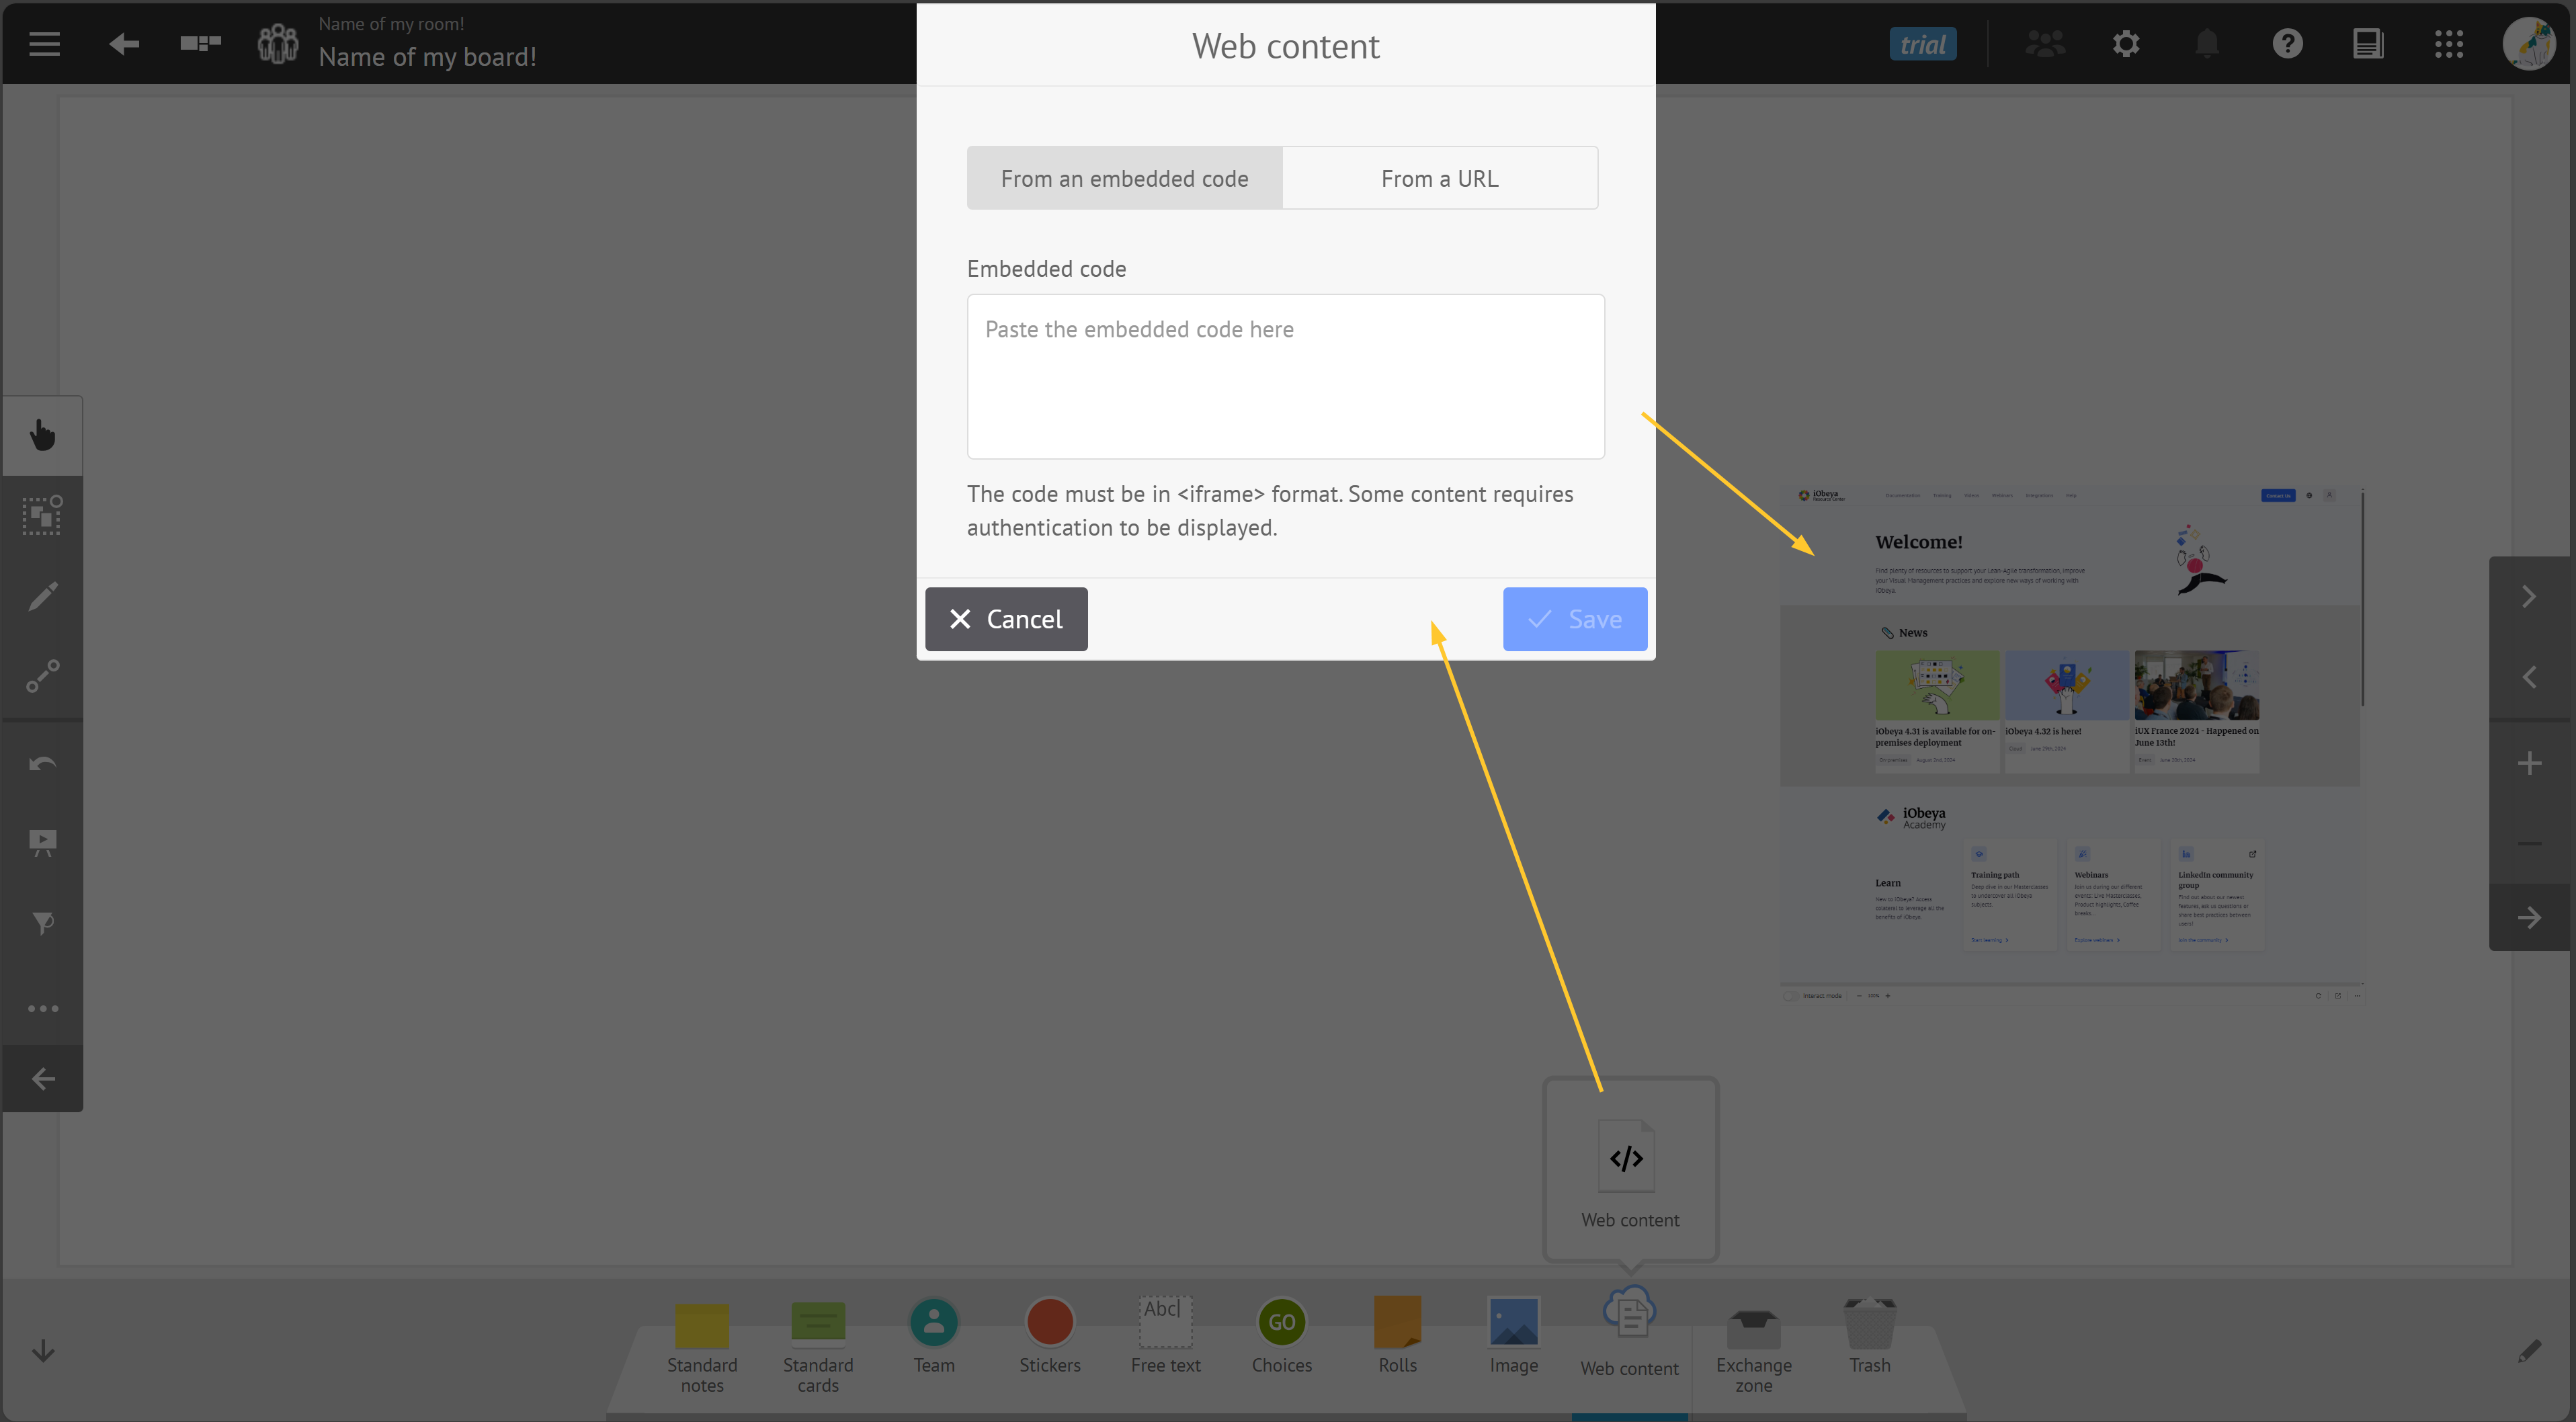
As a user, you can set embedded code.
