- 3 Minutes to read
- Print
- PDF
Managing Team Members
- 3 Minutes to read
- Print
- PDF
In iObeya, managing team members involves organizing who can access and contribute to your rooms and boards, assigning tasks and facilitating communication. iObeya’s user management features help you maintain control over your project and ensure that the right people have the appropriate level of access.
In this article, discover the key aspects of managing team members in iObeya, from adding team members and assigning permissions to inviting people to join your team.
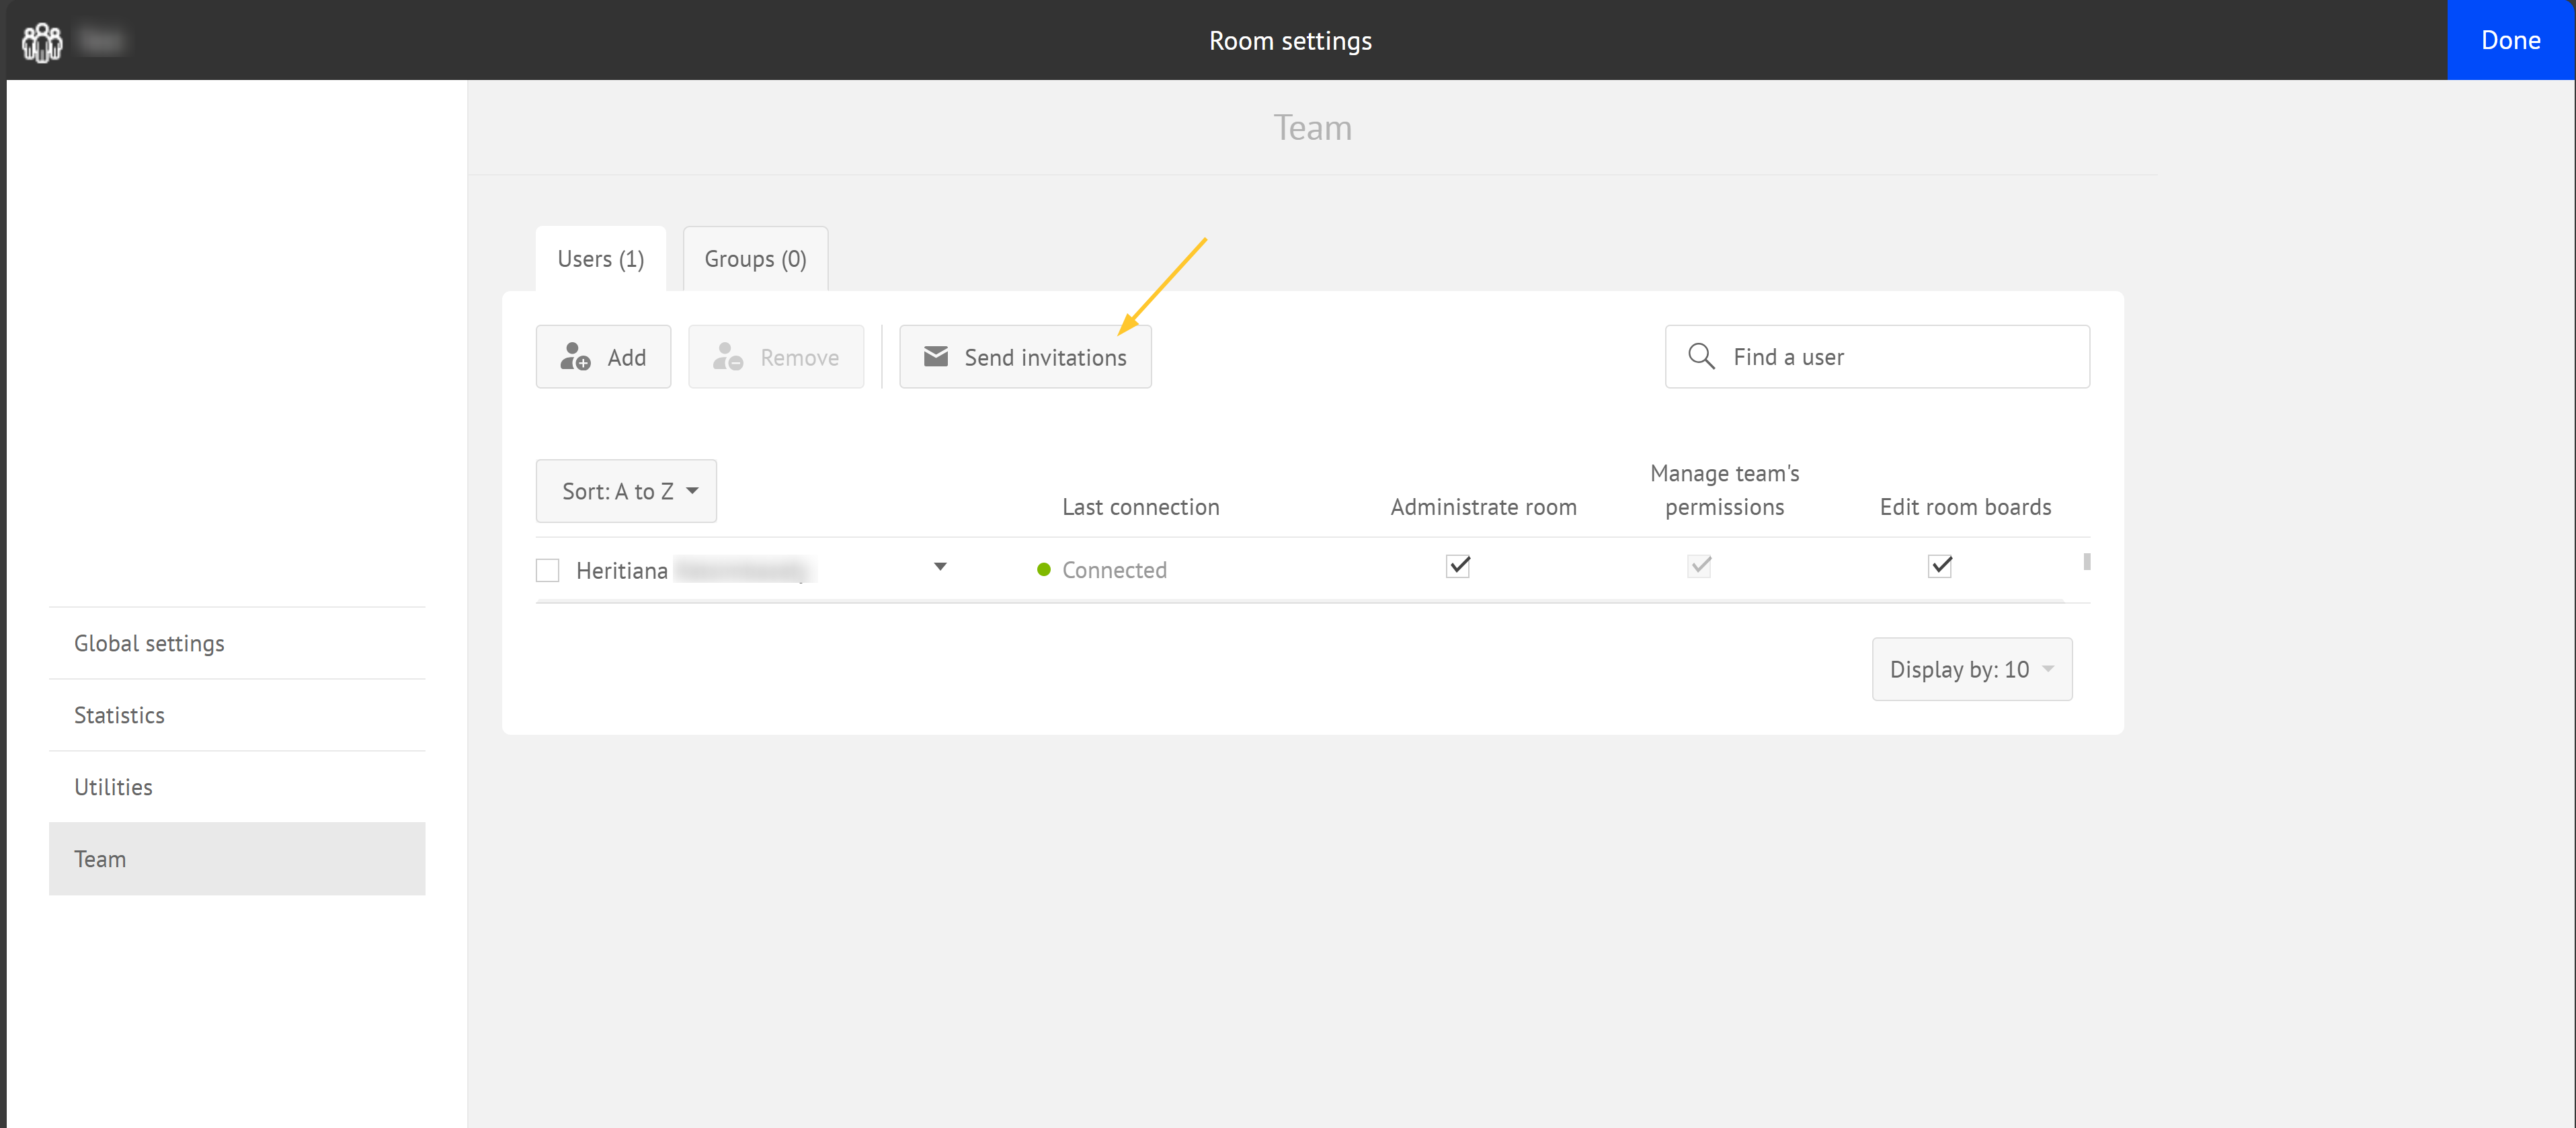
When you create your room, you want to add or invite your team members to your rooms. You can manage Team members iniObeya from the Team page of the Room settings:

Add: used to add an existing user on the platform only to your room
Remove: used to remove members of the team from your room
Send invitations: used to invite an existing user or a new member to join your team
Groups are managed directly from the iObeya administration interface.
Warning:
To manage users and their permissions, you need to be assigned the permissions to edit users and roles in your rooms.
Intro to user roles and permissions in iObeya
Roles and permissions let you define what each user can access and do in your iObeya platform:
For example: A Room administrator (role) can set permissions in the room (permissions).
iObeya users can be assigned the following user roles:
Guests: Users with limited access, typically read-only. They can view the room and its contents but cannot edit or manage settings.
Team Members: Users that can create and modify boards within the room. They have permissions to edit content but not to manage team settings.
Room administrators: Users that have full control over the room, including managing team members, configuring room settings and editing boards.
You can set permissions for user roles:
Roles | Permissions |
|---|---|
Guests |
|
Team Members | Edit room boards:
|
Administrators | Administrate the room:
Manage team’s permisisons:
Edit room boards:
|
For temporary collaborators or stakeholders who only need to view the room, use Guest access to keep your team members count manageable. All users who exceed the limit of team members (active users) per room are added as guests. To find out the maximum number of active users allowed in your room, click the Global Settings of the Room settings.

You can add as many guests to your team as you like. Feel free to manage the permissions.
Adding team members
To add team members in your room:
From the Team page of the room settings, Click Add.
.png)
The Add users window is displayed.
Enter the name of a user with iObeya access permissions and add them.
Tip:
Fill in one or more fields and then click the magnifying glass to find the user.
You can add several users simultaneously in this window.
Grant permissions to each user in the table.
.png)
Inviting people to join your team
Note:
Every iObeya user invited joins as editor, unless the limit number of editors is reached.
To get out more about how many editors you can have in a room, you can view the dedicated information from the Global settings page of the room settings.
Warning:
Inviting users to a room is for professional use only. Find our terms of service in the GCU.
To invite people to join your team:
From the Team page of the room settings, click Send invitations.

Type the email addresses of the iObeya user you intend to invite and then validate.
An email is sent to this person. He or she receives a link in order to sign up to iObeya.
You are free to:
enter as many email addresses as there are people to invite.
paste a list of email addresses.
In both cases, separate each adresses with a comma, a semicolon or a space.
Removing members of your team from your room
To remove members of your team from your room:
Select the members of your team you want to remove.
Click Remove.


.png)
