- 2 Minutes to read
- Print
- PDF
Creating a Trial Room
- 2 Minutes to read
- Print
- PDF
Starting with a trial room is an effective way to experience iObeya's features and enhance project management through collaboration. Users can create and test iObeya rooms free for 30 days, allowing them to customize their workspace according to their needs. To set up a trial room, users must provide a name and description, and they can choose to start with a whiteboard or a predefined template. The trial room can include various boards for different project aspects, such as backlogs and brainstorming areas. Users can invite others, manage permissions, and utilize various interaction modes for effective collaboration. If the trial is successful, users can request their platform administrator to convert it into a permanent room, although a license is required for this conversion. For assistance, users can access tutorials and documentation or contact the platform administrator, who oversees all administrative tasks within iObeya.
Starting with a trial room is a great way to get hands-on experience with iObeya.
A trial room allows to explore iObeya’s features, collaborate with your team and see how the platform can help manage your projects effectively. You can easily adapt your workspace to your needs by creating and testing iObeya rooms free of charge for 30 days.
In this article, learn how to create a trial room to experience iObeya’s collaborative capabilities firsthand.
From your Home page, you can create a trial room:

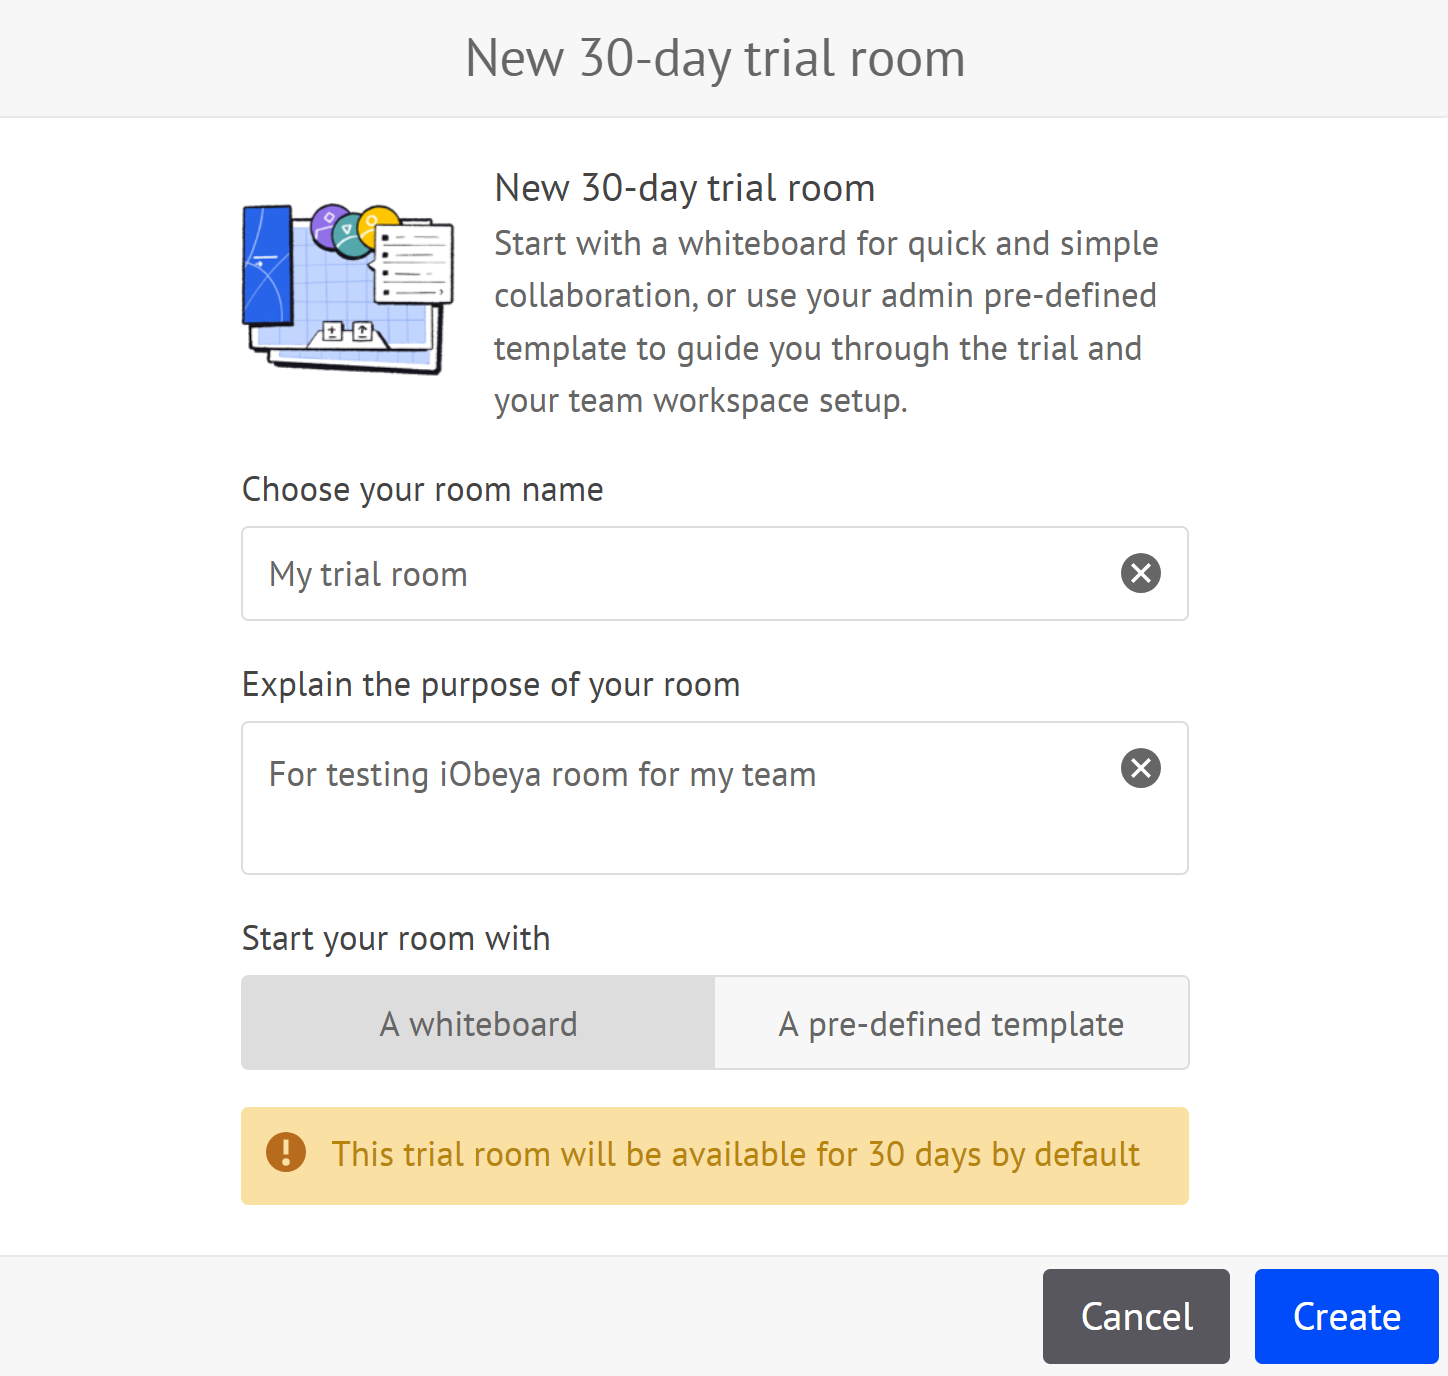
Click + Create a trial room.
Give your room a clear name and description.
Warning:
This information is mandatory and allows your Platform administrator to understand the purpose of your room.
You can start your room with a whiteboard or a pre-defined template.

Recommendation:
If you are used to working on a whiteboarding session, start your room with a whiteboard.
Note:
If you are a platform and domain adminitrator, you can preconfigure a trial room template to fit your main use cases : deploy standardized visual management boards and associated guidelines.
See the Administration guide to find out more.
Click Create.
You trial room is created.
.png)
Note:
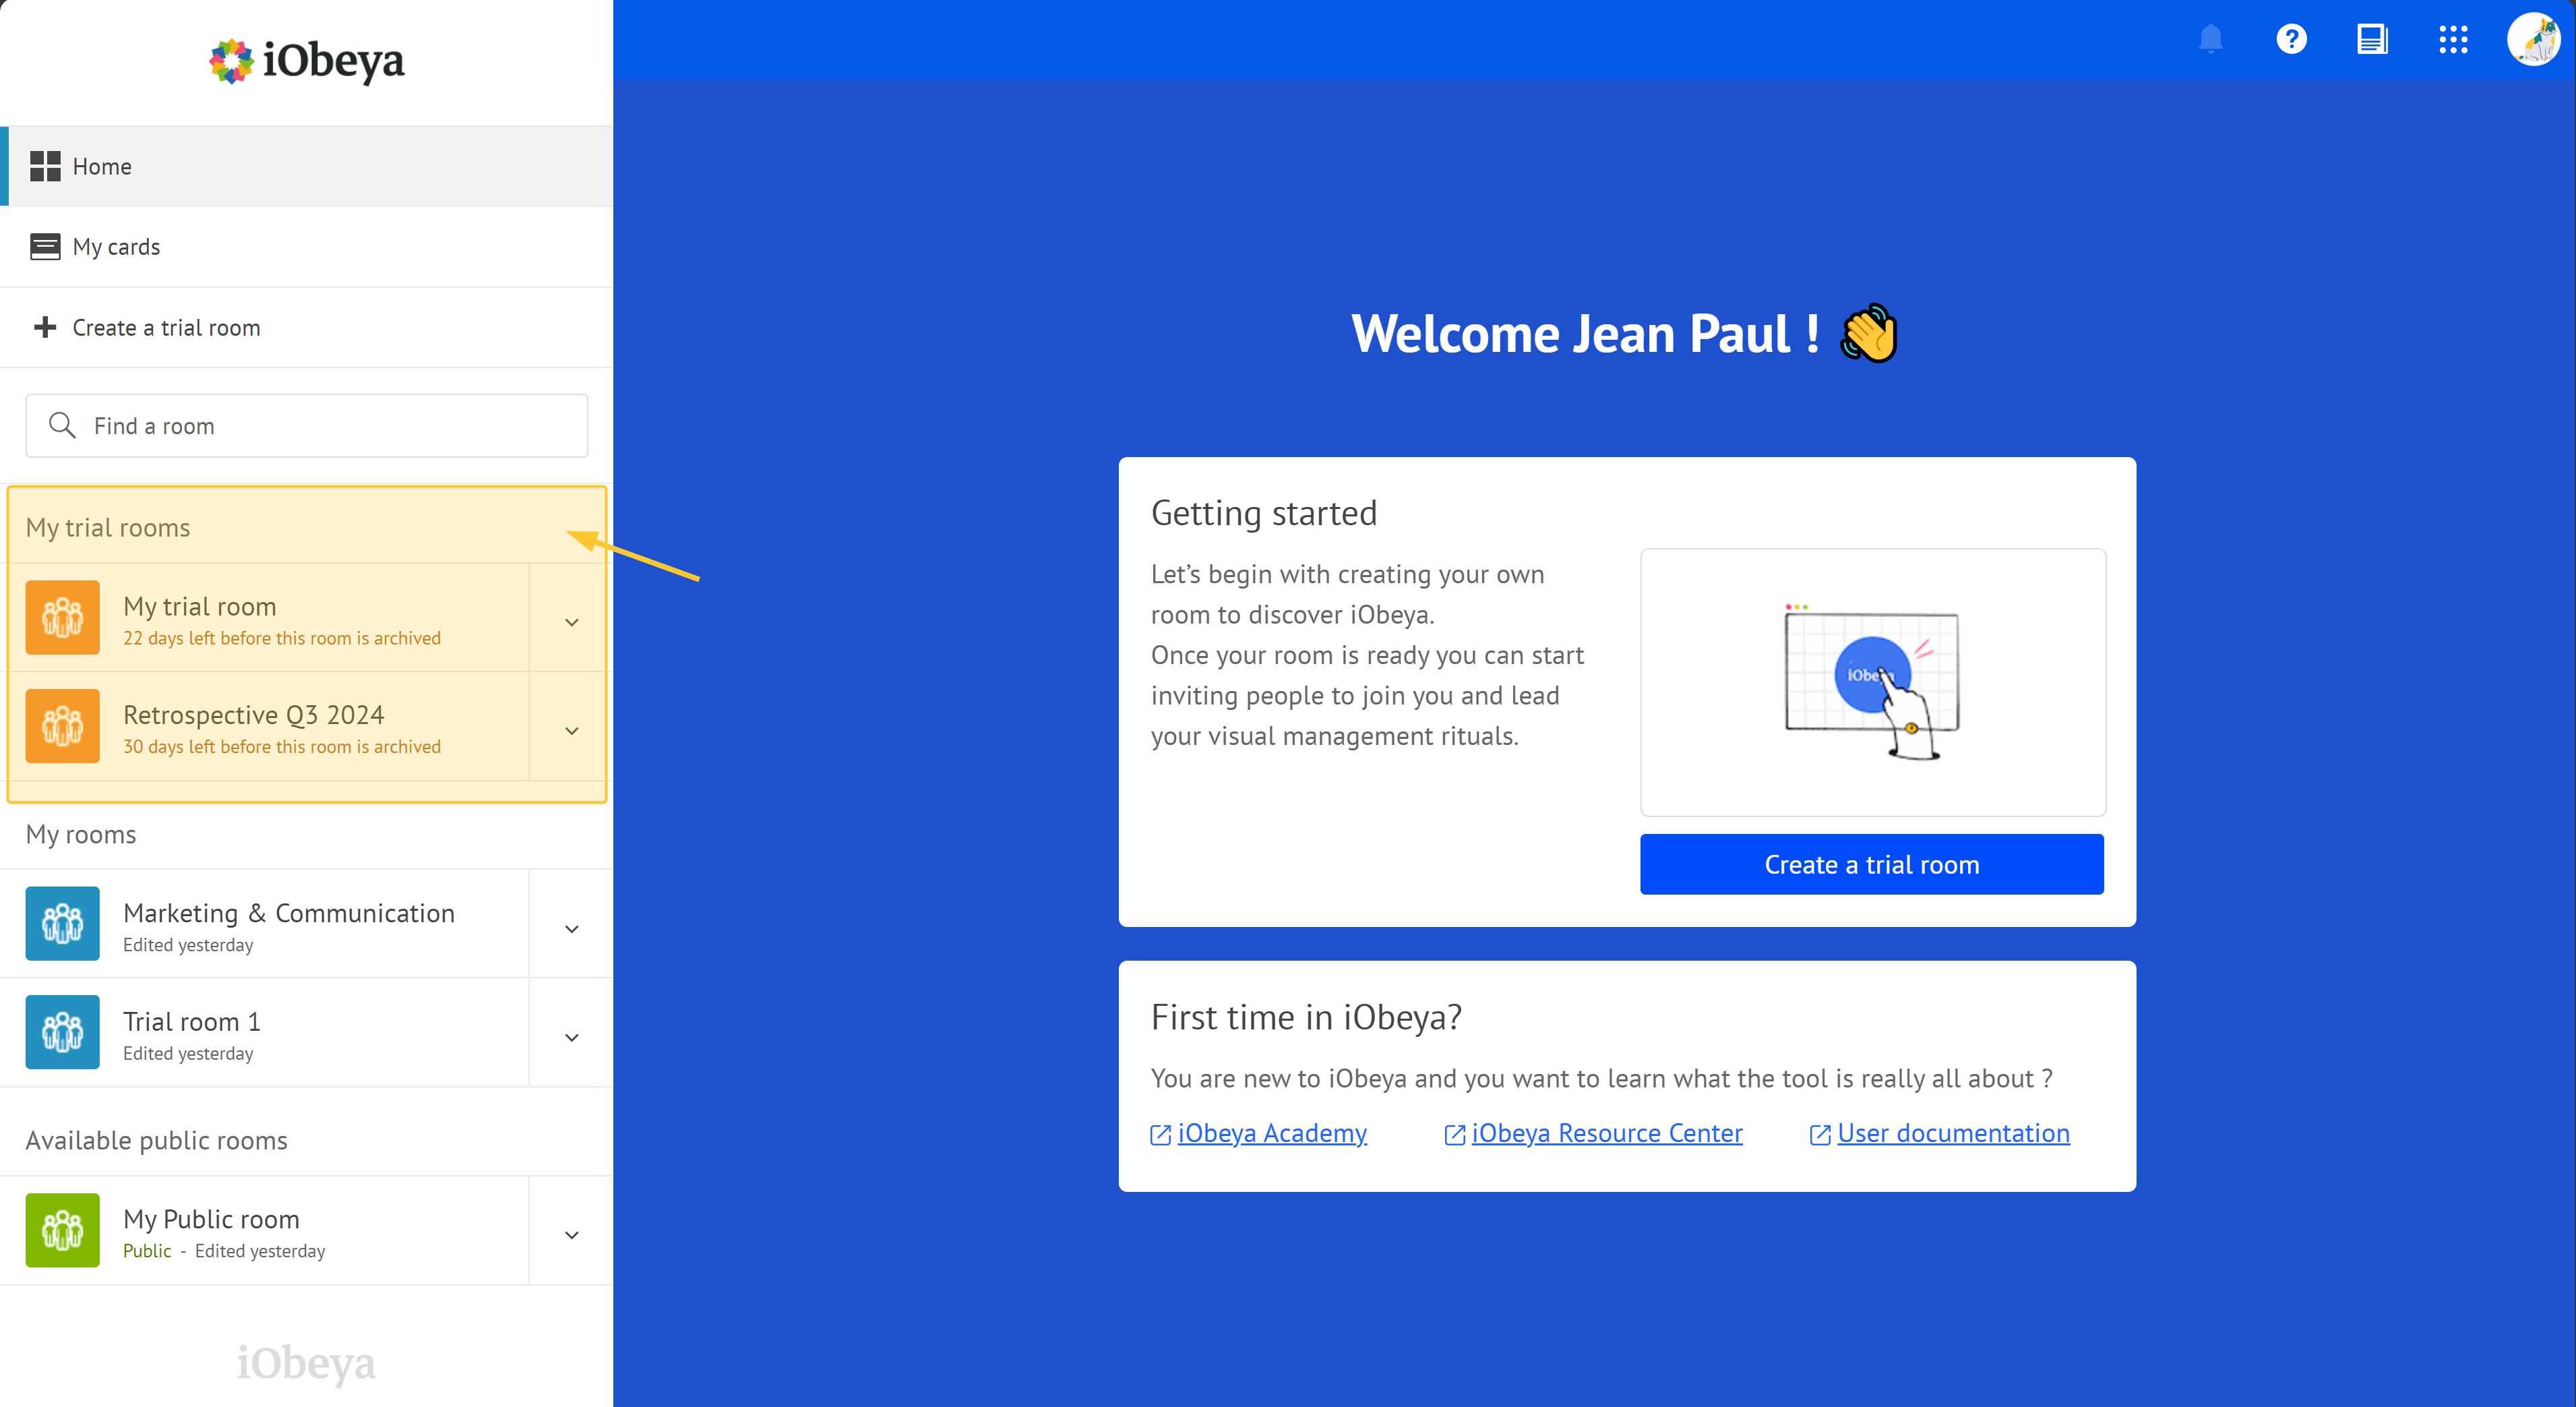
Your trial room is displayed in the left-hand menu (My trial rooms) of the home page:

Configure and customize your trial room:
Invite Team members: invite others to join your room and manage their permissions.
Add boards to your room: in iObeya, you can add different boards to your room. These can represent various aspects of your project, such as a backlog, task board, or brainstorming area.
Add visual elements to populate your boards.
Start collaborating: use the different interaction modes and utilities in iObeya to collaborate effectively.
Your room is available for 30 days by default. Use this opportunity to familiarize everyone with the tools and processes within iObeya.
If your trial is successful, you can request your platform administrator to convert it into a permanent standard room. Contact him via the e-mail address he has defined at domain level.
Warning:
Your trial room does not need a license to be created. However, you do need an available license to convert it into a permanent standard room.
See iObeya licensing to find out more.
If you run into issues or need help with advanced configurations, take advantage of our iObeya’s support resources, including tutorials, documentation, or contact our Support team.


.png)
